
Noah Williams is an interior designer and flooring expert at Nova Floor. In Dubai, he helps people pick the right floor, get it installed, and keep it looking good. He also writes simple, practical flooring and home care guides for readers in Dubai and around the world.
How to Clean Terracotta Tiles Naturally | 8 Stain Removal Techniques + Tips
Noah Williams
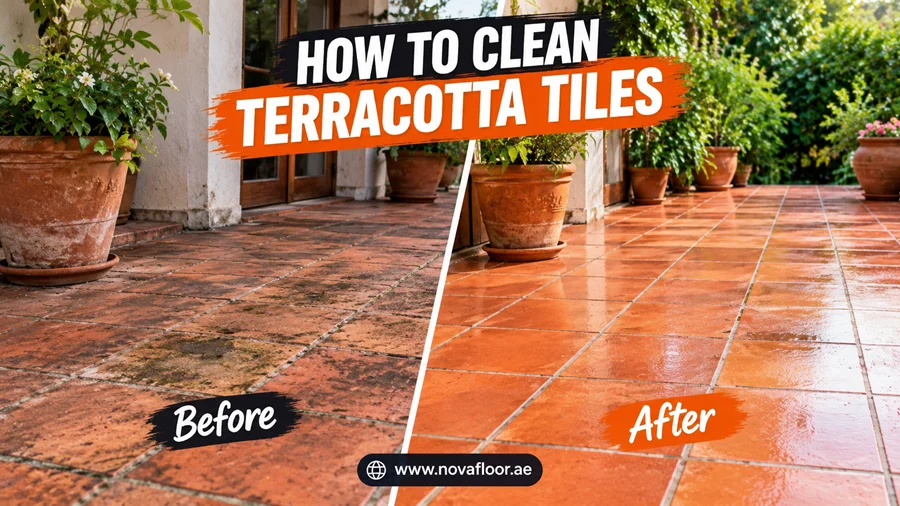
Sweep or vacuum first, then damp-mop with lukewarm water and a few drops of fragrance-free castile soap. Rinse with plain water and dry the floor right away. Lift stains with baking soda or a flour poultice instead of scrubbing, and keep vinegar, lemon, bleach, and steam mops away from the clay.
Terracotta is unglazed clay fired at a relatively low temperature, so it stays porous. It soaks up water, oil, and anything you mop it with. That is why gentle, absorbent methods work on it, and harsh or acidic ones quietly wear it down.
There is also a lot of conflicting advice online. Some older guides recommend vinegar, acid, steam, or even diesel. This guide explains what actually works today, why, and what to skip.
In this guide you will learn:
- Four quick tests to identify your floor before you clean
- A weekly routine for sealed and unsealed tiles
- 10 natural stain fixes, from cooking oil to pet accidents
- How to revive old terracotta found under carpet
- Outdoor care, including frost protection for cold winters
- Traditional natural finishes like linseed oil and beeswax, with the safety steps most guides leave out
This guide is written by Noah Williams, interior designer and flooring expert at Nova Floor.
Contents
Natural Fixes at a Glance
Find your stain, then jump to the full method below. Always blot first and test on a hidden tile.
| Stain | Natural fix | Leave it on for |
| Fresh cooking oil or grease | Dry baking soda or cornstarch | 4 to 8 hours |
| Old, set-in oil | Flour or baking soda poultice | 24 to 48 hours, repeat 2 to 3 times |
| Red wine, coffee, tea | 3% hydrogen peroxide on a white cloth | 30 to 45 minutes |
| Pet urine and odor | Baking soda, then enzyme cleaner if needed | Up to 24 hours |
| Leaf and berry stains (outdoor) | Mild soap scrub, then sunlight | A few sunny days |
| Algae, moss, green film | Soapy water scrub, then oxygen bleach | 10 to 15 minutes |
| White powder (efflorescence) | Dry brush only, no water | Repeat over dry days |
| Rust marks | Keep dry, gentle poultice, then a stone-safe rust remover | Spot test first |
| Candle wax or gum | Ice, then a plastic scraper | 5 to 10 minutes |
| Dried paint drips | Plastic scraper and warm soapy water | Until softened |
Why Terracotta Needs Gentler Care Than Other Tile
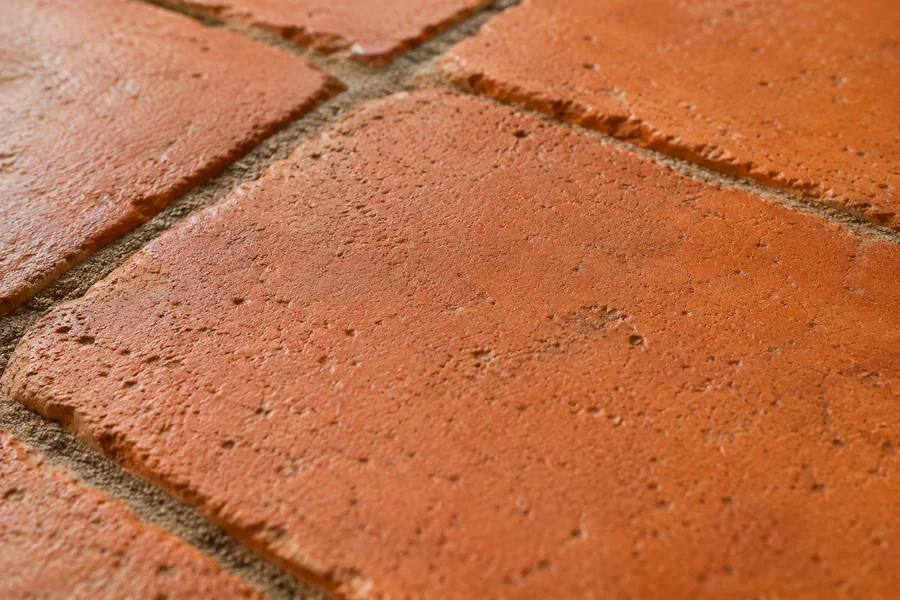
Terracotta literally means “baked earth.” It is natural clay fired at a much lower temperature than porcelain, so the clay never fully hardens into a glass-like body. The result is a tile full of tiny open pores, with a warm color that comes from iron in the clay.
Porcelain and glazed ceramic shed liquids. Terracotta drinks them. That one difference leads to three practical rules:
- Speed matters. A spill wiped up in a minute usually leaves nothing. The same spill left for an hour can become a stain.
- Acid is the enemy. Vinegar, lemon, and many “natural” descalers slowly etch clay and the cement grout around it.
- Less water is better. Excess water carries dirt and minerals deep into the tile, which later shows up as dark patches or white haze.
Handmade vs. machine-made terracotta
Handmade tiles, including Mexican Saltillo and many European tiles, are usually softer and more porous. They need the gentlest methods and more frequent sealing. Machine-pressed terracotta is denser and a little more forgiving, but the same rules apply. If you are not sure which you have, treat the floor as handmade.
Before You Clean: 4 Quick Tests to Identify Your Floor
These tests take about 20 minutes in total and tell you exactly which methods are safe for your floor.
1. The water test (is it sealed?)
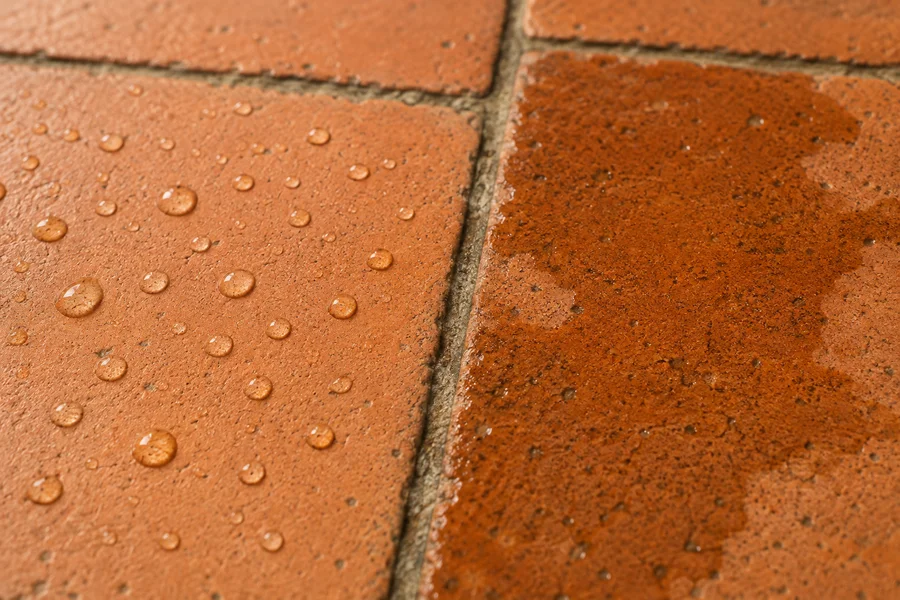
Put a few drops of water on a clean tile in a quiet corner, and repeat in a busy walkway. Check after 1 minute, then again after 15 minutes.
| What you see | What it means | What to do |
| Water beads up and stays put | Sealer is working | Normal gentle cleaning |
| Water slowly flattens and darkens the tile | Sealer is wearing thin | Clean gently and plan to reseal soon |
| Water soaks in within a minute | Unsealed or sealer is gone | Use very little water and seal after cleaning |
2. The shine test (what kind of finish?)
Look across the floor at a low angle. A matte, natural look usually means a penetrating sealer or no sealer. A sheen or shine means a surface coating such as wax, linseed oil, or a polymer sealer. If the middle of the room is dull but the edges near the walls still shine, the coating has worn away in the traffic lanes.
3. The fingernail test (coating or not?)
Scratch a hidden edge gently with your fingernail. If a thin waxy or yellowish curl comes off, you have a surface coating. Coatings trap dirt underneath, so no amount of mopping will make that floor look clean until the coating is removed.
4. The grout check
Press the tip of a key or screwdriver lightly into a grout line. Firm grout is fine. If it crumbles into sand, repair it before any wet cleaning, because water will run through the gaps and under the tiles.
6 Terracotta Cleaning Myths (and What to Do Instead)
Much of the advice online is outdated or simply risky. Here is what to ignore.
| Myth | The problem | Do this instead |
| “Mop weekly with vinegar, it’s natural.” | Vinegar is an acid. Used regularly, it etches clay, eats cement grout, and breaks down sealer. | Lukewarm water with a few drops of castile soap. |
| “Use muriatic or hydrochloric acid for tough dirt.” | Strong acids can burn and discolor clay permanently and are hazardous to handle. | Natural poultices first, then a pH-neutral or alkaline cleaner made for terracotta. |
| “Steam clean it for a deep clean.” | Steam forces hot moisture into the pores and can cloud or lift sealers. | Damp mop, and a professional deep clean if needed. |
| “Wipe it with diesel to bring back the shine.” | Diesel soaks into the clay, smells for weeks, attracts dirt, and is a fire hazard. | Clean, dry, then use a proper sealer or a natural oil finish. |
| “Boil linseed oil before you apply it.” | Heating oil at home is a serious fire risk. “Boiled linseed oil” is a product you buy ready to use. | Buy boiled linseed oil and apply it cold or slightly warmed in a warm room. |
| “Lemon juice removes stains naturally.” | Lemon is an acid, just like vinegar, and can leave pale etched spots. | Baking soda, flour poultice, or 3% hydrogen peroxide. |
Is vinegar ever okay?
Only in two narrow cases. First, heavily diluted, occasionally, on a well-sealed floor, followed by a full plain-water rinse, although soap and water does the same job with less risk. Second, professionals sometimes add a small amount of vinegar to rinse water after an alkaline stripper, to neutralize the floor. That is a restoration step, not a cleaning routine. Never use vinegar on unsealed, handmade, or antique tiles.
Your Natural Terracotta Cleaning Kit
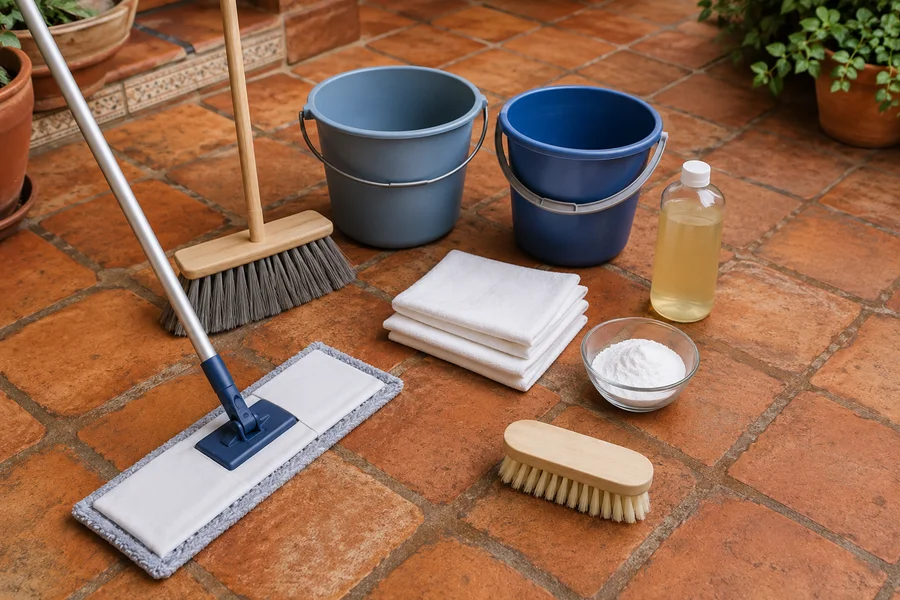
Most of this is already in your home. Keep these tools just for the terracotta so residue from other cleaners never reaches the clay.
For everyday cleaning
- Soft-bristle broom, or a vacuum with a soft brush head (no beater bar)
- Flat microfiber mop
- Fragrance-free, dye-free castile soap or a pH-neutral cleaner made for natural stone or unglazed tile
- Two buckets: one for soapy water, one for clean rinse water
- Microfiber cloths for drying
For stains
- Baking soda and cornstarch
- Plain all-purpose flour
- 3% hydrogen peroxide (the standard drugstore strength)
- Oxygen bleach powder (sodium percarbonate) for outdoor use
- Soft nylon brush and a plastic scraper
- Plastic wrap and painter’s tape
Keep these away from terracotta
Vinegar, lemon juice, bleach, ammonia, scouring powder, steel wool, oil soaps, steam mops, and heavy-duty descalers.
Why fragrance-free soap matters: Regular dish soaps and scented cleaners often contain dyes, perfumes, and additives that can leave a film inside the pores. A few drops of plain castile soap cleans without that residue.
The Weekly Routine for Cleaning Terracotta Floors
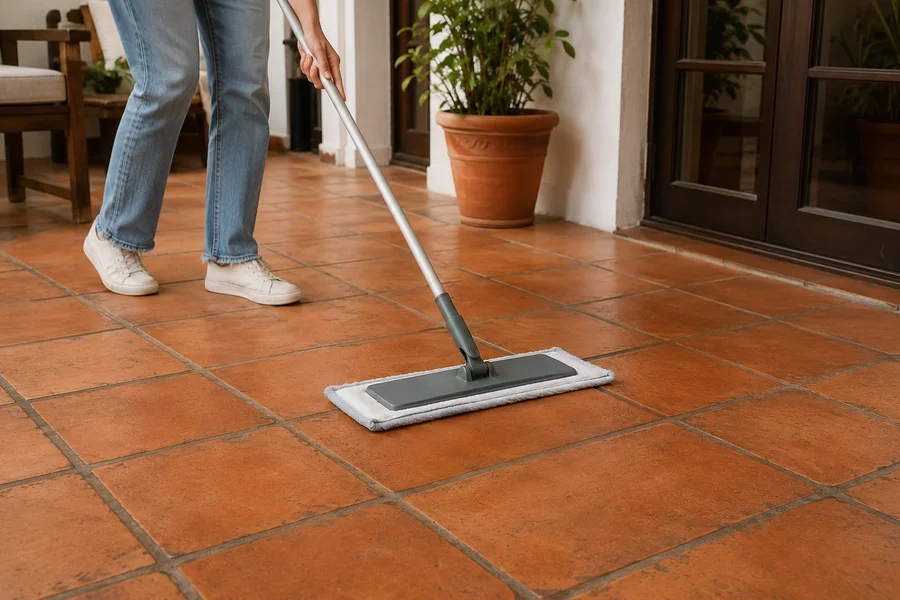
Sweep daily and damp-mop once a week. That simple habit prevents most terracotta problems.
- Dry clean first. Sweep or vacuum the whole floor before any water touches it. Grit acts like sandpaper under a mop. Let tracked-in mud dry completely, then sweep it up.
- Mix a mild solution. Add about 1 teaspoon of castile soap to 1 gallon of lukewarm water. Avoid hot water, which can soften sealers.
- Mop damp, not wet. Wring the mop until it stops dripping. Work in small sections of about 20 to 30 square feet.
- Rinse. Go over each section with clean water from the second bucket. Soap left behind turns sticky and attracts dirt. Change the rinse water whenever it looks cloudy.
- Dry right away. Wipe with a microfiber cloth, paying extra attention to grout lines. Open a window or run a fan. Never let puddles dry on their own.
If your floor is sealed
Follow the routine as written. Mop weekly, and expect most spills to wipe up easily.
If your floor is unsealed
Use even less water: a barely damp microfiber cloth or mop is enough. Skip soap most weeks and use it only when the floor is visibly greasy. Treat every spill as urgent, and plan to seal the floor once it is clean and fully dry.
Tip: If the floor still looks dull after cleaning, it is usually soap residue or worn sealer, not dirt. Rinse with plain water first. If it is still dull, run the water test again.
How to Keep Terracotta Tiles Clean in a Kitchen
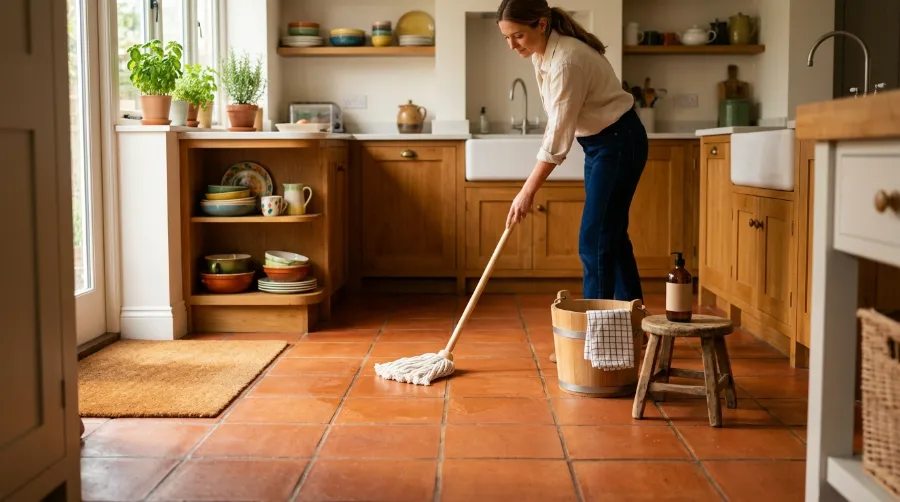
Kitchens are the hardest room for terracotta because cooking oil and food spills land on the floor every day. A few habits make a big difference.
- Keep a dry cloth near the stove. Blot splatter while it is still warm, before it soaks in.
- Keep baking soda within reach. For any oil spill, blot and cover it with baking soda immediately, then vacuum it up later.
- Put a washable runner in front of the stove and sink. These two spots take most of the spills and water.
- Mop kitchens more often. A quick damp mop twice a week stops greasy film from building up.
- Check the sealer twice a year. Kitchen floors usually need resealing sooner than other rooms, so run the water test in front of the stove.
10 Natural Ways to Remove Stains From Terracotta
Two rules apply to every method: blot, never rub, and test on a hidden tile first. Terracotta varies from tile to tile, so a method that is safe on one batch can lighten another.
1. Fresh cooking oil and grease: baking soda
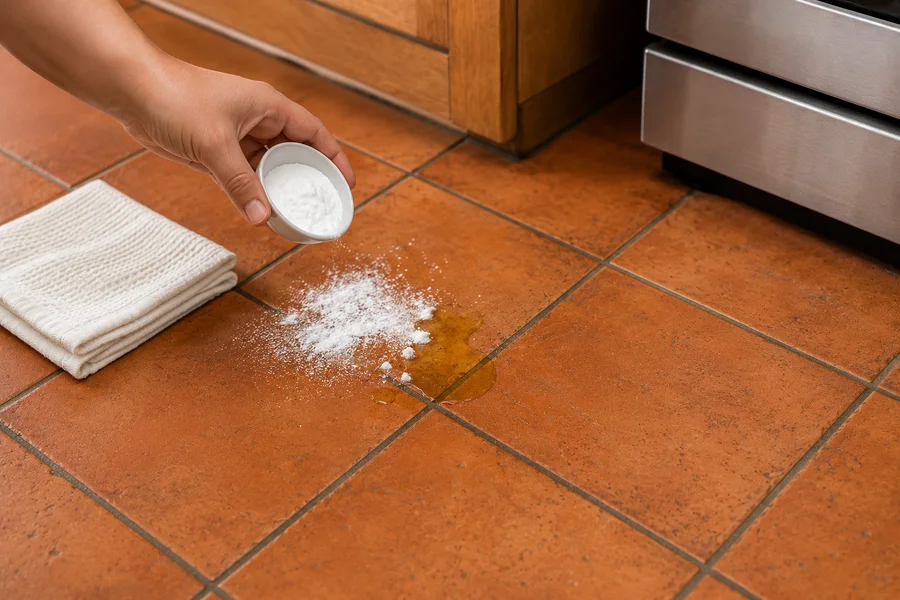
Blot up as much oil as you can with paper towels. Cover the spot with a thick layer of baking soda or cornstarch, at least 1/4 inch deep. Leave it for 4 to 8 hours, or overnight for a large spill. The powder pulls oil out of the pores. Vacuum it up, wipe with mild soapy water, and dry. Repeat if a shadow remains.
2. Old, set-in oil stains: the flour poultice
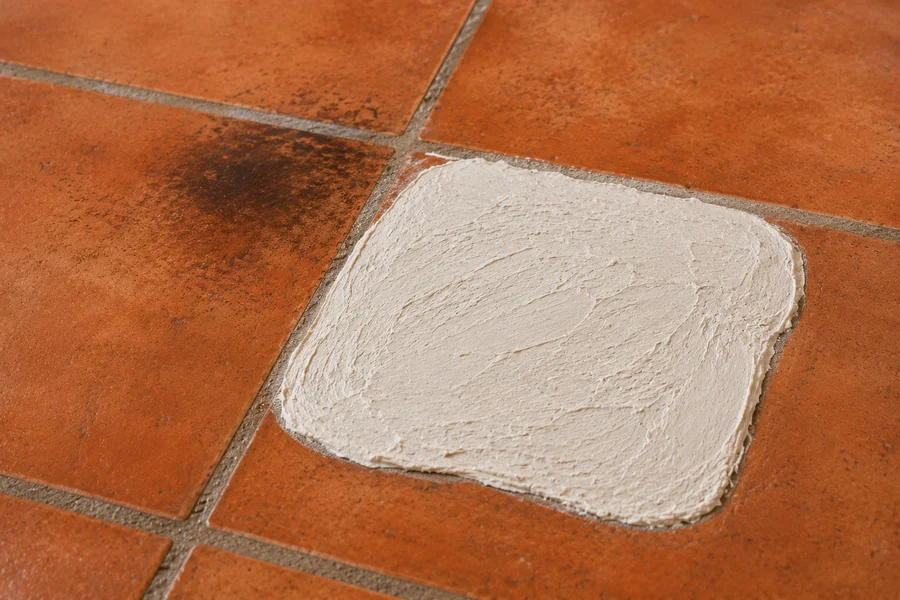
Mix flour with water and a drop of fragrance-free soap until it is as thick as peanut butter. Spread it about 1/4 inch thick and 1 inch wider than the stain. Cover with plastic wrap, tape the edges, and poke a few small holes so it dries slowly. After 24 to 48 hours, let it dry completely, scrape it off with a plastic scraper, and rinse. Old stains often need two or three rounds, with each one lighter than the last.
3. Red wine, coffee, and tea: hydrogen peroxide
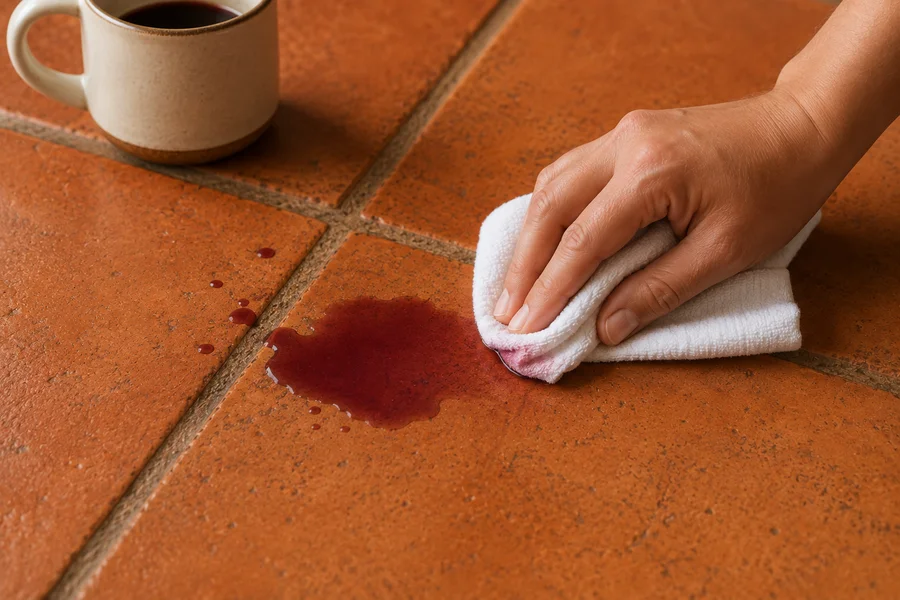
Blot immediately. Soak a white cloth in 3% hydrogen peroxide and lay it over the stain for 30 to 45 minutes, checking every 15 minutes because peroxide can lighten darker clay. Rinse and dry. For a stubborn mark, mix peroxide and baking soda into a paste, cover it with plastic wrap, and leave it overnight.
4. Pet accidents and odor: baking soda, then enzymes
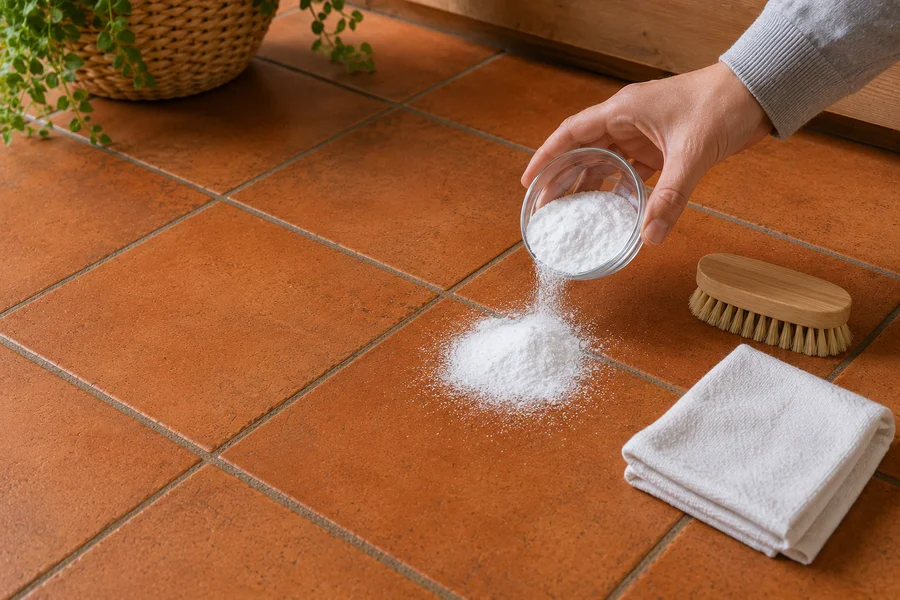
Blot every drop, rinse lightly with cool water, and blot again. Cover the area with baking soda and leave it for up to 24 hours to absorb odor. If the smell returns, use an enzyme cleaner labeled safe for natural stone, applied sparingly. Avoid ammonia-based products, because their smell can draw pets back to the same spot.
5. Leaf and berry stains outdoors: soap and sunlight
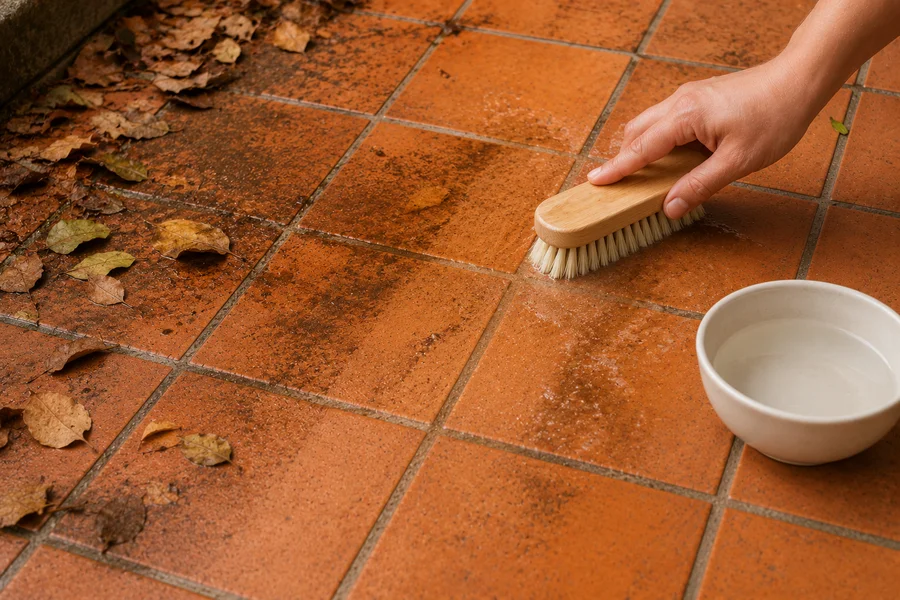
Sweep away the debris and let the tile dry. Scrub with a soft brush and warm soapy water, then rinse. Then let the sun do the rest: tannin stains often fade on their own after a few sunny days. For heavy marks, a baking soda paste left on for an hour gives the sun a head start.
6. Algae, moss, and green film: soap first, oxygen bleach second
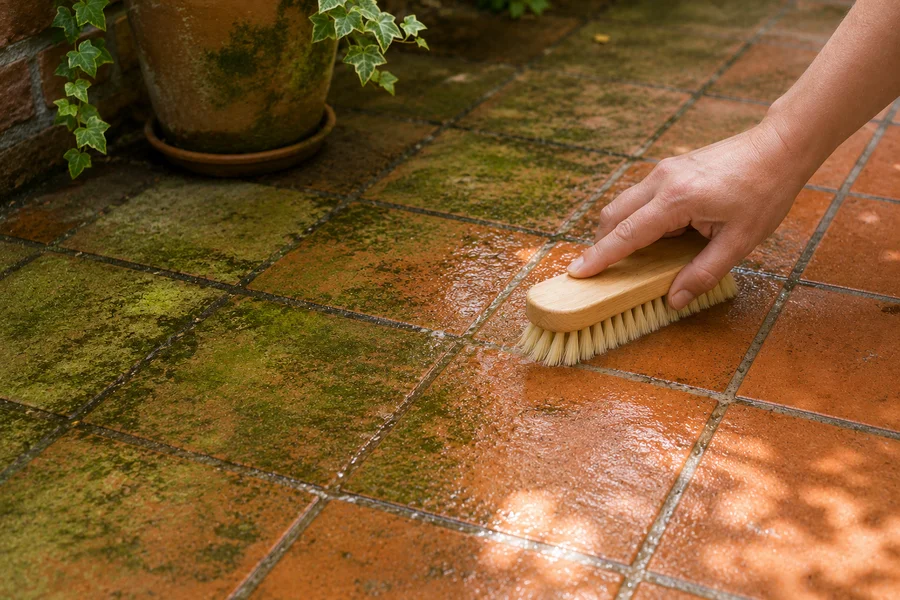
Scrub with warm soapy water and a stiff nylon brush, then rinse with a hose on a gentle setting. For growth that keeps coming back, dissolve oxygen bleach (sodium percarbonate) in warm water following the label, leave it for 10 to 15 minutes, scrub, and rinse twice. Skip chlorine bleach, which can leave pale streaks and salt residue in the clay. Never use a steel brush; it leaves tiny metal bits that rust into orange spots.
7. White powder or haze (efflorescence): brush it dry
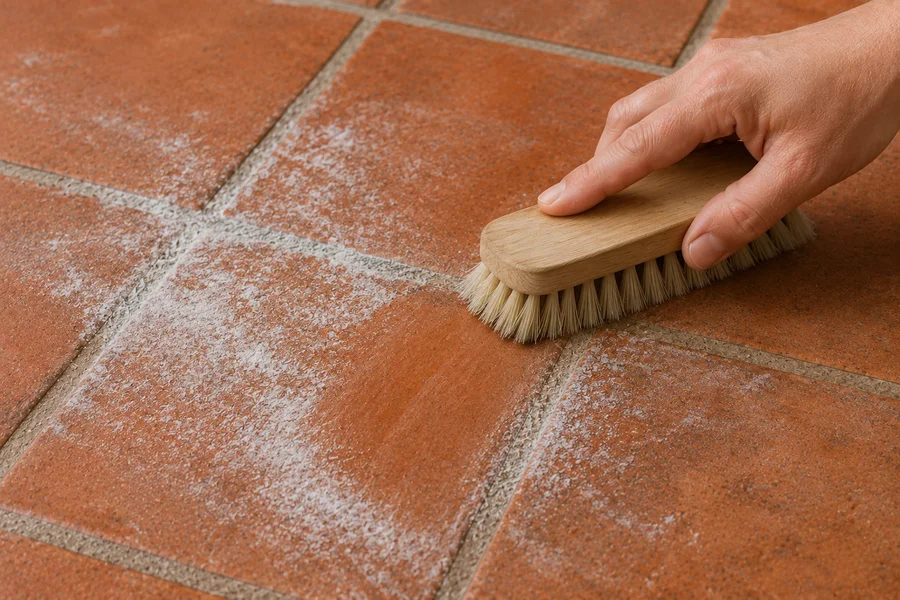
That white bloom is mineral salt carried up by moisture from below, not dirt. Washing it dissolves more salt and makes it worse. Let the floor dry, then brush the powder off with a dry, stiff brush and vacuum it. Repeat over several dry days. Efflorescence often fades on its own within a few weeks to months as the floor dries out. If it keeps returning, look for the moisture source, such as a leak, poor drainage, or a missing moisture barrier under the floor.
8. Rust marks: keep it dry and go gently
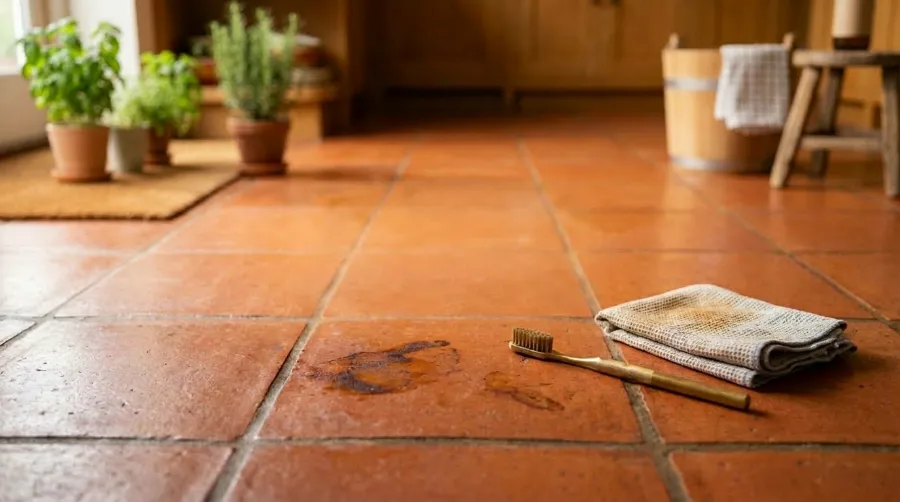
Rust usually comes from metal furniture legs, planters, or steel brushes. Keep the area dry first. Try a baking soda poultice to draw out light marks. For deeper rust, use a rust remover labeled safe for natural stone or unglazed tile, and spot test it, because many rust removers are acidic.
9. Candle wax and gum: freeze it
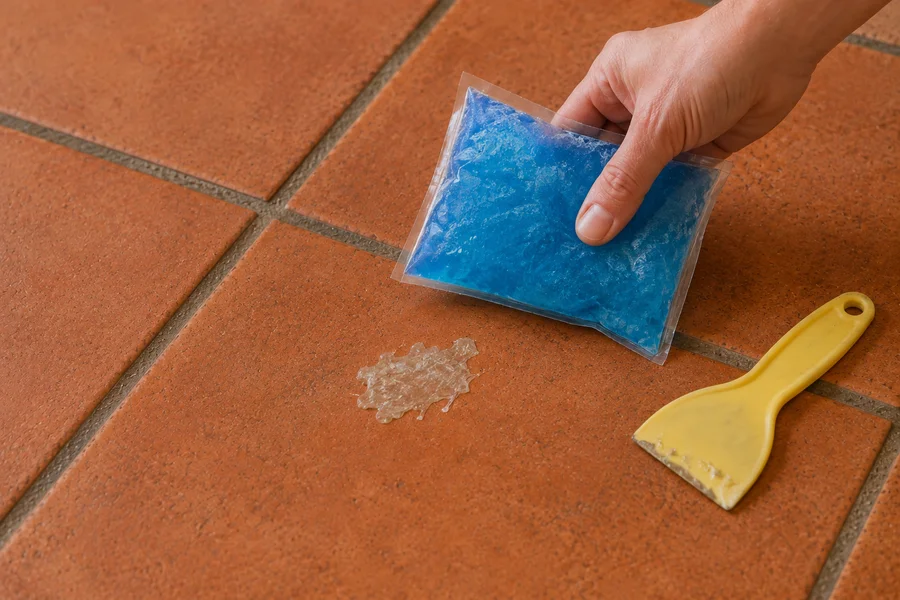
Do not use heat or solvents, which push the residue deeper. Hold a bag of ice on it for 5 to 10 minutes until it turns brittle, then lift it slowly with a plastic scraper. Clean what is left with mild soapy water.
10. Dried paint drips: soften and scrape
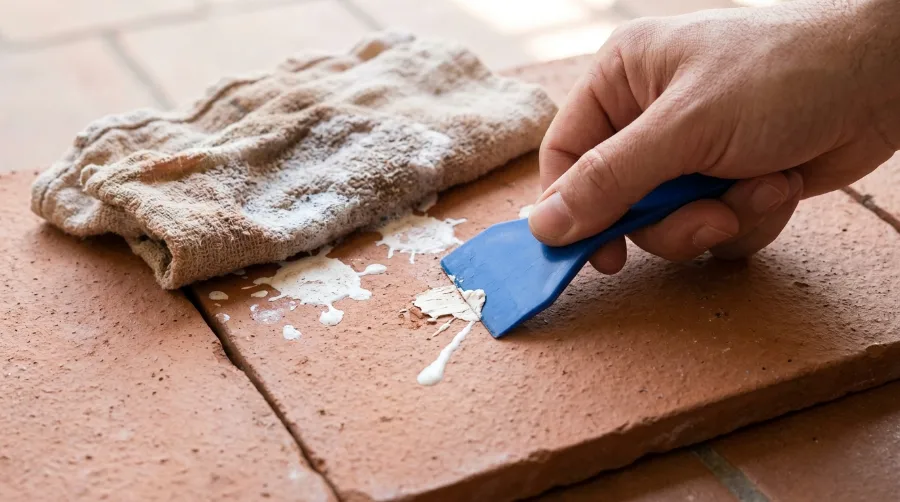
For small latex paint drips, lay a warm, soapy cloth over the spot for a few minutes to soften the paint, then lift it with a plastic scraper. Avoid metal blades, which gouge soft clay. Oil-based paint or large areas usually need a professional paint and coating remover.
Found Old Terracotta Under Carpet or Vinyl? Start Here
Old terracotta hiding under carpet or vinyl is common in older homes, and it can usually be saved. Go slowly and in this order.
- Remove the old flooring and debris. Lift carpet tack strips and staples carefully, then scrape off loose underlay with a plastic scraper.
- Let the floor breathe. Tiles that were covered for years often hold moisture. Leave them uncovered for at least a week before judging how they look.
- Run all four tests. The fingernail test matters most here, because old floors often have layers of wax or oil under the dirt.
- Brush off any white powder dry. Uncovered floors often bloom with efflorescence as they dry. This is normal and usually settles down.
- Try the gentle routine on one small area. Use soap, water, and a soft brush. If the tile looks good once dry, continue across the floor.
- Decide on stripping. If the test area stays dark, sticky, or blotchy, there is an old coating trapping dirt. That needs a stripper or a professional, covered in the next sections.
- Dry fully, then seal. Allow at least 3 to 7 days of drying before any sealer or oil finish.
Do not use diesel, builder’s wipes, or harsh acids on an uncovered floor, even though these tips still circulate online.
How to Clean Outdoor Terracotta and Protect It From Frost
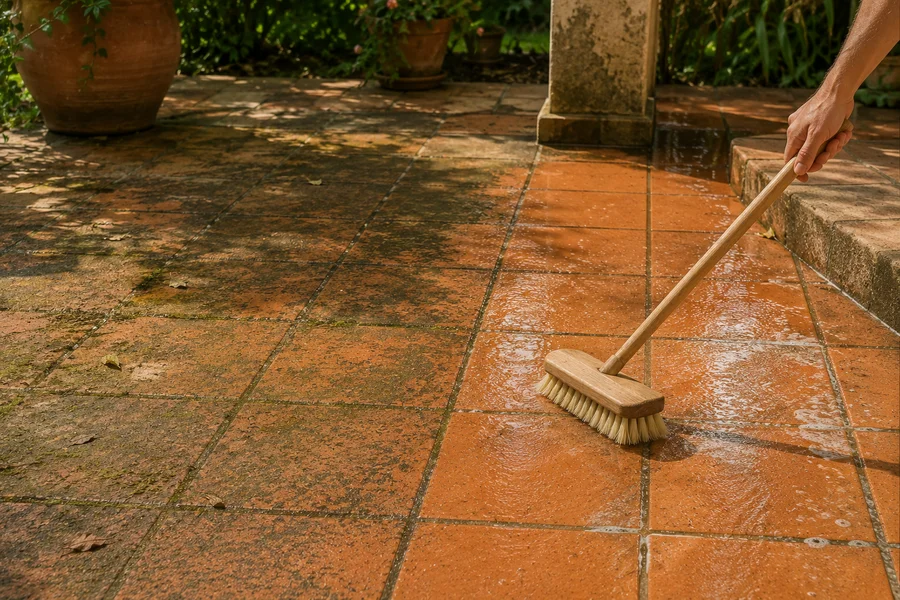
Outdoor terracotta deals with rain, leaves, sun, and freezing winters. The cleaning methods are the same, but three extra things matter.
Pressure washing: low and wide, or not at all
A close, powerful jet can strip the fired surface off soft clay and drive water under the tiles. If you use a pressure washer, choose a low setting, a wide fan tip (25 or 40 degrees), keep the nozzle at least 18 inches away, and only wash when the grout is solid. Plan to reseal afterward, because pressure removes sealer along with the dirt.
Frost and freeze-thaw damage
Water inside the pores expands when it freezes. Over a few winters, this can flake off the face of the tile, a problem called spalling. In cold climates:
- Seal outdoor terracotta in early fall, before the first frost
- Make sure the patio drains and water never pools on it
- Fix cracked grout before winter so water cannot get under the tiles
- Clear snow with a plastic shovel, and never use rock salt or deicers on terracotta
- Bring terracotta planters with saucers indoors or raise them on feet
If you live in a mild, frost-free area, you can skip the winter steps, but sun will still wear sealer faster outdoors.
Choose the right outdoor sealer
Glossy surface coatings peel, blister, and turn white outdoors. Use a breathable, penetrating sealer instead. A water-repellent type helps prevent moss, algae, and efflorescence, while a stain-resistant type is better for patios with grills and dining tables.
When Natural Cleaning Is Not Enough
Natural methods handle everyday dirt and most stains. They cannot remove years of built-up wax, failed sealer, or deep grime. Here is how to tell, and what comes next.
Signs your floor needs a deep clean or restoration:
- It still looks dark, blotchy, or sticky after a proper clean and rinse
- The fingernail test shows a waxy or yellowed coating
- You have tried the same natural method three times with no change
- Paint, adhesive, or grout haze covers large areas
What the deep clean involves: Restoration pros usually test a small patch first. They apply a strong alkaline cleaner or stripper, let it sit, scrub with a floor machine, extract the dirty water with a wet vacuum, and rinse several times. Some add a little vinegar to the final rinse to neutralize the alkaline cleaner. For stubborn white salt crust or cement haze, they may use a mild, buffered acid cleaner made specifically for clay tile, then neutralize and rinse thoroughly.
Set realistic expectations: Stripping even a small room can take a full day, and the floor then needs 3 to 7 days to dry before sealing. Stripped terracotta often looks pale and patchy until it is sealed, which is normal.
Do not mix products. Using several different brands one after another can react in the pores and permanently dull the surface. Pick one system and follow its instructions. For antique, handmade, or large floors, a professional assessment usually costs less than fixing a failed DIY attempt.
Sealing Terracotta: Modern Sealers and Traditional Natural Finishes
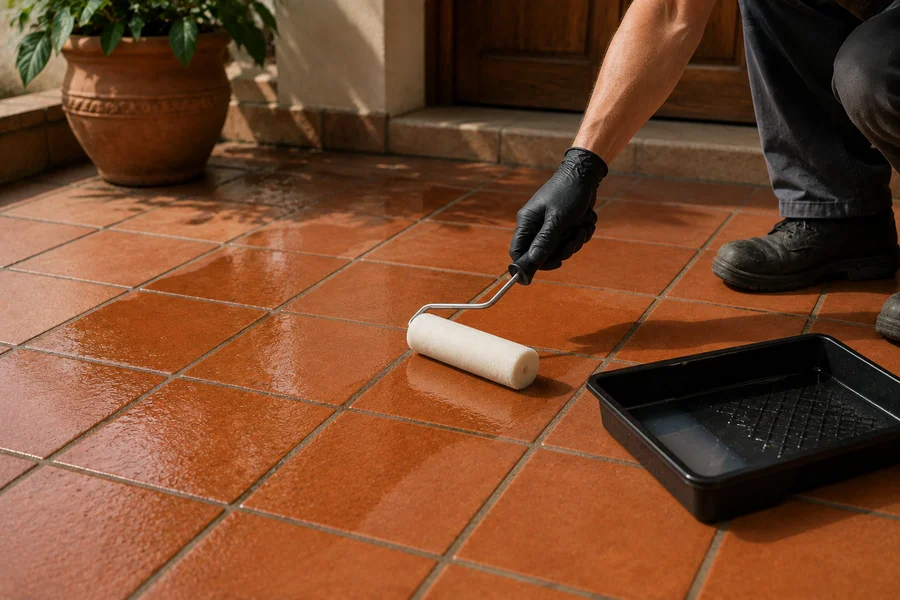
A sealed floor is far easier to keep clean, because spills sit on top instead of soaking in. You have two routes: a modern sealer or a traditional oil and wax finish.
Which finish is right for you?
| Finish | Look | Pros | Cons | Best for |
| Penetrating (impregnating) sealer | Natural, matte | Breathable, invisible, lasts years | Less dirt resistance than a coating | Most indoor and all outdoor floors |
| Color-enhancing penetrating sealer | Richer, deeper color, matte | Brings back faded color | Darkens the tile permanently | Faded or pale tiles |
| Topical polymer sealer | Satin or gloss sheen | Easiest to mop, strong stain resistance | Can peel or cloud over damp subfloors; needs stripping to redo | Dry indoor rooms |
| Wax | Soft sheen | Traditional look | Traps dirt, yellows in traffic lanes, needs regular reapplying | Low-traffic rooms only |
| Boiled linseed oil (+ optional beeswax) | Warm, slightly darker, soft glow | Natural, traditional, easy to refresh | Darkens tile, slow to dry, can build up and attract dirt | Indoor floors in dry rooms |
Traditional natural finish: linseed oil and beeswax
This is the old-world way of finishing terracotta, and it fits a natural cleaning routine.
- Clean and dry completely. Wait 24 to 72 hours after a normal clean, or 3 to 7 days after stripping. Vacuum the dust off, especially from the grout.
- Warm the room. Oil soaks in better when the room and the oil are warm. Choose a warm, dry day or heat the room for a few hours.
- Thin the first coat. Mix boiled linseed oil with an equal amount of pure gum turpentine or odorless mineral spirits. Each later coat uses more oil and less thinner.
- Brush it on thin. Use a paintbrush, working toward the door so you never step on wet oil. Footprints in wet oil become permanent.
- Wipe off the excess. After about 20 to 30 minutes, wipe away anything that has not soaked in. Excess oil turns sticky and grabs dirt.
- Let each coat dry. Allow at least 8 to 24 hours between coats. Two to three coats is usually enough.
- Optional beeswax. Once fully dry, buff in a very thin coat of beeswax paste for extra water resistance and a soft glow.
For a busy schedule, spread the coats over several evenings instead of one long day. Refresh with a light coat once a year or when the water test shows absorption.
Safety first: read this before using oil finishes
- Never heat or boil linseed oil yourself. Buy “boiled linseed oil,” which is ready to use.
- Oily rags can catch fire on their own. As linseed oil dries, it gives off heat. Lay used rags flat outdoors to dry, or seal them in a metal can filled with water, then dispose of them according to local rules.
- Ventilate well. Turpentine and mineral spirits are flammable and have strong fumes. Open windows, avoid open flames, and keep kids and pets out of the room.
- Skip oil finishes in damp spots. In wet, shaded areas outdoors, oil can stay tacky and grow mildew. Use a breathable penetrating sealer there instead.
How to apply a modern penetrating sealer
- Clean the floor, remove all old residue, and let it dry for 24 to 72 hours (3 to 7 days after stripping). To check, tape a 2 by 2 foot square of plastic to the floor overnight. If moisture forms underneath, wait longer.
- Mask baseboards with painter’s tape.
- Apply thin, even coats with a lambswool applicator or brush, starting in the far corner and working toward the exit.
- After 10 to 20 minutes, buff off anything that has not soaked in.
- Apply 2 to 4 coats until the tile stops absorbing.
- Allow 24 hours before light foot traffic and about 72 hours before rugs and furniture.
Reseal when the water test shows water soaking in, usually every 2 to 5 years indoors and more often outdoors and in kitchens. Seal the grout at the same time. For newly installed terracotta, installers usually apply a first coat before grouting, so grout does not stain the tile, and a second coat after.
Terracotta Maintenance Schedule
Use this as your year-round checklist.
| When | Indoor | Outdoor |
| Daily | Sweep or vacuum; wipe spills right away | Sweep high-traffic paths |
| Weekly | Damp mop with castile soap; rinse and dry | Brush debris out of joints |
| Monthly | Clean grout lines with a narrow nylon brush | Check drainage and look for moss |
| Spring | Water test in kitchen and entryway | Wash down the patio; treat green growth |
| Summer | Keep humidity around 40 to 60% | Check for cracked tiles and grout |
| Fall | Deep clean if needed | Clear leaves weekly; seal before first frost |
| Winter | Use entry mats for snow and salt | No rock salt; plastic shovels only |
| Every 2 to 5 years | Reseal, or when water stops beading | Reseal more often in harsh climates |
8 Mistakes That Ruin Terracotta Floors
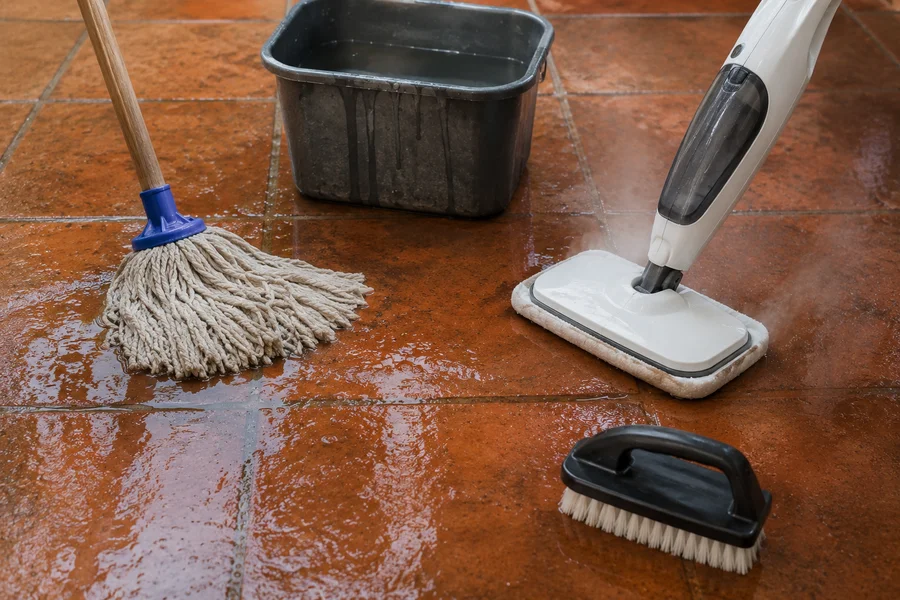
- Flooding the floor. Too much water carries dirt into the pores and feeds white haze. A damp mop cleans just as well.
- Using one bucket. Your clean water turns dirty within minutes, and you spread that dirt back across the floor. Use two.
- Skipping the rinse. Soap film dulls the tile and attracts dirt faster.
- Regular vinegar or lemon cleaning. The damage is slow but permanent.
- Steam mops and steel wool. One forces moisture into the clay, the other leaves scratches that trap grime.
- Mixing cleaning products. Different brands can react in the pores and ruin the surface texture.
- Sealing a damp floor. Trapped moisture causes cloudy white patches that only stripping can fix.
- Letting the sealer wear out. Resealing is quick and cheap compared with restoring a stained floor.
Frequently Asked Questions
What is the best natural cleaner for terracotta tiles?
Lukewarm water with a few drops of fragrance-free castile soap handles routine cleaning. Baking soda and a flour poultice take care of most stains.
Can I use baking soda on sealed terracotta?
Yes. Use it as a dry powder or a soft paste, and avoid scrubbing hard. It absorbs stains without scratching or harming the sealer.
How do I clean Saltillo tile?
Saltillo is a soft, handmade Mexican terracotta, so use the gentlest version of this guide: minimal water, castile soap, no acids, and regular sealing. Most Saltillo floors have a topical sealer, so run the shine and fingernail tests first.
Is terra cotta the same as terracotta?
Yes. Both spellings refer to the same unglazed fired clay tile, and the same care applies.
Why do my terracotta tiles look darker in the middle of the room?
That usually means an old wax or surface coating has worn away in walkways and trapped dirt, while the edges still have a layer. Cleaning alone will not fix it; the coating needs stripping.
Can I use Murphy Oil Soap on terracotta?
It is best to avoid it. Oil soaps can leave a film in the pores that attracts dirt and may affect how sealer bonds later.
How long should terracotta dry before sealing?
At least 24 to 72 hours after normal cleaning, and 3 to 7 days after a deep clean or stripping. Use the plastic sheet test to be sure.
How do I make old terracotta look new again?
Deep clean or strip any old coating, let the floor dry fully, then apply a color-enhancing penetrating sealer or a linseed oil finish. Most of the rich color comes back from the sealer, not the scrubbing.
Final Thoughts
Terracotta is not fragile, but it is thirsty, and every good cleaning habit follows from that. Test your floor before you start. Sweep before you mop, use as little water as possible, and lift stains out instead of scrubbing them in. Keep acids and steam away, and keep the floor sealed with a modern sealer or a traditional linseed finish.
Do that, and your terracotta will develop the warm, soft patina it is loved for, and last for generations.

Noah Williams
Interior Designer & Flooring Expert
Related Posts