
Noah Williams is an interior designer and flooring expert at Nova Floor. In Dubai, he helps people pick the right floor, get it installed, and keep it looking good. He also writes simple, practical flooring and home care guides for readers in Dubai and around the world.
How To Clean Tile Grout | 12 DIY Ways To Clean Discolored Grout + Maintenance Guide
Noah Williams
To clean tile grout, first identify what discolored it, then match the method to that cause. Embedded soil and general dinginess respond to an oxygen bleach soak: mix sodium percarbonate powder into water at 104°F or warmer, let it dwell on the joint for 15 to 30 minutes, agitate once with a stiff nylon brush, and rinse. Mold in wet areas needs an enzyme cleaner first to strip the biofilm. White powdery deposits need dry brushing and moisture control, never more water. Seal the grout once it dries completely, and the result holds for one to three years.
That sequence matters more than any single product. Grout is porous cement, and five different problems produce discoloration that looks nearly identical to the eye. People scrub for an hour, see almost no change, and assume the grout is finished. In most cases, they picked chemistry that does not act on the stain in front of them.
This guide by Nova floor experts sorts the problem the way a restoration technician does. You will diagnose the cause in about 30 seconds, work through 12 methods arranged from gentlest to most aggressive, and avoid the products that quietly degrade cement grout while appearing to clean it.
Contents
Why Grout Discolors | Diagnose Before You Scrub
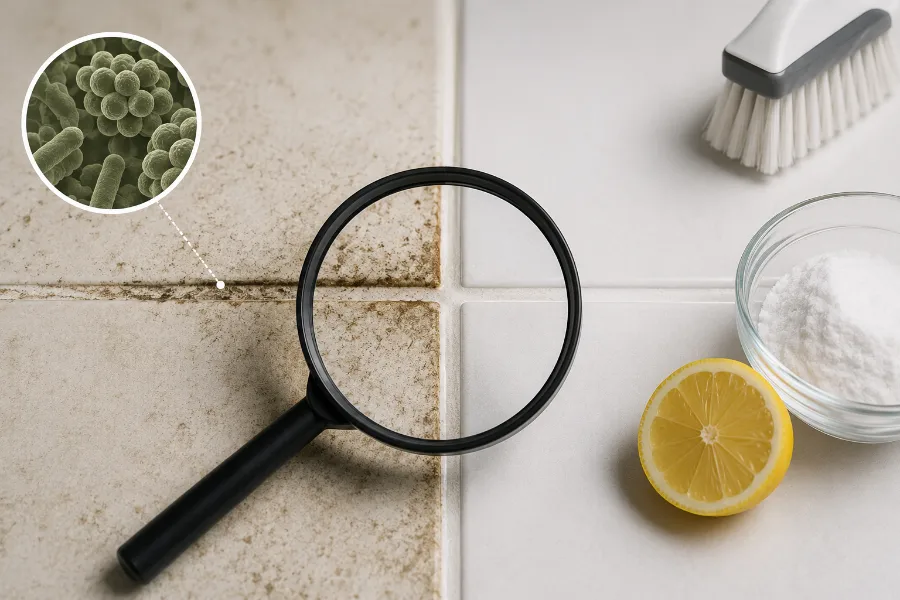
Cement-based grout contains Portland cement, sand, and water. Under magnification, it resembles a sponge made of stone, so everything that lands on it soaks in. Here are the five causes, ordered by how often they appear in homes.
- Embedded soil and body oils. Foot traffic grinds dirt into floor joints. In showers, soap scum and skin oils build a sticky film that traps everything else. This explains most gray, tan, or brown discoloration on floors.
- Mold and mildew. Warm, damp, poorly ventilated bathrooms grow Cladosporium, Aspergillus, and common mildew. Most dark spots people call “black mold” belong to these ordinary genera. Color alone never identifies a species.
- Efflorescence. This one fools nearly everyone. Efflorescence is a white, chalky, sometimes sparkling deposit of water-soluble mineral salts that migrate up from the cement below and crystallize on the surface as water evaporates. The Tile Council of North America traces those salts to the slab or a thick mortar bed rather than to mop water. Scrubbing harder achieves nothing. Adding more water restarts the cycle.
- Hard water and mineral scale. Calcium and magnesium leave a dull, crusty film in showers and around faucets. It reads as discolored grout, but it sits on top of the joint.
- Sealer failure or product residue. Wax-based and oil-based cleaners leave a tacky film that grabs dirt. Topical acrylic sealers can turn milky white when moisture reaches them, and people mistake that haze for efflorescence. Polymer-modified grout can also push a whitish polymer film to the surface if someone washed it too soon or with too much water after installation.
The 30-Second Diagnostic Test
Run these three checks before buying anything.
| Test | What you do | What the result tells you |
| Water drop | Drop water on a clean grout line, wait 60 seconds | Beads up: grout is sealed or epoxy. Darkens and soaks in: bare cement grout that needs sealing |
| Dry brush | Scrub a small white patch with a dry stiff nylon brush | Powder lifts off easily: efflorescence. Nothing moves: embedded stain or sealer haze |
| Return test | Clean one small dark spot, then check it in five days | Still clean: surface mildew, job done. Dark again: growth has rooted below the surface |
That last test carries more weight than any product decision. A spot that returns within days signals a moisture problem or grout that needs replacement, and no cleaner will hold.
Know Your Grout Type First
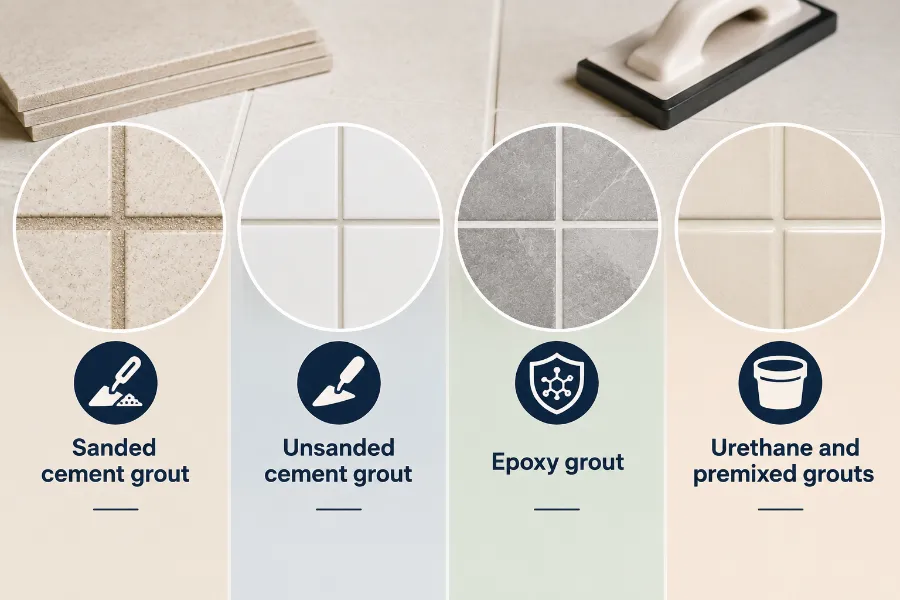
Using the wrong method on the wrong grout costs money.
Sanded cement grout fills joints wider than 1/8 inch. It resists abrasion reasonably well and handles a stiff nylon brush.
Unsanded cement grout fills joints narrower than 1/8 inch. It scratches more easily, so use softer bristles and lighter pressure.
Epoxy grout is a two-part resin with almost no porosity. It resists stains, never needs sealing, and will not accept a colorant.
Urethane and premixed grouts behave like epoxy for cleaning purposes. Check the manufacturer’s data sheet before applying any acid to them.
One more distinction shapes your whole approach: colored grout versus white grout. Pigments in cement grout sit vulnerable to acids and to long chlorine exposure. Both strip color and leave patchy joints that look worse than the original stain.
What You Need
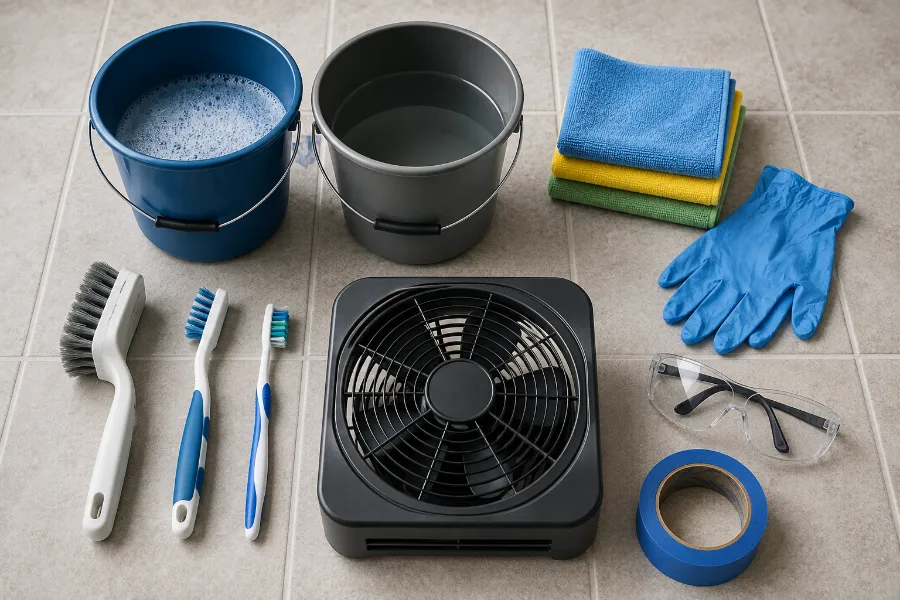
Gather these first. Working in one continuous pass beats stopping to hunt for a brush.
- Stiff nylon grout brush with a narrow head, plus a soft-bristle brush for unsanded joints
- Old toothbrush for corners and edges
- Two buckets: one for solution, one for rinse water
- Several microfiber cloths
- Nitrile gloves and eye protection
- A box fan or an open window for airflow
- Painter’s tape if you plan to use acid or colorant near natural stone
Skip wire brushes entirely. Steel bristles gouge cement grout and leave metal particles that rust in the joint.
12 DIY Ways To Clean Discolored Grout
The methods run from gentlest to most aggressive. Professional cleaners start with the least destructive approach and escalate only when it fails. Follow that order and you protect your joints.
Group A: Everyday Soil and General Discoloration
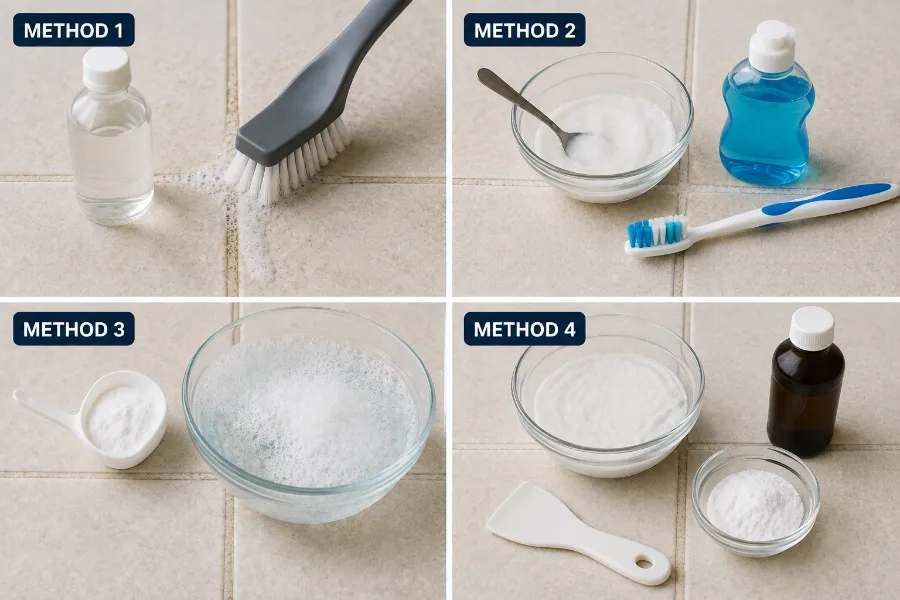
Method 1: pH-Neutral Cleaner and Correct Brush Technique
People underestimate this one because it sounds too simple, but technique outweighs product strength on lightly soiled joints.
Mix a pH-neutral tile cleaner with warm water per the label. Apply it to the joint rather than the tile. Wait five minutes so the surfactants loosen the soil film. Then scrub in short strokes that follow the grout line instead of crossing it, because cross-scrubbing pushes dirt back into the pores you just opened.
Rinse with clean water and change the rinse bucket often. Dirty rinse water redeposits everything you lifted, which is precisely why some people finish an entire floor and see no improvement.
This is your baseline for cleaning grout in kitchens, hallways, and entryways on a routine schedule.
Method 2: Baking Soda Paste With Dish Soap
Baking soda works as a mild alkaline abrasive. It scrubs mechanically while raising pH, and cement grout tolerates alkaline chemistry well.
Mix three parts baking soda with one part warm water and add a few drops of dish soap, aiming for toothpaste consistency. Press it into the joints with a gloved finger, wait 10 minutes, scrub, and rinse.
This is the safest diy grout cleaner for colored grout and for anyone avoiding fumes. It handles light kitchen grease and general dullness, though it will not reach deep organic staining.
Do not follow it with vinegar. The fizzing reaction that fills social media videos produces sodium acetate and water, which cleans nothing. You neutralized both ingredients for a bit of theater.
Method 3: Oxygen Bleach Soak (The Strongest Safe Option)
For anyone who wants a single answer to the best way to clean grout on cement joints, this is it.
Oxygen bleach is sodium percarbonate. Warm water splits it into hydrogen peroxide and sodium carbonate, and the released oxygen penetrates the pore structure to oxidize stain molecules from within instead of bleaching the surface white. That difference explains why the results last longer than a chlorine treatment.
Here is the method:
- Dampen the grout first, since moisture starts the reaction.
- Mix roughly 1/4 cup of powder into 2 cups of water at about 104°F or warmer. Cold water slows the oxygen release badly.
- Apply it thick enough to sit on the joint. On vertical surfaces, load a damp sponge and press it against the grout.
- Let it dwell 15 to 30 minutes without scrubbing. The dwell does the work.
- Agitate once with a stiff nylon brush, then rinse thoroughly.
- Mop the whole area afterward to collect loosened soil.
Two details most guides omit. The mixed solution stays active for roughly six hours, so mixing a large batch the night before wastes product. And colored grout needs a shorter dwell, around 5 to 8 minutes, after you test a hidden corner.
Work in sections of about 3 feet by 3 feet. Full dwell time on a small area beats a thin coat spread across a whole room.
Method 4: Hydrogen Peroxide and Baking Soda Poultice
A poultice draws stains upward as it dries, which suits deep, isolated marks such as coffee, wine, or rust shadows.
Mix 3% hydrogen peroxide into baking soda until you get a thick paste. Spread it over the stain about 1/4 inch deep, cover it with plastic wrap, and tape the edges. Leave it 12 to 24 hours, remove the plastic, let the paste dry completely, then scrape it off and rinse.
The drying phase does the real work. A poultice that stays wet accomplishes nothing, because evaporation is what pulls the stain out of the pore structure.
Group B: Mold, Mildew, and Biofilm
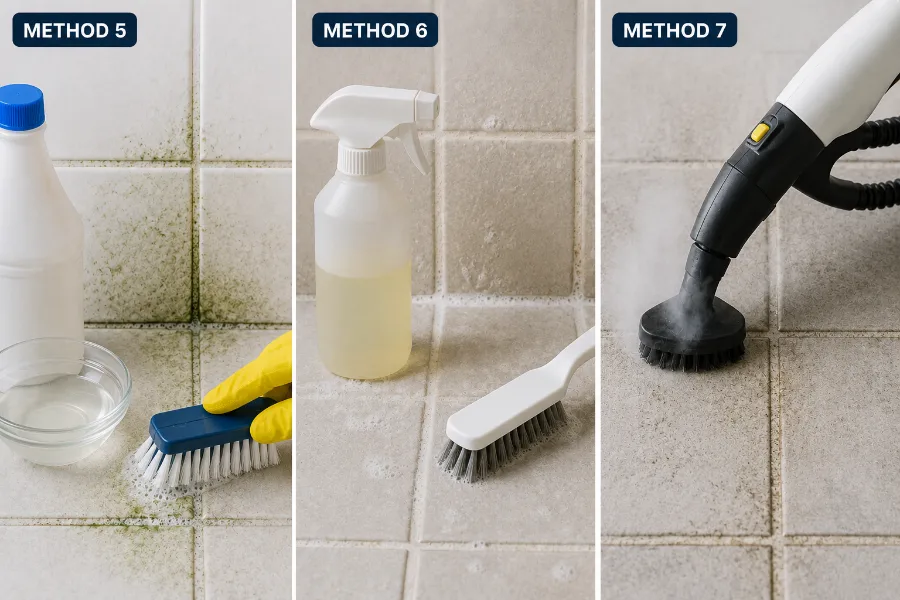
Method 5: Controlled Chlorine Bleach Application
Chlorine bleach earns its reputation and its warnings in equal measure. It whitens stains fast, and it also strips pigment from colored grout, degrades sealers, and produces fumes that irritate airways in an enclosed bathroom.
The EPA does not recommend bleach as a routine practice for mold cleanup, for a reason worth understanding. On porous materials bleach whitens the surface while leaving the organism in place, and dead mold still triggers allergic responses.
If you use it, use it correctly. Mix one part bleach to two parts water. Ventilate before you start and keep air moving throughout. Apply only to the joint, hold it to 10 minutes maximum, and rinse completely. Never combine it with ammonia, vinegar, or any acidic cleaner, since those mixtures release chloramine or chlorine gas.
Reserve this for white grout with visible surface growth. Colored joints belong in Method 3.
Method 6: Enzyme Cleaner for Soap Scum and Biofilm
Shower grout collects a biofilm of soap residue, body oil, and microbial growth bonded together. Oxidizers struggle against it because the film shields whatever sits underneath.
Enzyme cleaners break down organic soil the way a laundry pre-soak breaks down protein stains. Spray the joints, leave the product 15 minutes, agitate lightly, and rinse. Follow with oxygen bleach if discoloration remains.
That two-stage sequence answers how to clean shower tiles far more reliably than any single product. Strip the film first, then treat the stain.
Method 7: Steam Cleaning
Steam loosens soil with heat and vapor pressure instead of chemicals, and it reaches pores that a surface spray never touches.
To steam clean tile floors properly, attach the narrow grout tool, move slowly along each joint, and wipe immediately behind the head with a microfiber cloth. Steam lifts the soil, but the cloth removes it. Skip the wipe and you simply redistribute everything.
Now the limits, because steam suits some installations and not others.
Sanded and unsanded cement grout generally handle steam well. Manufacturers of epoxy and furan grout commonly advise against sustained high heat, so check the data sheet for your product before steaming those joints. Old, crumbling grout can lose material under a concentrated head. Hand-painted, vintage, and decoratively glazed tile can crack from rapid temperature change, so test an inconspicuous area.
The clearest warning applies to efflorescence. Forcing more moisture into the assembly pulls more salts to the surface, so steam worsens that specific problem. If your discoloration is white and powdery, put the steamer away.
Give unsealed grout a full day of airflow after steaming before you seal anything.
Group C: Mineral Deposits and Efflorescence
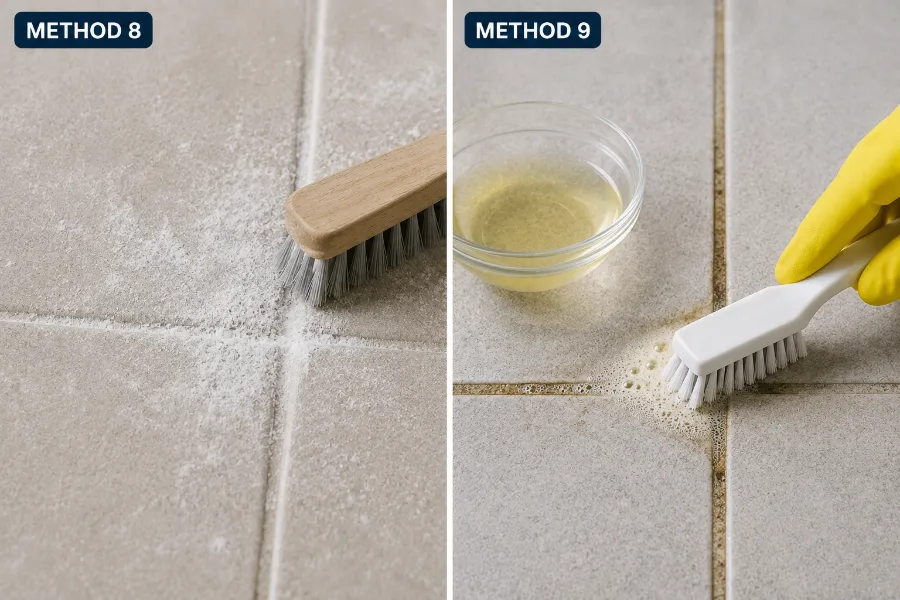
Method 8: Dry Removal for Efflorescence
Start with no liquid at all. Scrub the deposit with a stiff dry brush, vacuum the powder, and repeat over several days.
Efflorescence often runs its course once the assembly finishes drying. Water restarts the cycle and carries a fresh batch of salts to the surface, which is why people report the white haze returning within a week of every wet cleaning.
Method 9: Acidic Cleaner for Stubborn Mineral Deposits
When dry removal falls short, an acid dissolves the crystals. Grout manufacturers point to sulfamic acid crystals or a formulated acidic tile and grout cleaner rather than household acids, and that recommendation carries real weight.
Wet the grout with plain water first so the acid does not soak straight into dry pores. Apply the product per label directions, keep the dwell short, agitate, rinse twice, and neutralize with a pH-neutral cleaner.
Three rules apply without exception. Never use acid on marble, travertine, limestone, or any calcareous stone, because it etches the surface and re-polishing costs real money. Never use it on colored grout without testing, since acid leaches pigment and can pull a colored joint back toward raw cement gray. Never make acid part of a routine, because repeated exposure dissolves the calcium binder and leaves grout more porous than it started.
Household vinegar sits in the same category. It carries about 5% acetic acid, and cleaning vinegar runs slightly higher. Mapei’s own guidance states that occasional use on porcelain or ceramic with cement grout should not cause damage, while frequent or regular use can discolor and weaken grout and does not belong in routine maintenance. Treat vinegar as a rare tool rather than a weekly habit, and keep it off natural stone completely.
Group D: Mechanical and Restorative Methods
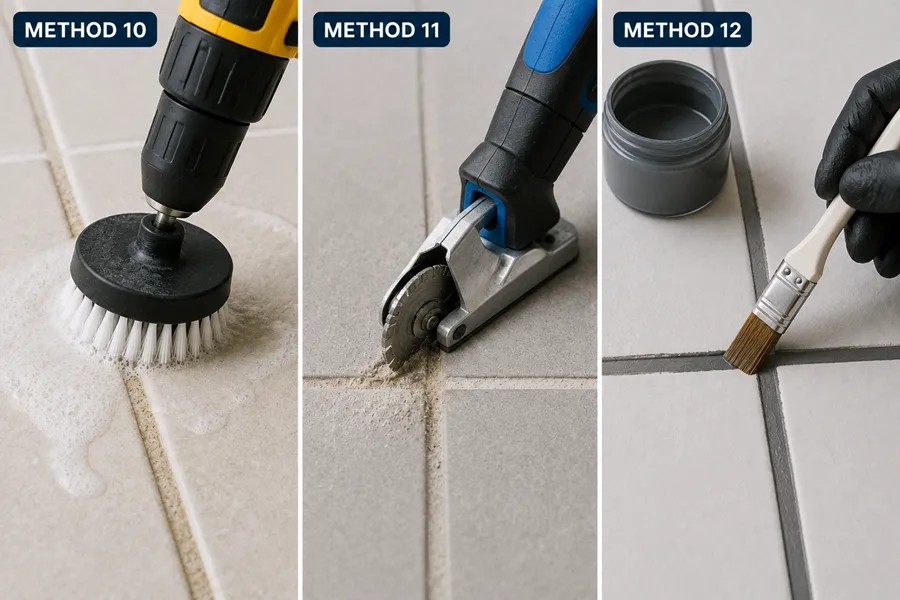
Method 10: Powered Brush Attachment
Hand scrubbing a whole floor destroys knees and produces uneven results across a large area. A drill-mounted or cordless rotary grout brush applies consistent pressure at consistent speed.
Choose nylon bristles rated for grout and run the tool at low speed. Keep it moving, because holding it in one spot wears a groove. Let your cleaner dwell first, then use the brush purely to agitate.
This is the practical answer to how to clean grout between floor tiles across an entire kitchen or hallway without giving up halfway through.
Method 11: Surface Renewal With a Grout Saw
Sometimes the top layer of grout no longer exists as a clean surface. Years of soil have bonded into the first millimeter, and no chemistry will reverse it.
A carbide grout saw or an oscillating multi-tool with a grout blade, removes that layer and exposes fresh material underneath. Work slowly and keep the blade centered so you do not chip tile edges. Vacuum the dust and clean the joint.
What happens next depends on how deep you went. A light skim that only exposes clean grout can simply be sealed. New grout needs proper depth to bond, so if you intend to regrout, remove the old material to roughly two-thirds of the joint depth rather than laying a thin layer over a shallow scratch. A thin skim coat crumbles out within months.
This takes patience and a steady hand. It also costs a fraction of retiling and delivers a genuinely new surface instead of a cosmetic improvement.
Method 12: Grout Colorant or Grout Stain
When you have cleaned everything that will clean, and the joints still look tired, colorant delivers the reset.
Grout stain is a reactive colorant that bonds with the minerals in cement-based grout and penetrates below the surface, so it cannot peel or wash away. Grout paint, sometimes sold as a colorant sealer, coats the surface and seals in one step. Stain lasts longer while paint applies more easily.
Rules that determine success:
- Clean and dry the grout completely first, because colorant will not bond through residue.
- Repair cracks and voids before you color, since colorant fills nothing.
- Test a hidden section. Applied color often reads more muted than the color chart suggests.
- Expect two coats over dark staining.
- Wipe overspill off the tile before it cures.
- Skip epoxy grout entirely, because colorant cannot penetrate a non-porous resin. A water-drop test settles this in a minute.
Colorant answers how to make grout white again permanently when cleaning has hit its ceiling. Set aside a weekend and good knee pads, since coverage is slow work.
Matching the Method to Your Problem
Use this table to skip straight to the right approach.
| Your situation | Start here | Escalate to |
| Gray, dull floor joints | Method 1, then 3 | Method 10 for large areas |
| Dark spots in shower joints | Method 6, then 3 | Method 5 on white grout only |
| White powdery deposit | Method 8 | Method 9 if it persists |
| Crusty film around fixtures | Method 9 | Reduce water hardness at the source |
| Isolated dark stain | Method 4 | Method 11 |
| Colored grout, general dullness | Method 2, then 3 at short dwell | Method 12 |
| Clean but permanently dingy | Method 11 | Method 12 |
| Stain returns within days | Stop cleaning | Inspect for a moisture source |
The Mistakes That Cause Most Grout Damage
- Oil-based and wax-based cleaners. Grout absorbs the soap and holds a tacky film that attracts more dirt than the cleaner removed.
- Wire brushes and abrasive powders on unsanded grout. They open the pore structure and guarantee faster restaining.
- Mopping a gritty floor. Dry grit acts as sandpaper on grout once you push it around wet. Sweep or vacuum first, every time.
- Chasing a stain with escalating chemicals. If two appropriate treatments fail, the problem is structural rather than chemical. Move to Method 11 or 12 instead of reaching for something stronger.
- Treating recurring mold as a cleaning problem. Growth that returns within days, a musty odor that survives cleaning, or staining that bleeds through fresh caulk all point to water inside the wall.
- Confusing caulk with grout. Corners, the tub joint, and the shower base need flexible caulk. Cement grout cracks in those movement joints, and stained caulk needs replacement rather than scrubbing.
Sealing carries its own set of errors, which the next section covers in sequence.
How To Seal Grout So It Stays Clean
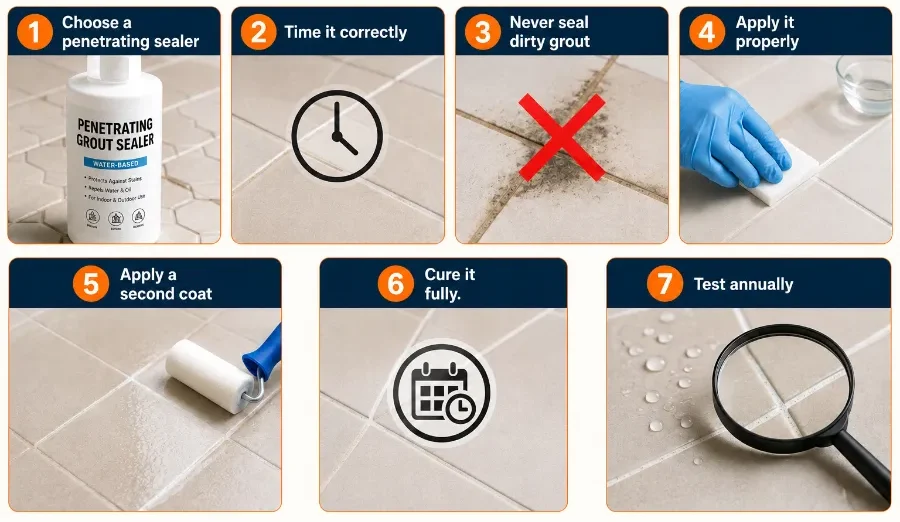
Sealing converts one weekend of work into three years of easy maintenance. Skipping it guarantees a repeat next season.
- Choose a penetrating sealer. Penetrating sealers, also called impregnating sealers, soak into the pore structure, bond at the pore wall, and create a water-repellent barrier from within. They stay invisible and let vapor escape. Membrane-forming sealers sit on top, add sheen, show wear paths, and can trap moisture behind the film in wet areas. For nearly every residential application, penetrating wins.
- Time it correctly. New cement grout needs 48 to 72 hours of cure at minimum, and some manufacturers ask for a full seven days. Humid rooms need longer. After a deep clean, allow at least 24 hours of drying. Press a dry paper towel firmly against the joint before you commit, since any moisture transfer means waiting longer.
- Never seal dirty grout. Sealer locks the discoloration in, and removing it later means stripping the sealer first.
- Apply it properly. Work in small sections. Brush or roll a thin, even coat directly onto the joint. Let it absorb for the interval the label specifies, usually 5 to 15 minutes. Wipe every trace of excess off the tile before it dries, because cured sealer haze on glazed tile takes solvent and effort to remove.
- Apply a second coat. Porous grout absorbs almost all of the first coat, and the second one builds the actual barrier.
- Cure it fully. Keep the surface dry for 24 to 48 hours before normal use, and wait the full interval the manufacturer specifies in a shower.
- Test annually. Drop water on the joint. Beading means the sealer holds, and soaking in means reseal now.
Reseal floors every one to three years. Reseal shower grout every six to twelve months, since constant moisture and alkaline cleaners wear it faster. Epoxy grout needs no sealer, because a penetrating product has nothing to bond to.
One caution on efflorescence: water-based impregnating sealers can make it worse, since they penetrate and slow the escape of the moisture carrying those salts. Stop the moisture source first, then choose a solvent-based product.
Your Grout Maintenance Schedule
Grout that receives regular attention takes roughly half the effort of grout ignored for six months.
- After every shower. Squeegee the walls and run the exhaust fan for 20 minutes. Bathroom humidity often climbs past 80% after a hot shower, and mold growth accelerates above that point. Twenty seconds with a squeegee prevents most of what would otherwise cost you an hour of scrubbing.
- Weekly. Wipe tile and joints with a pH-neutral cleaner.
- Monthly. Spot-treat any darkening with a short oxygen bleach application before it establishes. Check corners, thresholds, and the base of the shower where water pools.
- Quarterly. Run a full oxygen bleach treatment on high-use areas and inspect every caulk line.
- Annually. Run the water-drop test on all sealed surfaces and reseal what fails. Look for hairline cracks, which signal movement or a failing substrate.
Two habits pay off more than any product. Put a doormat at every entrance to cut the abrasive grit reaching your floors, and fix dripping shower heads and slow drains promptly, since constant moisture defeats any schedule.
For daily tile and grout cleaning, keep one bottle of pH-neutral cleaner within reach and use nothing else. Specialty products belong in the closet for quarterly work.
When To Stop Cleaning and Call a Professional
Some situations no longer respond to DIY methods. Recognizing them early saves a wasted weekend.
- Mold covering more than roughly 10 square feet, which is the EPA’s threshold for bringing in professionals on hard surfaces
- A musty smell that persists after thorough cleaning, or soft drywall behind the tile
- Grout that crumbles, powders, or falls out when you brush it
- Loose or hollow-sounding tiles, which indicate bond failure underneath
- Efflorescence that returns repeatedly, since it signals continuing moisture movement through the assembly
- Etched natural stone that needs re-polishing
Professional tile and grout cleaning uses high-pressure hot water extraction, which pulls contamination out of the pores rather than loosening it and leaving it behind. On a badly neglected floor, extraction reaches a level no household method matches, and your own maintenance then holds the result.
Cost and Time Comparison
| Approach | Typical cost | Time for one bathroom | Result lasts |
| Oxygen bleach treatment | Low | 1 to 2 hours | 2 to 4 months without sealer |
| Full clean plus sealing | Low to moderate | A weekend across two days | 1 to 3 years |
| Grout colorant | Moderate | Full weekend | Several years, longer with careful prep |
| Professional extraction and seal | Higher | Half a day, no labor from you | 1 to 2 years |
| Regrouting | Highest | Multiple days | 10 years or more |
Frequently Asked Questions
How to clean grout?
Identify the cause, then match the method. For general soil, mix oxygen bleach with warm water, let it dwell 15 to 30 minutes, agitate once with a stiff nylon brush, and rinse thoroughly. For mold in wet areas, strip the biofilm with an enzyme cleaner first. For white powdery deposits, brush dry and keep water away. Seal the grout once it dries completely.
How to clean grout on floor tiles without scrubbing for hours?
Extend the dwell time and reduce the effort. Apply your cleaner, wait the full 20 to 30 minutes, and use a drill-mounted nylon brush for agitation. Working in 3-foot sections keeps every area wet for the whole dwell, which is where the cleaning actually happens.
How to get grout white again on old, stained joints?
Run a full oxygen bleach treatment first, since grout that has never received a deep clean often responds better than people expect. If discoloration survives two treatments, the color has bonded into the material itself, and a grout colorant restores a uniform white more reliably than further cleaning.
How to clean white grout without turning it patchy?
Treat an entire run of joints in one session rather than spot-cleaning, because patchiness usually comes from uneven treatment instead of the product. Chlorine on partially sealed white grout also brightens unevenly wherever the sealer has worn thin, so oxygen bleach gives a more consistent finish.
How to clean discolored grout when the discoloration is white rather than dark?
Brush it dry first. Powder that lifts easily is efflorescence, and it needs moisture control rather than wet cleaning. A haze that will not move is more likely a failed topical sealer or polymer residue, which needs the old coating stripped before anything else works.
How to clean stained grout from a single spill?
Build a poultice from 3% hydrogen peroxide and baking soda, cover it with taped plastic wrap for 12 to 24 hours, then let it dry fully before removal. The drying phase pulls the stain out of the pores.
How to clean bathroom tiles and grout without harsh chemicals?
Combine steam with oxygen bleach. Steam loosens embedded soil using heat alone, and sodium percarbonate rinses away as oxygen, water, and soda ash. Both avoid chlorine fumes, which suits homes with children, pets, or septic systems.
How to clean grout in shower corners where mold keeps returning?
Check what material sits in the corner. Once mold penetrates caulk through its full thickness, cutting it out and re-caulking is the only fix, and repeated cleaning of stained caulk wastes effort. If fresh caulk discolors again quickly, water is reaching it from behind the tile.
Is a steam mop safe for every tile floor?
No. Cement grout and porcelain handle steam well. Epoxy and furan grout, hand-painted or vintage tile, and crumbling old grout all need caution or avoidance. Steam also worsens efflorescence by driving moisture into the assembly.
Does bleach damage grout?
Chlorine bleach degrades sealers, strips pigment from colored grout, and whitens organic growth rather than removing it from porous material. Occasional controlled use on white grout is acceptable, while regular use shortens the life of both the sealer and the joint.
How often should grout be sealed?
Reseal floor grout every one to three years and shower grout every six to twelve months. Confirm with the water-drop test rather than the calendar, and skip epoxy grout, which never needs sealing.
The Short Version
Match the chemistry to the cause. Give products time to dwell instead of applying more force. Escalate from gentle to aggressive rather than the reverse. Seal the joints once they are genuinely clean and genuinely dry, then protect the result with a squeegee, an exhaust fan, and a pH-neutral cleaner. Do that and today’s deep clean becomes a 15-minute task next season instead of another lost weekend.

Noah Williams
Interior Designer & Flooring Expert
Related Posts