Noah Williams is an interior designer and flooring expert at Nova Floor. In Dubai, he helps people pick the right floor, get it installed, and keep it looking good. He also writes simple, practical flooring and home care guides for readers in Dubai and around the world.
How To Create Patterns With Floor Tiles | 12 Classic & Creative Designs

Noah Williams
Every floor tile pattern carries a price tag beyond the tile itself. Some patterns burn 20% of your order in offcuts. Some crack your budget on labour. And a few will fail outright if your tile has the wrong proportions or sits above a certain size.
This guide by Nova Floor covers 12 floor tile patterns. For each one, you get the look, the technical limit, the waste factor, and the room where it earns its keep. You also get the industry standards that professional installers follow, so you can brief a contractor with confidence or lay the floor yourself without expensive surprises.
Contents
Three Things That Decide Your Pattern Before You Pick One
Pick the pattern last, not first. Three factors narrow your options quickly.
1. Your tile’s aspect ratio
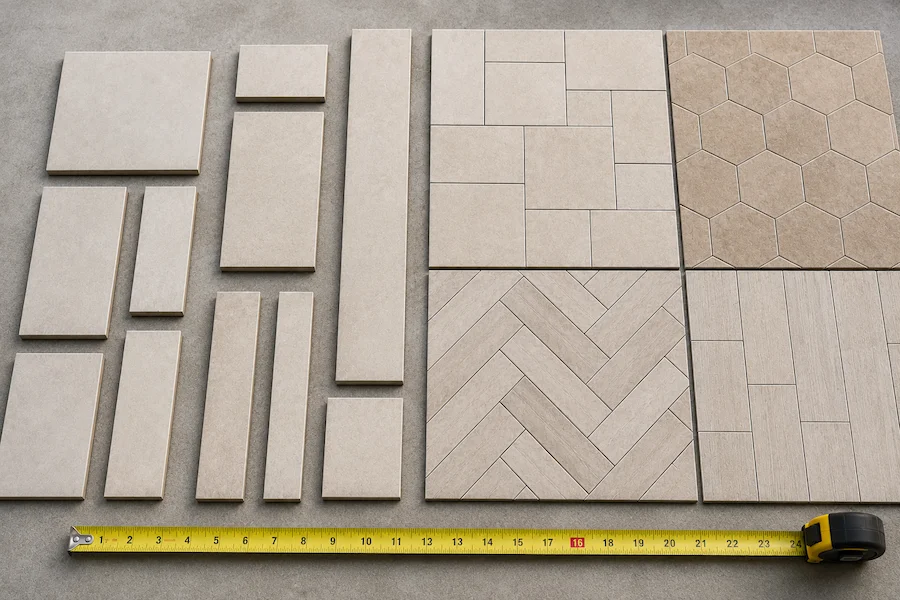
The ratio between a tile’s short side and long side controls which patterns work. A 12×24 tile has a 1:2 ratio. A 4×12 tile has a 1:3 ratio. That single difference rules out certain layouts entirely, and you will read why in the herringbone section below.
Square tiles free you up for grid, diagonal, checkerboard, and pinwheel. Rectangles open the door to offsets, herringbone, chevron, and basketweave.
2. Your tile’s longest side
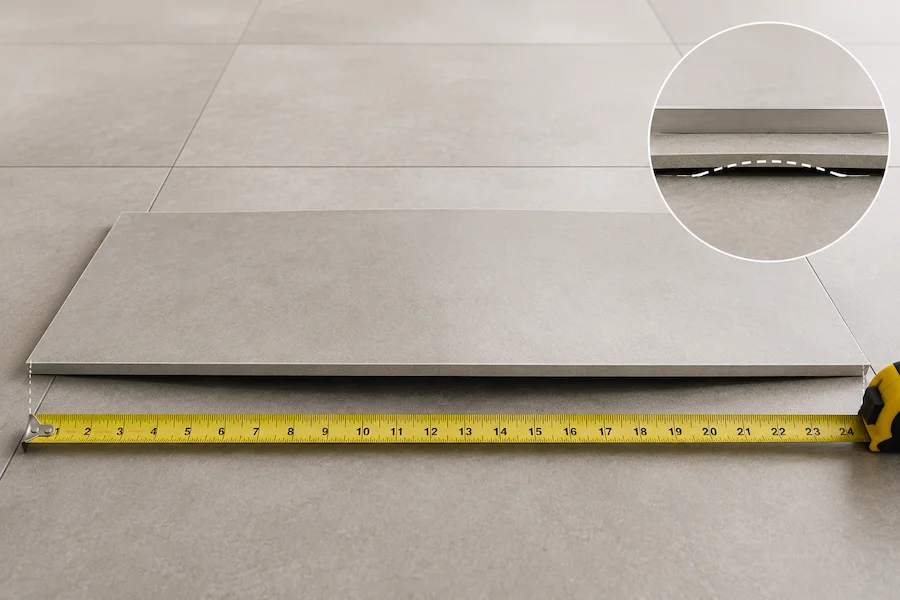
This is the rule most homeowners never hear. Tile with a side longer than 15 inches follows different layout rules than a small tile. Large tiles carry more warpage, meaning a slight crown across the face. That crown is legal under the tile manufacturing standard, ANSI A137.1. It becomes a problem only in certain patterns.
3. Your waste budget
Complex patterns cut more tile. Every angled cut leaves an offcut that rarely fits anywhere else. Your order needs to reflect that before you buy, because dye lots shift between batches. Running short halfway through a floor means a visible colour break.
Here is the working table. Order at the top of each range for L-shaped rooms, alcoves, or anything with an island to cut around.
| Pattern | Best tile shape | Waste factor | Skill level |
| Straight lay | Square or rectangle | 5 to 10% | Beginner |
| Running bond (50%) | Rectangle | 10 to 15% | Beginner |
| One-third offset (33%) | Plank, large format | 10 to 15% | Beginner |
| Diagonal | Square | 15% | Intermediate |
| Herringbone | Strict 1:2 rectangle | 15 to 20% | Advanced |
| Chevron | Pre-cut chevron tile | 15 to 25% | Advanced |
| Basketweave | Rectangle plus square | 12 to 15% | Intermediate |
| Pinwheel | Large square plus small square | 12 to 15% | Intermediate |
| Checkerboard | Square, two colours | 10 to 15% | Beginner |
| Versailles | Four coordinated sizes | 15 to 20% | Advanced |
| Hexagon | Hex | 15% | Intermediate |
| Penny tile | Round mosaic sheets | 15% | Intermediate |
The 12 Classic & Creative Floor Tile Patterns
1. Straight Lay (Grid)
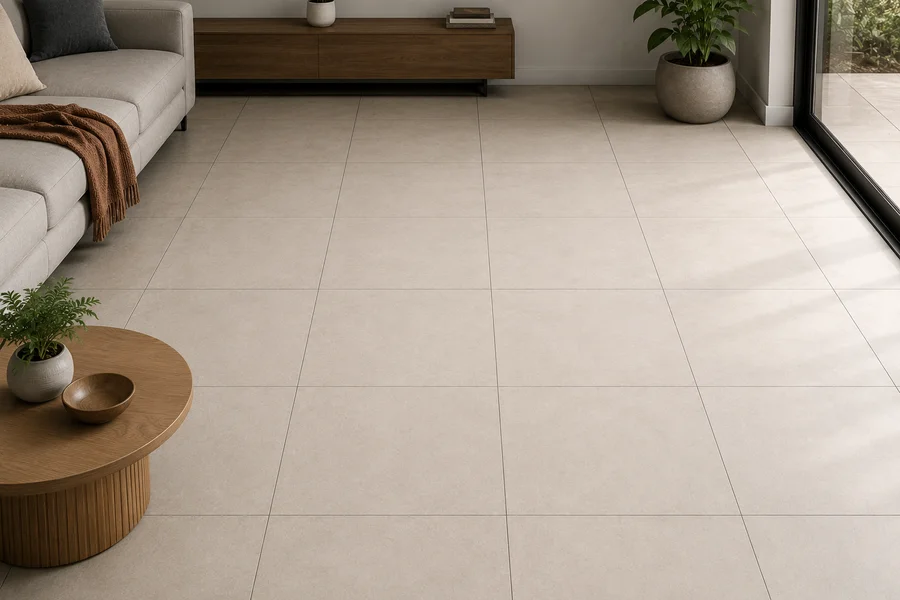
Tiles sit edge to edge in even rows. Grout lines run straight in both directions and cross at right angles.
Why it works: The grid wastes the least material of any layout. Cuts happen only at the perimeter. On a large-format tile with tight joints, the floor reads almost seamless.
The technical advantage: A stacked grid lets you run the narrowest grout joints available. Rectified tile in a straight lay can go down to 1/16 inch joints, because no tile edge sits against another tile’s midpoint. That single fact makes the grid the safest choice for anyone chasing a monolithic, joint-free look.
Watch for: A grid exposes every flaw. Walls that run out of square show up immediately, because your cut row tapers along one edge. Check your room for square before you commit. If two opposite walls differ by more than half an inch, consider a pattern with more visual noise.
Best rooms: Open-plan kitchens, modern living areas, and any space using tile above 24 inches.
2. Running Bond (Brick Joint, 50% Offset)
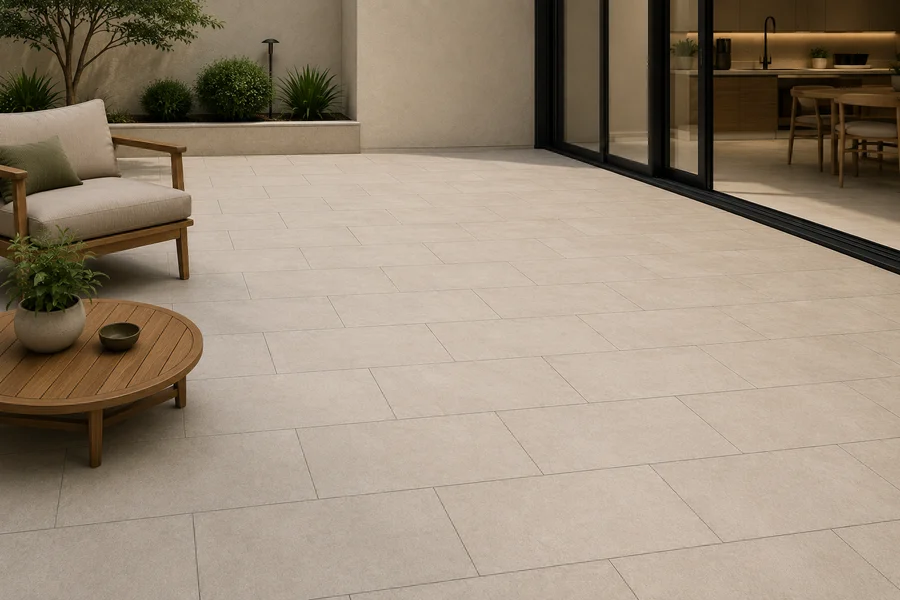
Each row shifts sideways by half a tile. The joint in one row lands at the centre of the tile below.
Why it works: The stagger breaks up long grout lines and hides small variations between tiles. It reads relaxed rather than rigid. This remains the most-used tile layout pattern in homes worldwide, and for good reason: it forgives more than a grid does.
The hard limit: Do not use a 50% offset on large tile. The TCNA Handbook caps the offset at 33% for any tile where the side being offset runs longer than 15 inches, unless the tile manufacturer states otherwise. Push past that and the standard requires your specifier and owner to sign off on a mock-up first.
The reason sits in the tile itself. Every porcelain and ceramic tile carries a permitted crown across its face. On a 6×12 tile, nobody notices. On a 12×24 plank, a 50% offset drops the highest point of one tile beside the lowest point of its neighbour. You get lippage, meaning a ridge you can feel underfoot and catch a toe on.
Best rooms: Bathrooms, laundry rooms, and hallways using tile under 15 inches.
3. One-Third Offset (33% Stagger)
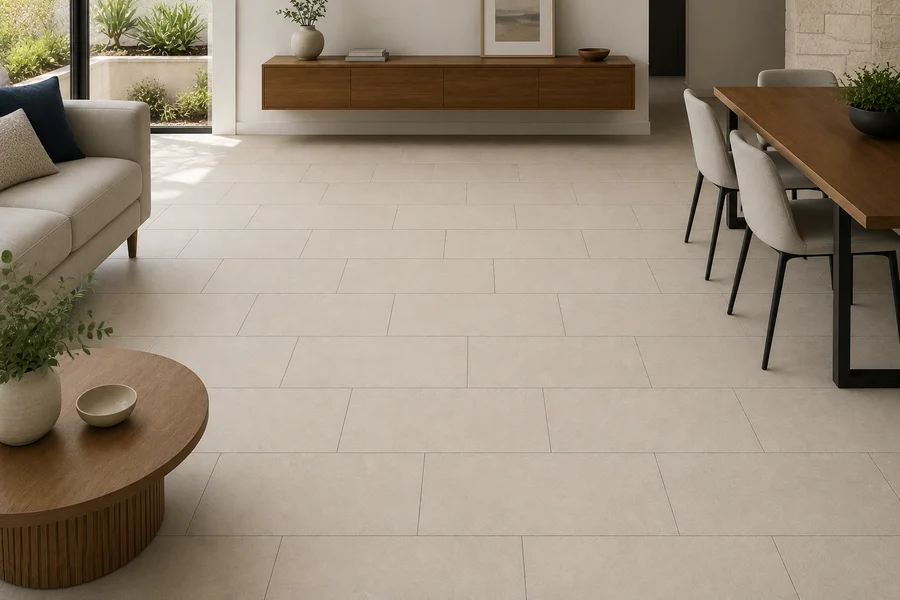
Rows shift by a third of the tile length instead of half. Joints step diagonally across the floor in a slow rhythm.
Why it works: This is the pattern the industry moved to, and it solves a real engineering problem rather than chasing a trend. Shifting to one third places each joint over the flatter middle section of the tile below. The warpage spreads across three tiles instead of stacking high against low.
The numbers you need: For tile with any side of 18 inches or longer, joints must average at least 1/8 inch on rectified tile and 3/16 inch on calibrated, non-rectified tile. Tight joints and big tile fight each other. A wider joint absorbs the height difference between neighbouring tiles.
Below that, the general floor rule applies: 1/16 inch is the absolute minimum joint, and the joint must measure at least three times the tile’s facial dimension variation. Ask your supplier for that variation figure. Most will have it.
Best rooms: Anywhere you use wood-look planks or 12×24 and larger. This is the default for large-format floor tiles design in modern builds.
4. Diagonal (Diamond)
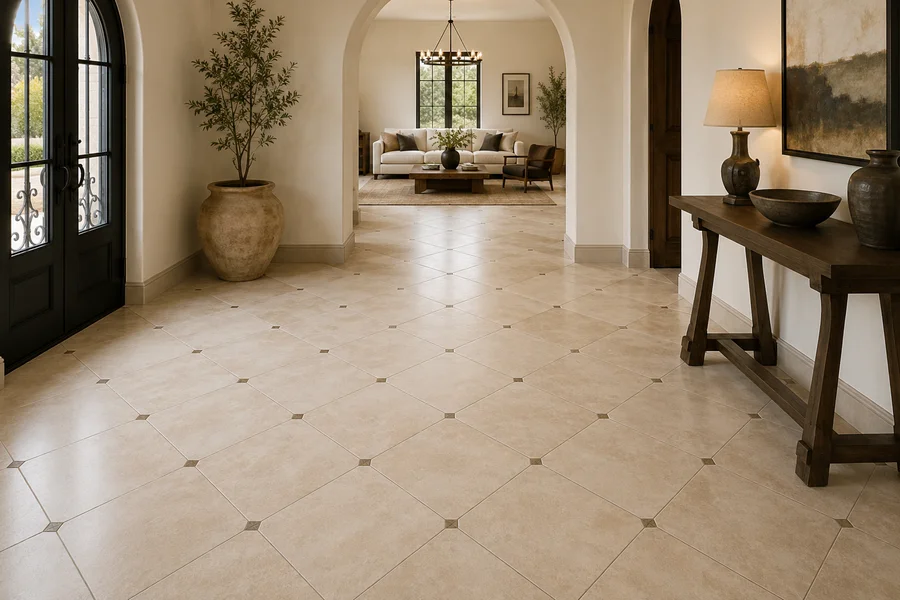
Rotate the whole grid 45 degrees to the walls. Squares become diamonds.
Why it works: Diagonal lines pull the eye across the widest dimension of a room rather than straight down it. A narrow galley kitchen or a small bathroom gains apparent width. The trick costs nothing except cuts.
A second benefit: Out-of-square walls disappear. A diagonal layout meets every wall at an angle already, so a wall that drifts by an inch over 12 feet no longer produces an obviously tapering row. If your room is crooked, this pattern hides it.
The cost: Budget 15% waste. Every perimeter tile needs a 45-degree cut, and each cut produces a triangle that fits nowhere else. Save the larger triangles. They often serve the opposite wall.
Best rooms: Small bathrooms, entryways, galley kitchens, and older homes with settled walls.
5. Herringbone
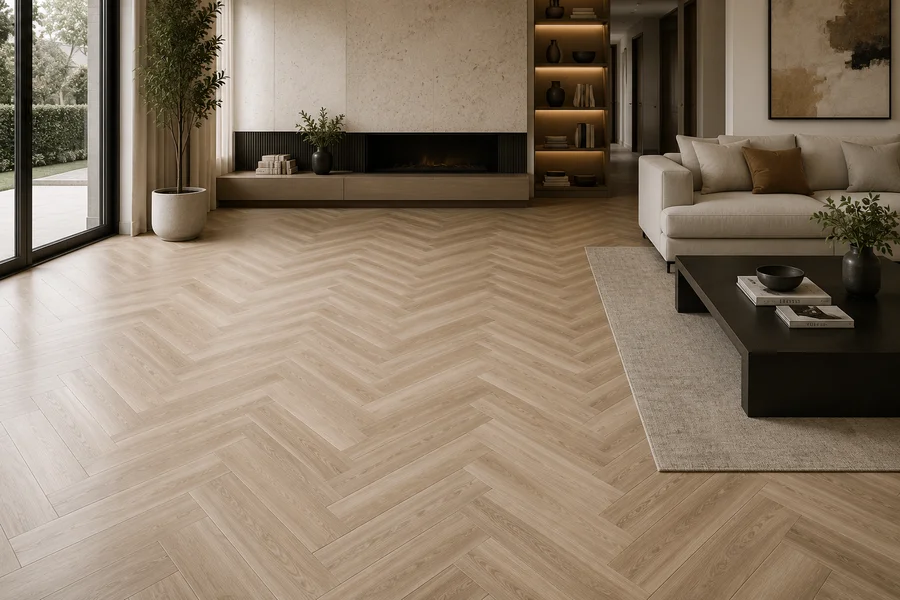
Rectangular tiles meet at 90 degrees in a repeating V. The pattern climbs across the floor in interlocking zigzags.
Why it works: Nothing else creates this much movement from plain tile. A herringbone floor reads as expensive even when the tile costs very little. A plain 3×12 tile in this layout will outperform a costly tile laid straight.
The ratio rule that stops most people: True herringbone needs a strict 1:2 tile. That means 4×8, 6×12, or 12×24. The long edge of one tile has to equal exactly two short edges of the tile beside it. A 4×12 tile carries a 1:3 ratio. Butt two short ends against one long side and you fall 4 inches short. The joints will never line up.
You can still lay a 1:3 tile in a stepped variation. Just know that the classic closed herringbone is off the table.
Grout advice: Use contrasting grout. Match the grout to the tile and the geometry vanishes, which defeats the point of paying for the labour.
The cost: Plan for 15 to 20%, and push toward 25% in an L-shaped room or around a kitchen island. Herringbone cuts at all four walls, not two.
Best rooms: Entryways, feature floors, mudrooms, and any space that needs one strong idea.
6. Chevron
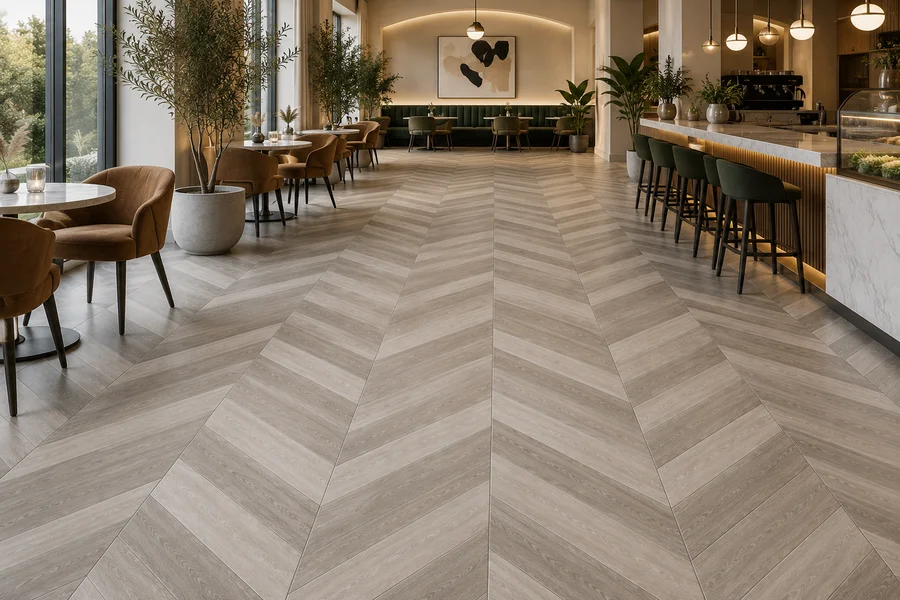
Chevron looks like herringbone at a glance. It is not.
The difference: Herringbone uses rectangular tiles laid at angles, so the ends butt against sides and the zigzag has stepped edges. Chevron uses tiles with ends cut at an angle, usually 45 or 60 degrees. The points meet exactly. You get one unbroken grout line running the length of each row.
Why it works: Chevron reads sharper and more formal than herringbone. Those continuous lines lengthen a room dramatically when you run them along its longest axis.
Buy the shape, do not cut it: Cutting your own chevron pieces on site is a losing game. Every angle must match to within a degree or the points drift out of alignment across the floor. Manufacturers sell parallelogram-shaped chevron tile ready to lay. Pay the premium.
Best rooms: Long hallways, formal dining rooms, and narrow spaces you want to stretch.
7. Basketweave
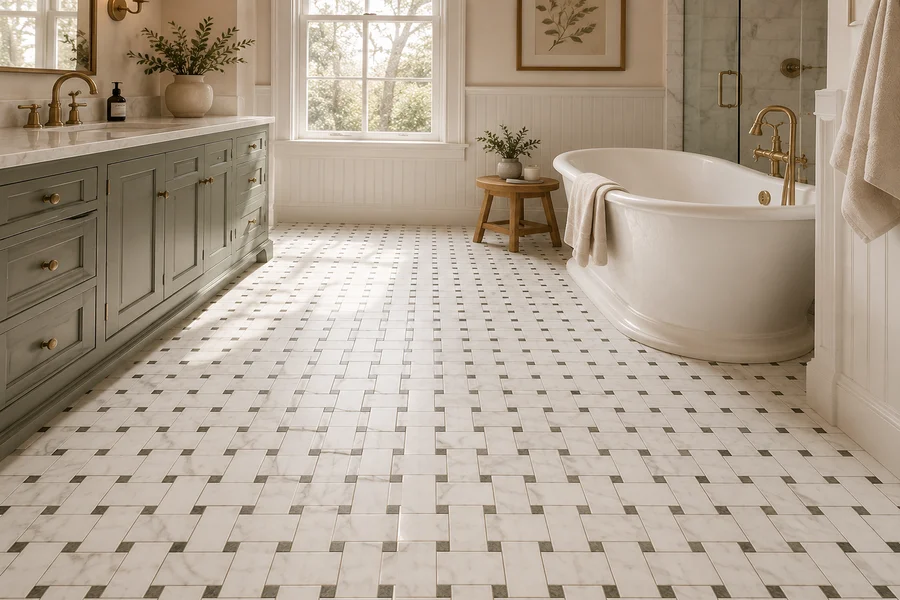
Pairs of rectangular tiles alternate direction. Two tiles run horizontal, the next two run vertical. The floor looks woven.
Why it works: Basketweave brings texture without colour. It carries strong period associations, particularly with early twentieth-century bathrooms, so it suits older homes and traditional schemes.
The variation worth knowing: Classic basketweave uses pairs of rectangles alone. The other version drops a small square in the gap between each pair, usually in a contrasting colour. That second version scales better across large floors, because the accent squares create a secondary rhythm that stops the pattern from reading as visual static.
Layout tip: Basketweave has a defined repeat unit. Measure that unit, then centre it in your room before you set a single tile. A basketweave that runs off-centre looks like a mistake rather than a choice.
Best rooms: Traditional bathrooms, period kitchens, and small floors where texture matters more than scale.
8. Pinwheel (Hopscotch)
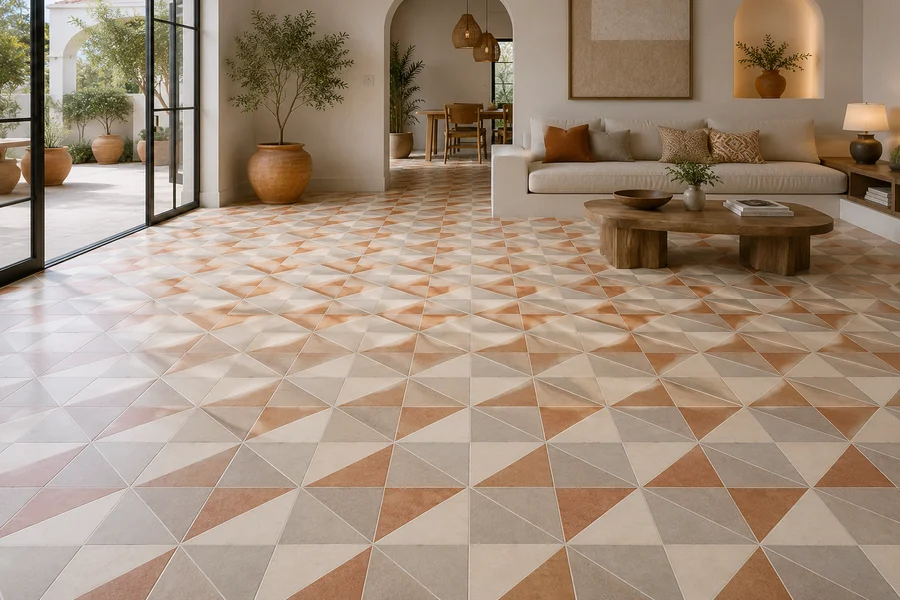
A small square sits at the corner junction of four larger squares. The larger tiles appear to rotate around the small one.
Why it works: Pinwheel adds a focal detail at regular intervals without complicated cutting. The pattern uses two tile sizes in a fixed relationship, usually a 12-inch square with a 4-inch accent, or an 8-inch with a 2-inch.
Critical check: Both tiles must share the same thickness. Mixing thicknesses across a floor creates permanent lippage that no amount of mortar adjustment fully corrects. If the accent tile comes from a different range or a different material, confirm thickness before ordering. Tell your installer either way, so they can build up the thinner tile if needed.
Best rooms: Entry halls, powder rooms, and floors that need a repeating accent colour.
9. Checkerboard
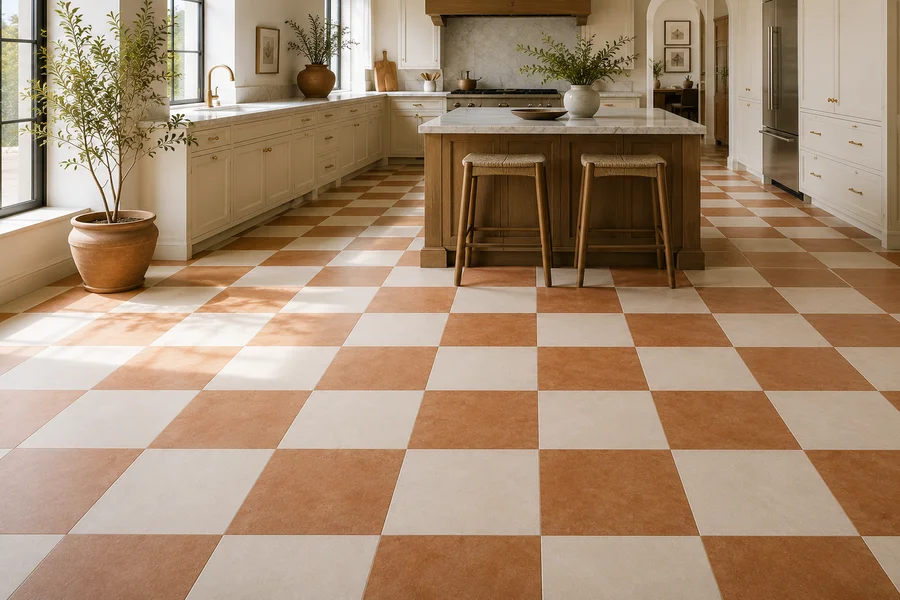
Two contrasting colours alternate across a grid.
Why it works: Checkerboard carries instant character. It anchors a room the way a rug does. Black and white remains the classic, though the pattern reads gentler in softer pairings such as cream and sage, or two close greys.
Scale changes everything: A 12-inch checkerboard in a small bathroom overwhelms the space. Drop to 8 inches or smaller and the same pattern turns delicate. In a large kitchen, go the other way and use 18-inch or 24-inch squares for a bolder, more architectural effect.
Set it on the diagonal: Rotating a checkerboard 45 degrees produces a completely different floor. The alternating colours form diamonds, and the room reads wider. Push the idea further by using three colours of 18-inch tile instead of two. You get an oversized plaid, which suits a long hallway.
Centre it deliberately: Checkerboard shows off-centre layouts more clearly than any other pattern. Align the colour blocks with a doorway, a stair base, or a vanity so the eye reads intention.
Best rooms: Kitchens, entryways, mudrooms, and period bathrooms.
10. Versailles (French Pattern)
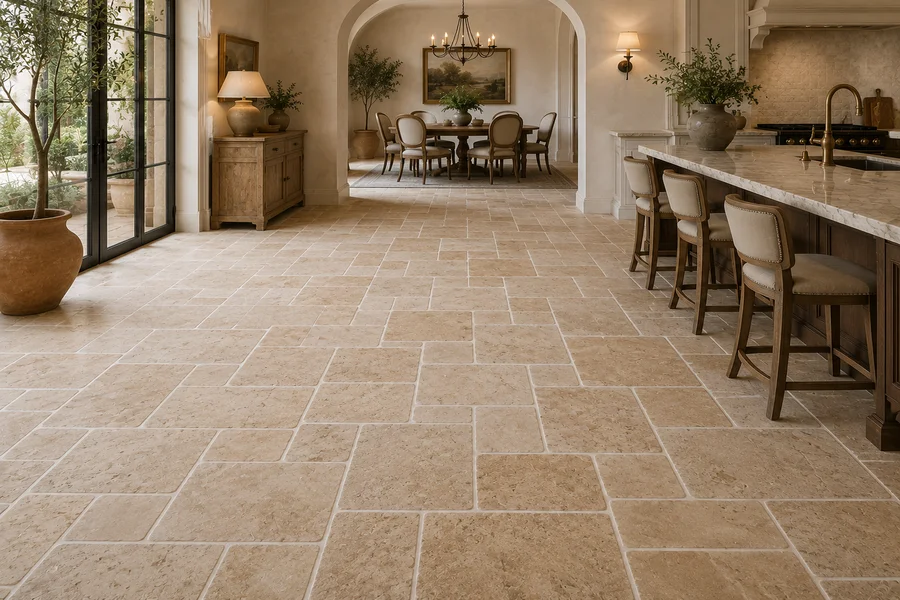
Four tile sizes interlock in a repeating module that never quite reveals its own grid.
Why it works: The Versailles pattern hides its repeat. Because four sizes combine into one module, your eye stops looking for a grid and reads the floor as organic. This suits natural stone, particularly travertine and limestone, where colour variation reinforces the effect.
Buy it as a kit: Suppliers sell Versailles as a coordinated bundle with a specified repeat and a layout sheet. Do not assemble your own from separate tile sizes. The four dimensions must relate to each other precisely, including the grout joint width, or the module will not close.
Plan the module count: Measure your room, then work out how many complete modules fit. Position the first module so partial ones land where furniture or cabinetry will sit. Never let a partial module sit in a doorway.
The cost: 15 to 20% waste. Natural stone pushes toward the higher figure because breakage during handling adds to cut waste.
Best rooms: Large open floors, sunrooms, patios, and rustic kitchens.
11. Hexagon
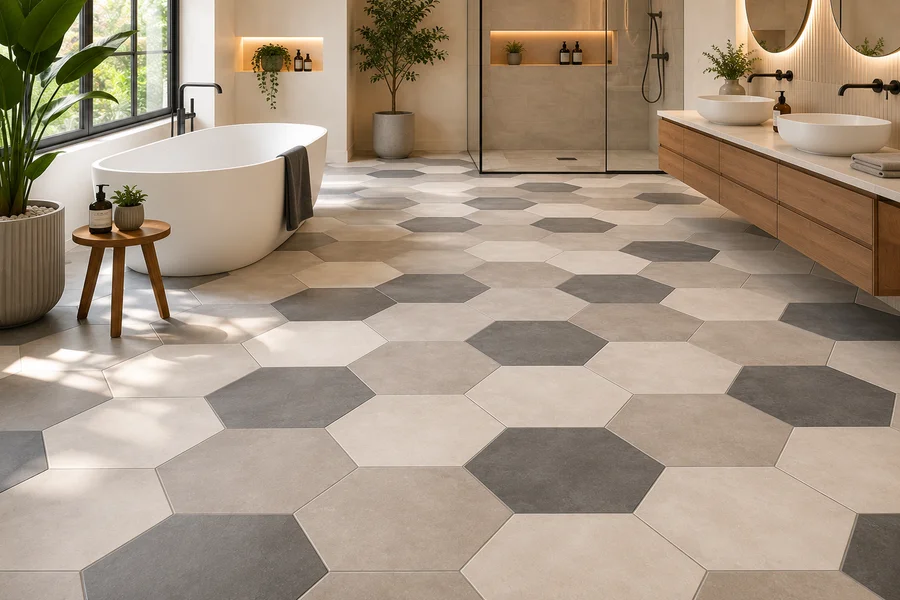
Six-sided tiles tessellate with no gaps, producing a honeycomb.
Why it works: Hexagons break the tyranny of the right angle. The pattern flows rather than marches, which suits organic and transitional schemes.
Three ways to use it:
- Single colour. The shape carries the interest on its own. Choose this for a calm floor.
- Random mix. Order three colours and have the installer place them without a system. This avoids the uniform look that hexagon floors often fall into. Insist on genuine randomness, because installers drift into patterns without noticing.
- Gradient or cluster. Group darker tiles densely at one edge and thin them out across the floor. This works beautifully in a shower or a small bathroom.
Practical benefit: Small hexagons carry more grout joints per square foot than large-format tile. Those joints add grip. That matters in wet rooms, which brings us to the pattern with the most grout of all.
Best rooms: Bathrooms, laundry rooms, and shower floors.
12. Penny Tile Patterns
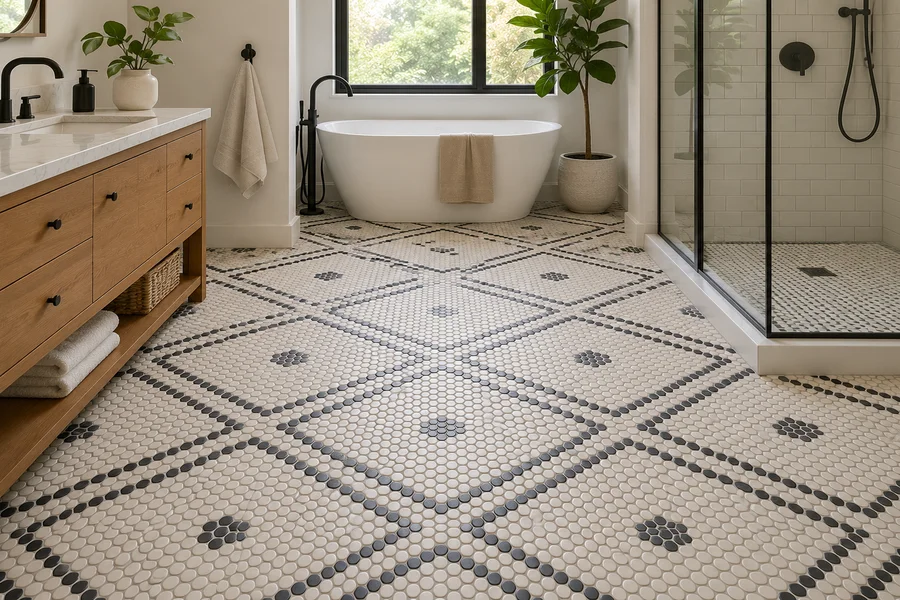
Penny tile means small round tiles, roughly the diameter of a coin, supplied on mesh sheets. It has the deepest history of anything on this list and, right now, the most creative potential.
This section runs longer than the others because penny tile behaves differently from every other format.
If you’re considering an alternative to tile patterns, learn how to install laminate flooring like a pro for a clean and professional finish.
Why penny tile suits bathroom floors
Small round tiles pack an enormous number of grout joints into every square foot. Those joints do real work. Grout offers more grip than glaze, so a penny tile bathroom floor typically outperforms a large-format floor underfoot when wet.
Check the number rather than trusting the shape. ANSI A137.1 requires a wet DCOF of 0.42 or greater for tile in level interior spaces that people walk on while wet. Manufacturers publish this figure. Ask for it before you buy, particularly if you want a gloss finish.
The round shape also handles curves and awkward corners without difficulty. You cut the mesh backing with scissors rather than cutting tile. In a small bathroom with a pedestal sink, a bulkhead, or an out-of-square corner, that saves hours.
The one thing you must know about penny tile sheets
Penny sheets have two different edges. On one side the tiles line up in a clean straight row. On the other side they sit offset, creating a toothy, interlocking edge.
Do not fight this. Plan around it.
Run the straight edge along one axis of the room and the toothy edge along the other. Dry-lay your border first and shuffle the sheets until the corners resolve cleanly. Sort this before mortar touches the floor, because you cannot fix it afterwards.
Five penny tile patterns worth building
- Solid field with a border. Lay a white field, then run one or two rows of a contrasting colour around the perimeter. This is the simplest of all penny tile patterns and it makes a small room feel deliberate rather than plain.
- Scattered accents. Drop single dark pennies at random across a white field. Keep the density low, roughly one in twenty, or the floor turns busy.
- Geometric motifs. Build diamonds, asterisks, or crosses from clusters of dark pennies. Space them evenly across the room. Aim for roughly one motif per one and a half square feet. Any denser and the floor turns restless, any sparser and the pattern looks unfinished.
- A central medallion. Set one large shape in the middle of the floor, such as a diamond, a star, or a heart. Place it where people stand, directly in front of a vanity or centred under a light. One shape, one strong idea.
- Tile rug. Outline a rectangle with a dark border and fill it with a contrasting field. The floor reads as though a rug sits on it. This suits a long bathroom or a mudroom.
How to design and install a custom penny pattern
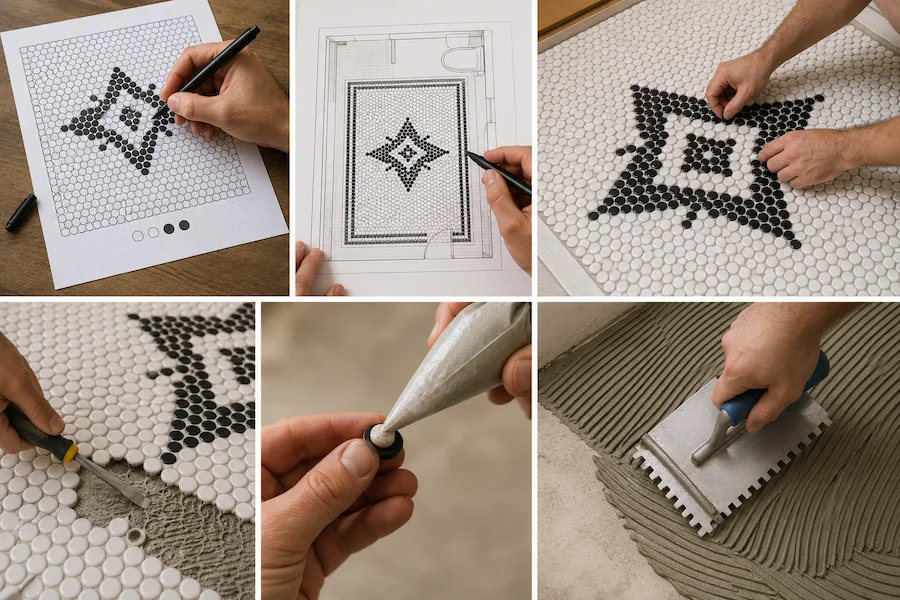
Print your pattern to scale. Print a sheet of true-size penny circles and colour in your design with a pen. This takes twenty minutes and prevents a floor you regret. Count the pennies in your motif while you are there, so you know exactly how many accent tiles to order.
Give your installer a diagram. Penny tile takes a long time to lay, and nobody wants to pay for it twice. Hand over a marked-up drawing before work starts, not a verbal description. Agree the starting point on that drawing too, so the pattern lands where you expect.
Use the pop-and-place method. Lay your full field in the base colour and let it set. Then dry-place the accent tiles on top of the finished floor and move them until the spacing looks right. Mark the positions. Pop out the base tiles underneath with a screwdriver. Pipe a small amount of mortar onto the back of each accent tile using a plastic bag with the corner snipped off, then press it in. This gives you far more control than trying to build the pattern live in wet mortar.
Match your trowel to your tile. Small tile needs small notches. Drag the trowel until the teeth scrape the substrate. Too much mortar squeezes up between the pennies and fills the joints before you grout.
Budget for the grout, not just the tile
Penny tile consumes grout at a rate that surprises people. A 12×12 sheet holds roughly 240 individual tiles. Cover a 30 square foot floor and you have laid around 7,000 pennies, each surrounded by grout on all sides.
Put numbers on it. At a 1/8 inch joint, 12×12 floor tile needs roughly 8 pounds of grout per 100 square feet. One-inch mosaic at the same joint width needs around 44 pounds for the same area. That is more than five times the material.
Labour scales the same way. Expect to spend longer grouting a penny floor than laying it.
Grout type: Use unsanded grout. Joints on penny tile fall at or below 1/8 inch, which is the threshold where sanded grout stops being appropriate. Sanded grout also scratches gloss glazes and polished stone.
Work in small sections. Grout haze sets fast on a surface with this much joint. Grout roughly five minutes of work, then sponge it clean before moving on. Push the float across the joints from several directions so grout packs fully around each circle.
Clean the haze properly. Some haze survives even careful work. Let the grout cure overnight, then scrub with a proprietary acid-based cleaner or a diluted vinegar solution. Keep acid away from marble, limestone, and travertine. It etches them permanently.
The white penny tile bathroom floor, done well
A white penny tile bathroom floor is the most requested version of this tile, and the easiest to get wrong. Three choices separate a good one from a flat one.
Grout colour does the heavy lifting. White grout with white tile erases the pattern entirely and shows every stain. A warm grey grout defines each circle, holds its colour, and keeps the floor soft rather than clinical. This remains the safest choice for a white penny floor. A charcoal grout produces a much more graphic result, closer to a period bathroom.
Mix your finishes. Gloss white pennies with matte black accents give you contrast in texture as well as colour. The floor catches light differently across its surface.
Finish the threshold. A metal edge profile, such as a Schluter trim, closes the tile edge where it meets timber or carpet. Colour-match it to your accent tile. This detail costs very little and separates a professional-looking floor from a DIY one.
How To Set Out Any Tile Pattern Correctly | 6 easy Steps
The pattern matters less than the setting out. Follow this sequence.
Step 1: Prepare a stable substrate
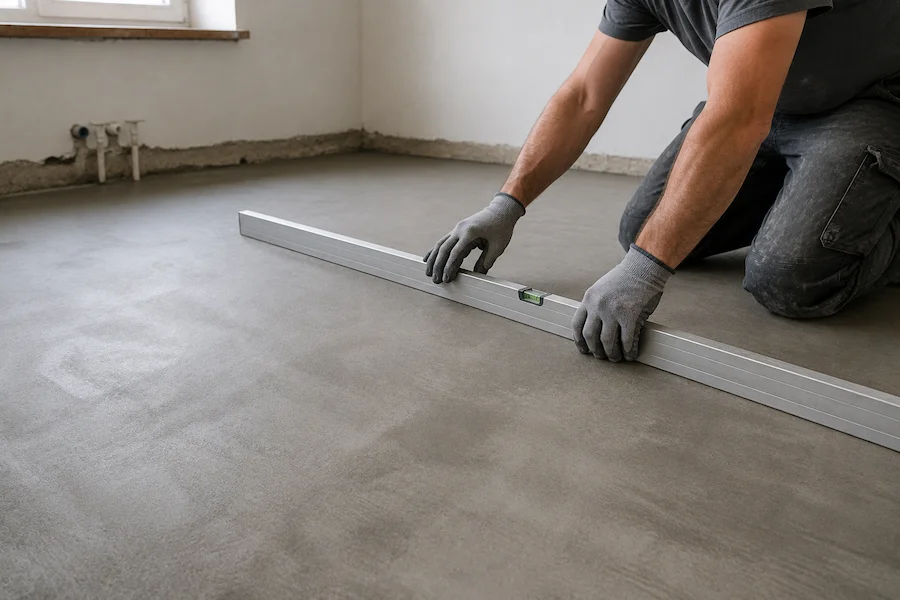
Tile cannot go directly onto plywood. Timber moves with humidity through the seasons, just as hardwood floors naturally expand and contract with changes in moisture, and that movement cracks grout and breaks the bond. Fix cement backer board over the plywood first. Bed it in mortar, screw it every 12 inches, then tape and mortar the seams. Let it cure overnight before tiling.
Step 2: Find your centrelines
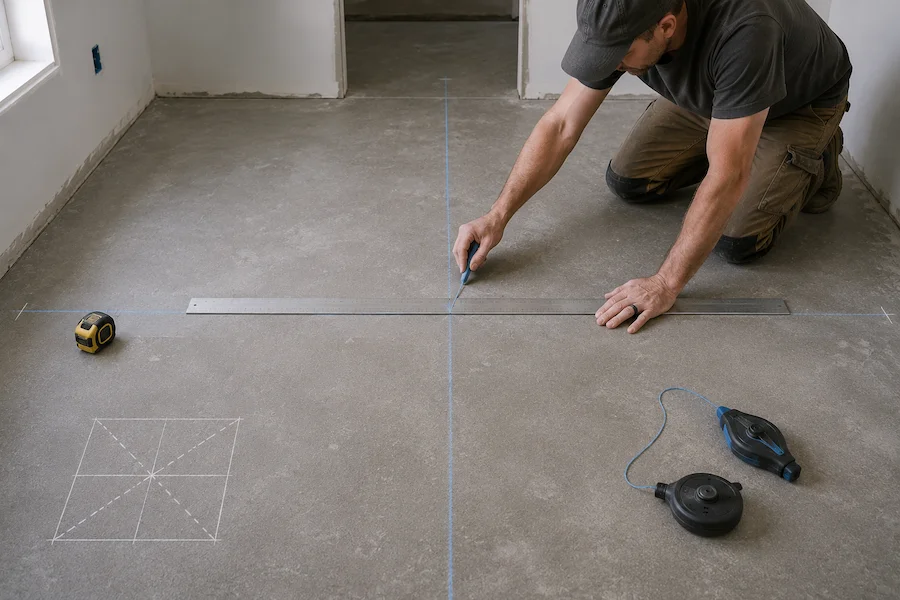
Measure both directions and snap chalk lines through the centre of the room. Work outward from those lines rather than from a wall. Walls lie. Centrelines do not.
For a diagonal layout, snap your lines at 45 degrees to the longest wall.
Step 3: Dry-lay the field
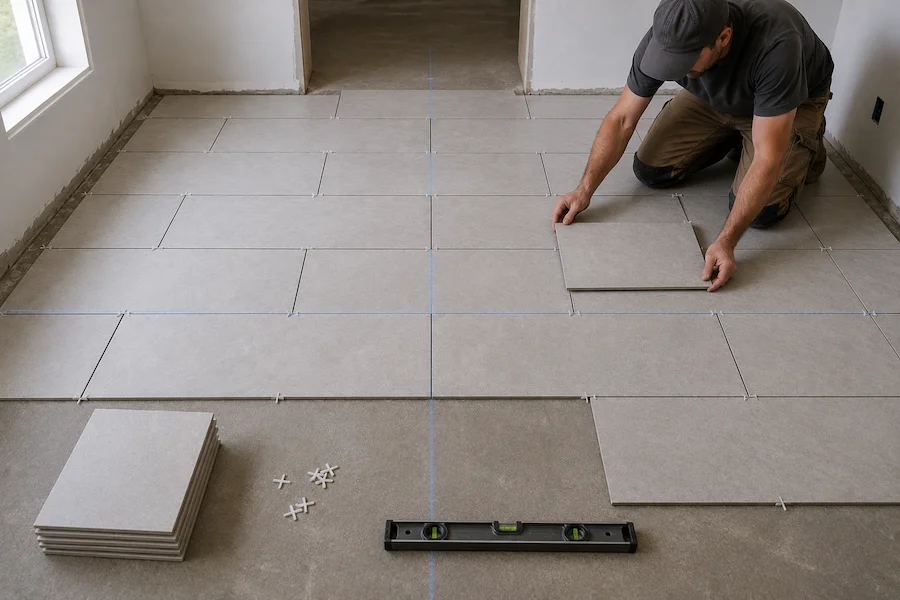
Lay tiles loosely along both centrelines, spacers included, all the way to the walls. This shows you exactly what happens at the perimeter before you commit.
Step 4: Balance the cuts
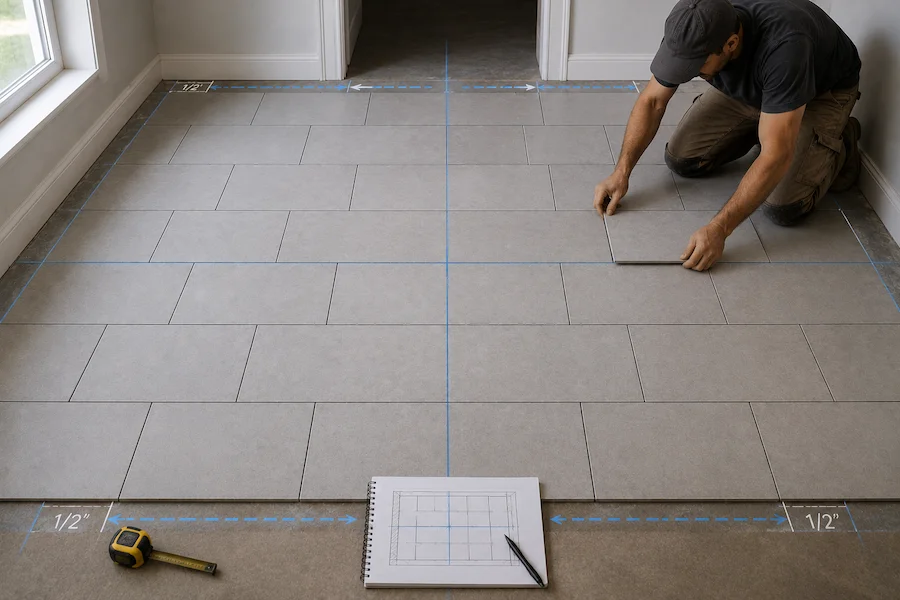
Industry guidance is clear on this. Aim for a balanced layout with no cut smaller than half a tile wherever possible. Slivers along a wall look like an error.
If your dry lay produces a 2-inch strip on one side, shift the whole field by half a tile. Now you have two 7-inch cuts instead of one full tile and one sliver. Balanced.
Step 5: Decide which cuts get hidden
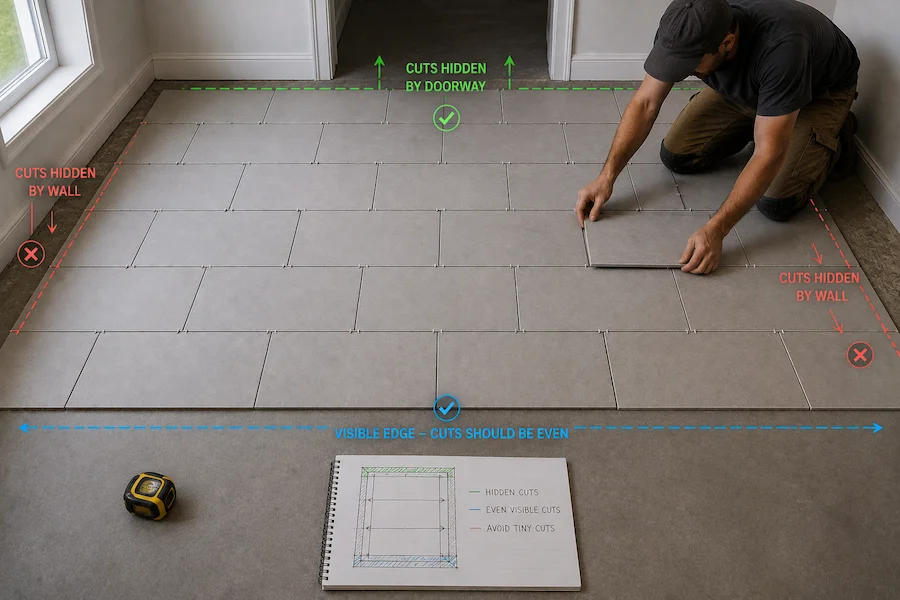
Not all walls carry equal weight. Put your full tiles where people look and your cuts where furniture sits. In a bathroom, that means full tiles at the doorway and cuts behind the vanity. In a kitchen, full tiles across the open floor and cuts under the toe kick.
Step 6: Check as you go
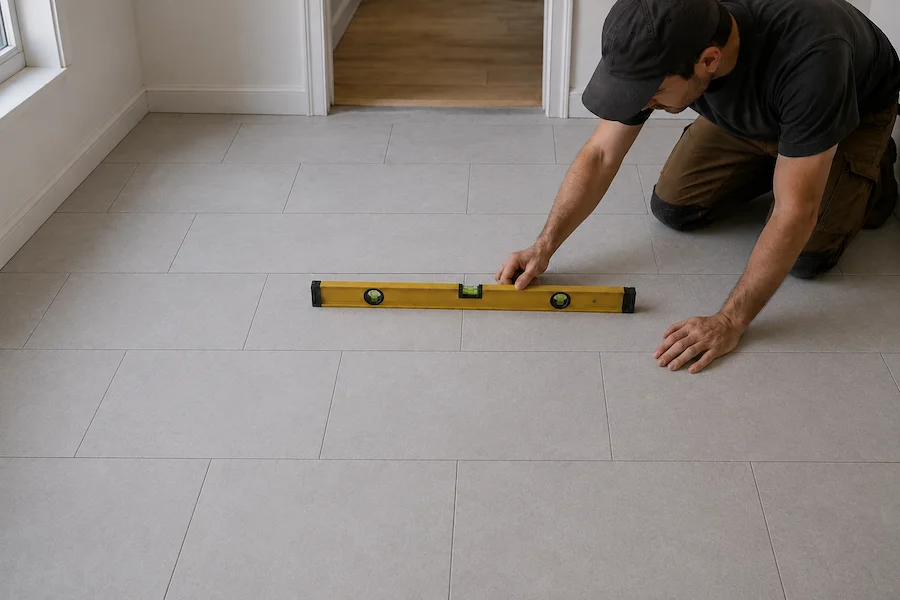
Set a straightedge across the field every few rows. Catching a drift after three rows costs you minutes. Catching it after thirty costs you the floor.
Grout: The Decision That Changes Your Pattern Most
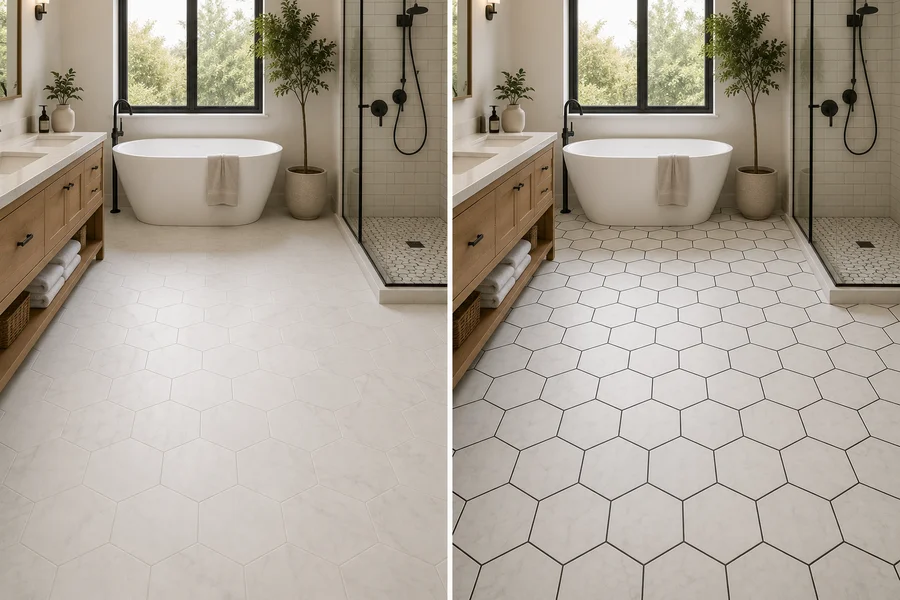
Grout colour determines whether your pattern shows or hides.
High contrast reveals geometry. Dark grout with light tile draws every line. Choose this when you paid for a herringbone, basketweave, or checkerboard, because the labour only pays off if people see the pattern.
Matched grout creates surface. Grout close to the tile colour softens the joints and lets the floor read as one plane. Choose this for large-format tile in a grid, where you want continuity rather than pattern.
Mid-tone grout survives real life. Bright white grout stains. Very dark grout shows soap residue and limescale. A mid-tone grey or greige stays looking correct for years in a bathroom or entryway.
Sanded or unsanded
Use unsanded grout for joints of 1/8 inch and narrower, and for any polished stone or glass that sand would scratch. Use sanded grout above 1/8 inch, where the sand prevents shrinkage cracking. Consider epoxy grout for showers and heavy-use wet floors, since it resists staining and chemical attack far better than cement-based products.
Five Mistakes That Ruin Good Tile Patterns
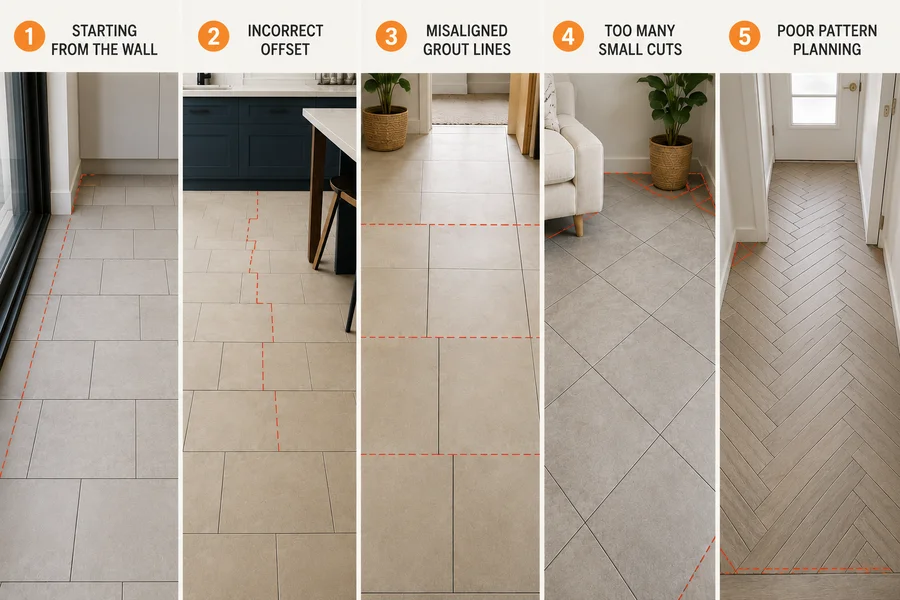
Ordering by area alone. Square footage tells you the coverage, not the tile count. Apply the pattern’s waste factor, then round up to full boxes, then order it all in one batch to keep the dye lot consistent.
Skipping the mock-up on large tile. If you want a 50% offset on tile above 15 inches, lay a section dry, view it under the room’s actual lighting, and check the lippage before you commit. The standards require this for a reason.
Choosing the pattern before the tile. A herringbone plan collapses the moment you fall in love with a 4×12 tile. Confirm the ratio first.
Mixing tile thicknesses without telling anyone. Combining formats is a great design move. It becomes a defect when the installer discovers the thickness difference mid-floor. Flag it at the quoting stage.
Starting at a wall. Every wall in every house runs slightly out of square. Start from the centre and let the error split evenly across both sides.
If you’re working with a concrete surface, find out whether vinyl flooring can be installed over concrete before choosing your next flooring solution.
Frequently Asked Questions
Which floor tile pattern makes a small room look bigger? Diagonal is the strongest. Turning the grid 45 degrees moves the eye along the room’s widest dimension rather than its length. Large-format tile in a straight lay, similar to SPC flooring, creates a clean and uninterrupted look, since fewer grout lines mean fewer visual interruptions.
Which direction should the floor tile run? Run a rectangular tile parallel to the longest wall as a default. This emphasises the room’s length and creates flow. Reverse it in a narrow corridor: running tile across the width makes the corridor feel wider.
Can I use a 50% offset on 12×24 tile? Only with caution. The tile’s 24-inch side exceeds the 15-inch threshold, so the standards direct you to a 33% offset instead. If you want 50%, lay a mock-up first, inspect the lippage, and accept the result before the full floor goes down, just as laminate flooring installation depends on careful planning and accurate measurements.
What is the cheapest way to get an interesting tile pattern? Buy plain tile in two or three colours and let the layout do the work. A checkerboard, a random colour mix, or a simple border costs almost nothing beyond the labour. Standard 3×12 and 18×18 tile in the right pattern will beat expensive tile laid straight, every time.
Is penny tile hard to install? Laying it is straightforward, because the mesh sheets cut with scissors and no tile saw is needed. Grouting it is the hard part. Budget more time for grout than for tile, and work in small sections to control the haze.
How much extra tile should I order? Ten percent for a straight lay. Fifteen percent for diagonal, hexagon, or mosaic sheets. Fifteen to twenty percent for herringbone, chevron, or Versailles. Add another five percent if this is your first tiling project.
Final Thoughts
These 12 floor tile patterns give you every option worth considering, from a plain grid to a custom penny tile bathroom floor. Choose by working through the room first, then the tile, because the aspect ratio and the 15-inch rule settle several questions before taste ever enters the picture. Order the right waste factor, set out from the centrelines rather than a wall, and keep every cut above half a tile. Pick your grout with equal care, since it decides whether anyone actually sees the pattern you paid for. Get those four steps right and even the cheapest tile will lay a floor that looks considered for decades.

Noah Williams
Interior Designer & Flooring Expert