
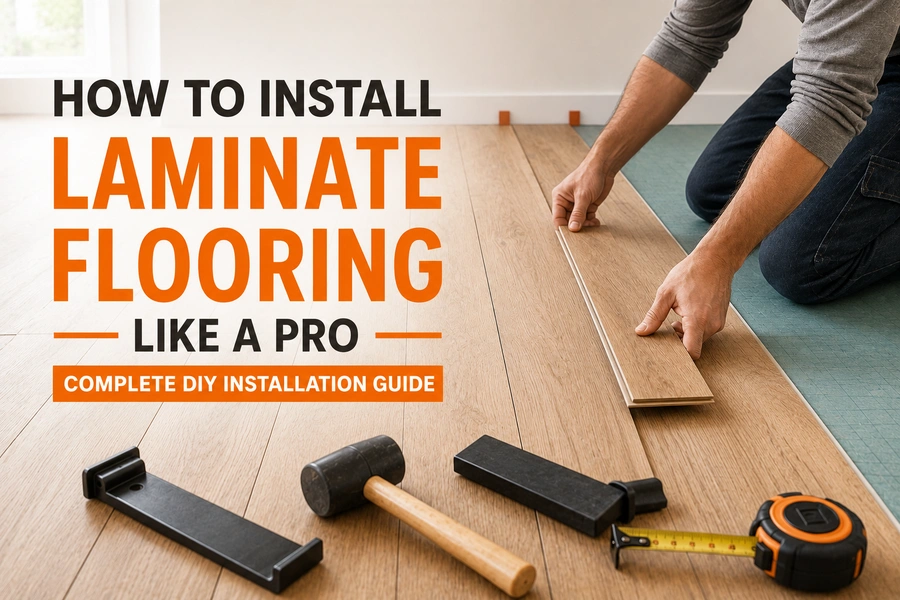
Installing laminate flooring is one of the most rewarding DIY projects you can take on. The planks click together like puzzle pieces. No glue. No nails. No special license needed.
Most homeowners can finish an average bedroom in a single day. And the savings are real: professional installation adds roughly $4 to $8 per square foot on top of material costs, according to This Old House. Do the work yourself, and that money stays in your pocket.
This guide by Nova Floor walks you through every step, from measuring your room to snapping in the last plank. You’ll also learn the prep work most beginner guides skip, the steps that separate a floor that lasts 20 years from one that buckles in six months.
Let’s get started.
Contents
What Is Laminate Flooring? A Quick Overview
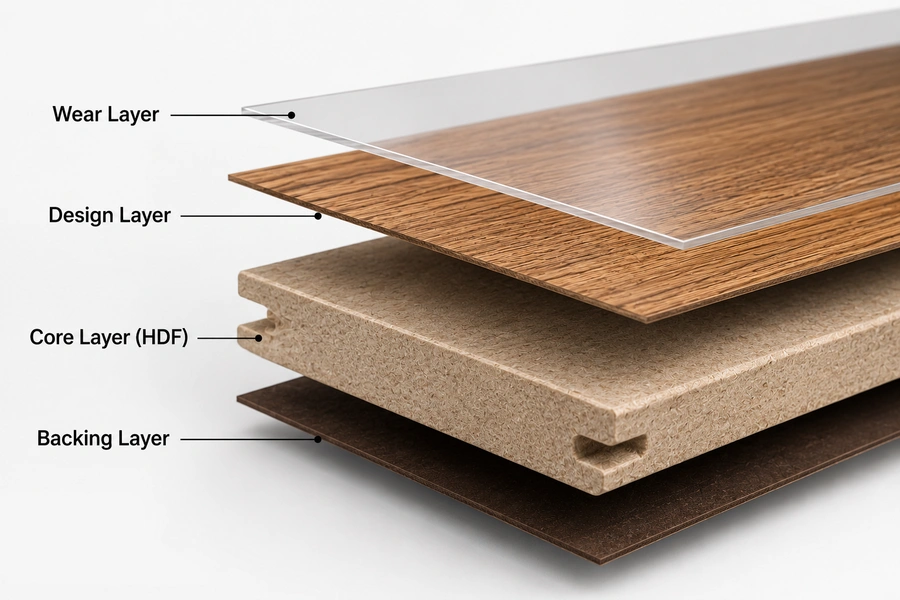 Laminate flooring Dubai is a man-made product built in four layers:
- Wear layer: A clear, tough coating that resists scratches and stains
- Design layer: A printed image of wood, stone, or tile
- Core layer: High-density fiberboard (HDF) that gives the plank its strength
- Backing layer: A moisture-resistant base that keeps the plank stable
Laminate installs as a floating floor. That means the planks lock to each other, not to the subfloor beneath them. The whole floor “floats” as one connected sheet. This is what makes laminate so DIY-friendly, and it’s also why the prep steps below matter so much.
Tools and Materials You’ll Need for Installing Laminate Tiles
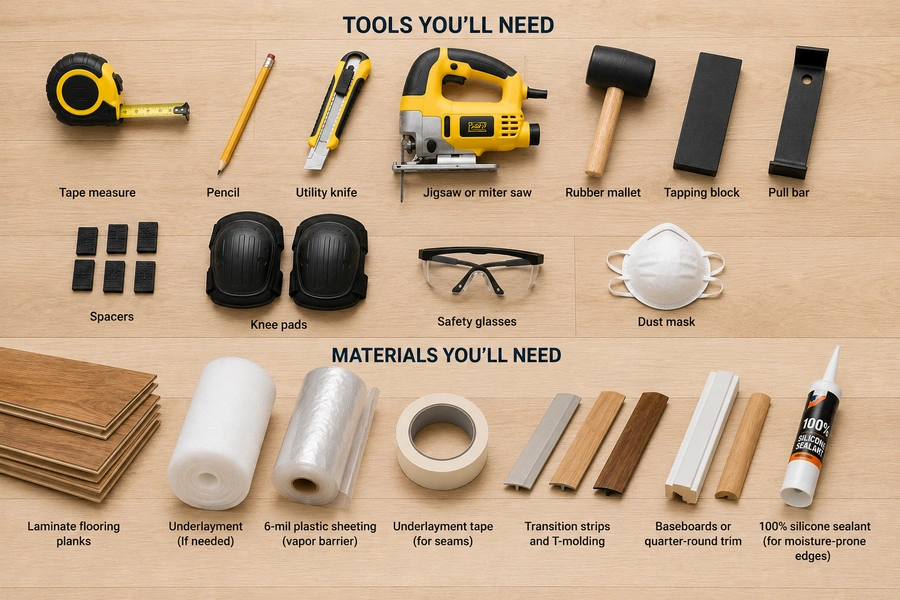
Gather everything before you start. Nothing kills momentum like a mid-project hardware store run.
Essential Tools
| Tool | What It’s For |
| Tape measure | Measuring the room and marking cuts |
| Pencil | Marking cut lines |
| Utility knife | Cutting underlayment |
| Jigsaw or miter saw | Cutting planks to length and around obstacles |
| Rubber mallet | Tapping planks together gently |
| Tapping block | Protecting plank edges while you tap |
| Pull bar | Locking in planks near walls |
| Spacers | Holding the expansion gap along walls |
| Knee pads | Saving your knees over hours of floor work |
| Safety glasses and dust mask | Protecting your eyes and lungs while cutting |
Money-saving tip: A laminate installation kit bundles the mallet, tapping block, pull bar, and spacers together for around $20 to $35. It’s cheaper than buying each piece separately.
Materials
- Laminate flooring planks (see how much to buy below)
- Underlayment (skip if your planks have a pre-attached pad)
- 6-mil plastic sheeting as a vapor barrier (for concrete subfloors)
- Underlayment tape for sealing seams
- Transition strips and T-molding for doorways
- Baseboards or quarter-round trim
- 100% silicone sealant for moisture-prone edges (near dishwashers, entry doors, etc.)
How Much Laminate Flooring Should You Buy?
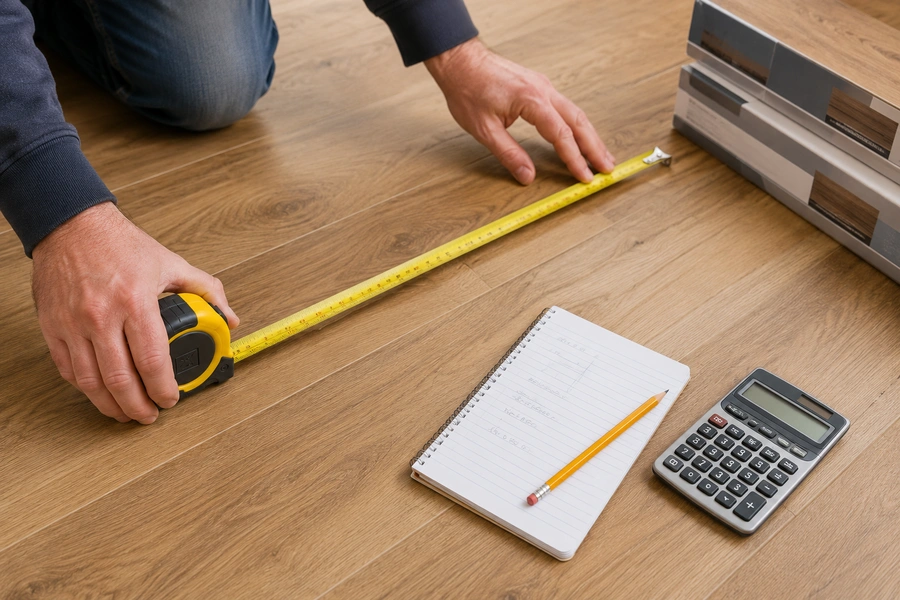 Measure the length and width of your room in feet. Multiply them together to get your square footage. Then add extra for waste:
- Simple rectangular rooms: Add 10%
- Rooms with angles, closets, or diagonal layouts: Add 15%
Example: A 12 ft × 15 ft bedroom is 180 square feet. Add 10% (18 square feet) and buy at least 198 square feet of flooring.
Measure twice. Better yet, measure three times. Running out of planks halfway through a room means a frustrating trip back to the store, and the risk that the new box comes from a different dye lot with a slightly different color.
Keep a few leftover planks after the job. They’re perfect for future repairs.
6 Easy Steps to Install Laminate Flooring
Step 1: Acclimate the Flooring
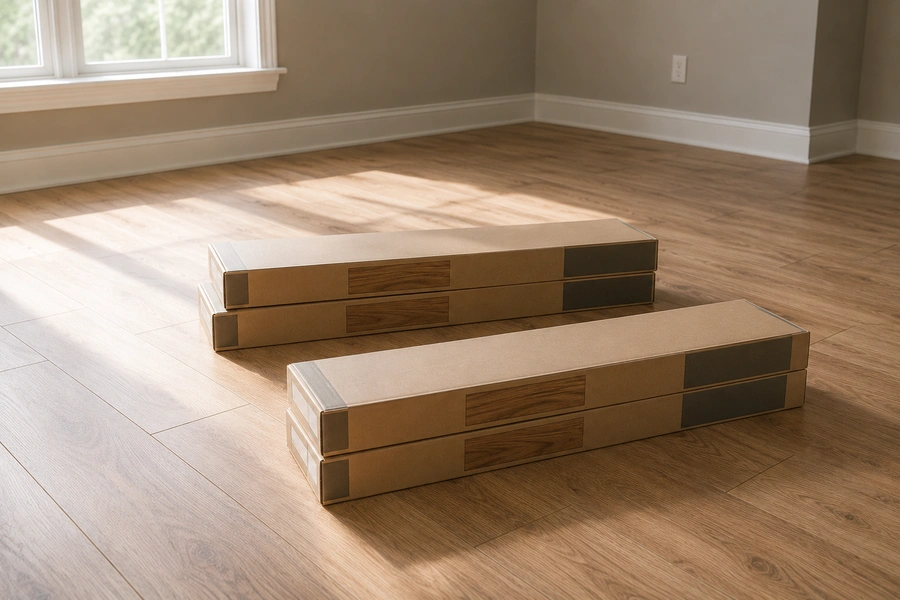 This is the step most beginner tutorials ignore, and it causes more failed floors than any other mistake.
Laminate’s fiberboard core expands and contracts as temperature and humidity change. If you install planks straight off the delivery truck, they’ll adjust to your home’s climate after they’re locked together. The result: gaps, peaking, or buckling.
Here’s how to acclimate laminate flooring correctly:
- Place the unopened boxes flat on the floor in the room where they’ll be installed.
- Keep boxes at least 3 feet away from exterior walls and heating or cooling vents.
- Don’t stack boxes upright, planks can bow.
- Wait at least 48 hours. Most manufacturers require 48 to 72 hours.
- Keep the room at normal living conditions: roughly 60–85°F with moderate humidity.
Check your product’s instructions for the exact timing. When in doubt, wait longer. Extreme cold or a very humid season can call for up to 72–96 hours.
Step 2: Prepare the Subfloor
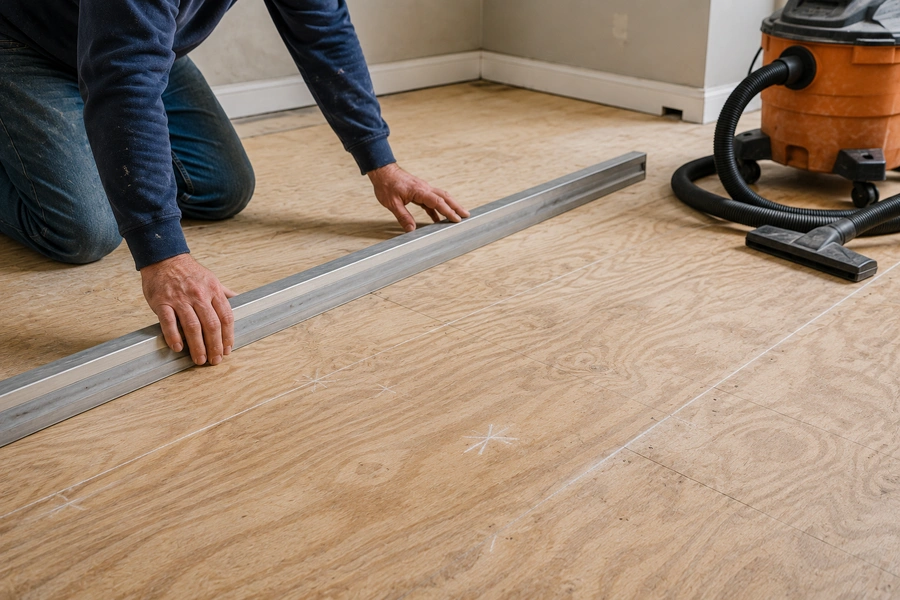 A laminate floor is only as good as what sits beneath it. Prep the subfloor properly and installation becomes easy. Skip it and you’ll get hollow spots, squeaks, and separating seams.
Remove the Old Flooring
Pull up carpet, padding, and tack strips. Pry off baseboards carefully if you plan to reuse them (label the backs so they go back in order). Remove any staples or protruding nails. You can usually install laminate over existing vinyl, tile, or hardwood if the surface is flat and solid, but never over carpet.
Check for Flatness
Your subfloor must be flat within 3/16 inch over any 10-foot span. That’s the standard most manufacturers require.
Test it with a long straightedge or a tightly stretched string. Look for daylight underneath. Mark any dips or humps with chalk.
- Fix low spots with a self-leveling compound suited to your subfloor type.
- Fix high spots by sanding (wood) or grinding (concrete).
Note that flat is not the same as level. A gently sloping floor is fine. Waves, dips, and ridges are not. An uneven subfloor causes flexing that can break the click-lock joints over time.
Test for Moisture
- Wood subfloors: Use a moisture meter. Readings should stay below 12%.
- Concrete subfloors: Concrete is porous, and moisture rises through it. New slabs need weeks to cure. Test with a moisture meter or a simple mat test (tape a plastic sheet to the slab for 24 hours; condensation underneath means too much moisture).
Clean Everything
Sweep and vacuum thoroughly. Even small debris under a floating floor can cause clicking sounds and uneven wear.
Undercut the Door Casings
Here’s a trick that instantly makes your job look professional. Instead of cutting awkward notches in planks around door trim, cut the bottom of the trim itself:
- Lay a plank (with underlayment under it) flat against the door casing.
- Rest your saw on top of the plank and cut through the casing.
- The plank now slides neatly underneath the trim for a seamless look.
An oscillating multi-tool or a hand saw works well for this cut.
Step 3: Install the Vapor Barrier & Underlayment
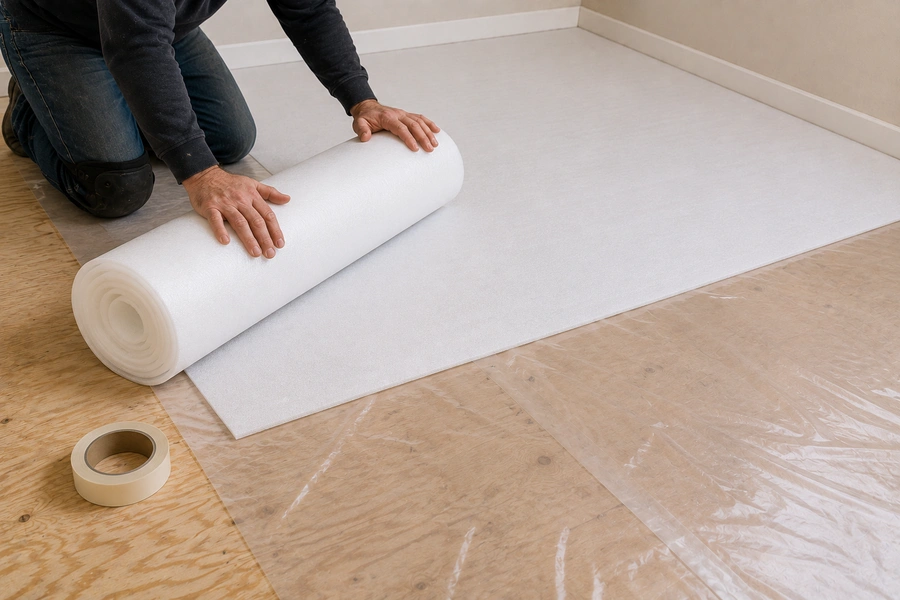
On concrete subfloors: Lay 6-mil plastic sheeting across the entire floor as a moisture barrier. Overlap the seams and seal them with underlayment tape. Without this barrier, moisture from the slab will swell the laminate’s core.
On wood subfloors: You can skip the plastic vapor barrier.
Underlayment: This thin foam layer cushions the floor, dampens sound, and smooths tiny imperfections. Roll it out row by row as you work; don’t cover the whole room at once, or you’ll tear it while walking around. Butt the edges together without overlapping (unless the product says otherwise) and tape the seams.
Skip underlayment entirely if your planks come with a pre-attached pad. Doubling up creates a floor that’s too soft, which stresses the locking joints.
Step 4: Plan Your Layout
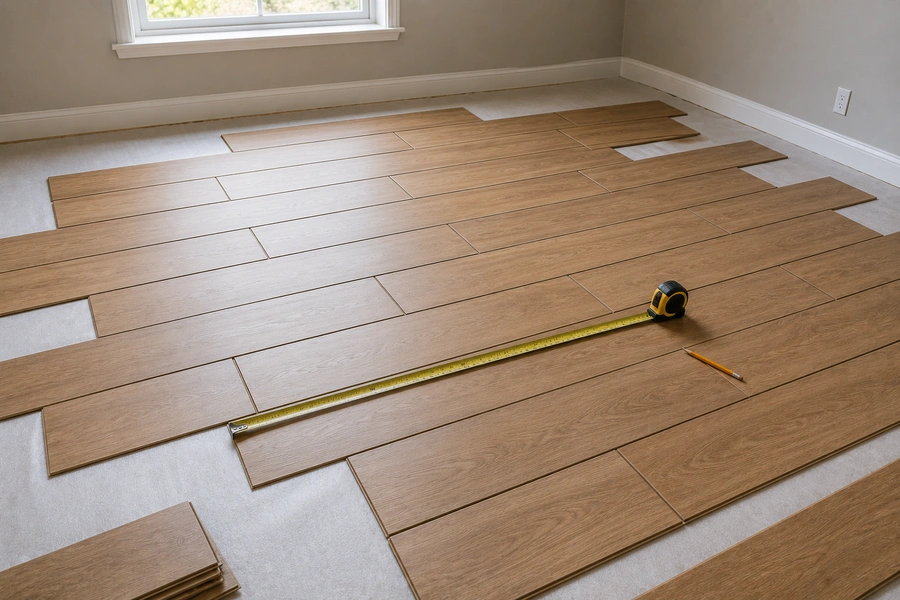
Ten minutes of planning saves hours of frustration.
Choose the Plank Direction
Three common approaches:
- Run planks parallel to the main light source. This hides seams and creates a natural flow.
- Run planks parallel to the longest wall. This makes the room feel larger.
- Run them the way you like best. It’s your home.
Do the End-Math First
Measure the room’s length and divide by the plank length. If your final plank in a row would end up shorter than about 12 inches (check your manufacturer’s minimum, some specify 16 inches), cut the first plank in the row shorter to balance things out.
Check the Last-Row Width Too
Divide the room’s width by the plank width. If the final row would be a sliver less than 2 inches wide, rip the first row narrower so both edge rows look balanced.
Plan Your Stagger
End joints in neighboring rows should never line up. Offset the seams by at least 8 to 12 inches (follow your product’s spec) in a random, brick-like pattern. Avoid repeating “stair-step” patterns, they look mechanical and weaken the floor.
Pro tip: Open three or four boxes and pull planks randomly from each. This mixes the color variation between boxes so you don’t end up with a patch of identical planks in one corner.
Step 5: Install the Laminate Flooring
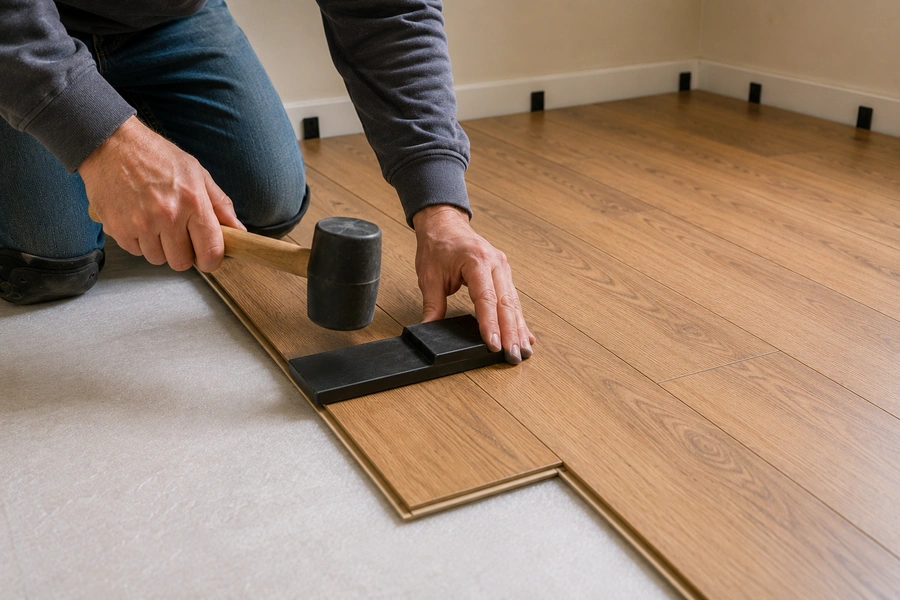 Now the fun part. Here’s the process professionals use:
Lay the First Row
- Start in the left corner of the room, with the tongue side facing the wall. (Many installers trim the tongue off the first row for a cleaner fit against the wall.)
- Place spacers between the plank and the wall to hold your expansion gap, typically 1/4 to 1/2 inch, per your manufacturer’s instructions.
- To join planks end-to-end, lift the next plank to about a 30-degree angle, insert its tongue into the groove of the previous plank, and lower it until it clicks.
- Cut the last plank in the row to fit, keeping the expansion gap at the end wall.
Why the Expansion Gap Matters
Laminate expands in humid summers and shrinks in dry winters. The gap around the room’s edge is the pressure-relief valve that lets it move. Without it, the floor has nowhere to go, so it buckles upward. The gap disappears under your baseboards later, so it never shows.
Leave the same gap around every fixed object: pipes, columns, fireplace hearths, and door frames. For very large rooms, runs longer than about 40 feet, install a T-molding to break up the floor and give it extra room to move.
Lay the Remaining Rows
- Start row two with the cut-off piece from row one (as long as it meets the minimum length). This creates your stagger automatically and reduces waste.
- Fit each plank’s long side first at an angle into the previous row, then slide it snug against the plank beside it and lock the short end.
- Use the tapping block and mallet to close any small gaps. Never hammer directly on a plank edge, you’ll crush the locking profile.
- Inspect every plank before installing it. Check the locking edges for damage and the surface for chips. Set damaged planks aside for cut pieces.
- Don’t panic if the first two or three rows feel wobbly. That’s normal. Once several rows are locked together, the floor stabilizes. Some installers rest a few unopened flooring boxes on the completed rows to hold them steady.
Handle the Tricky Cuts
- Cutting planks: A miter saw gives the cleanest crosscuts. With a jigsaw, cut planks face-down to prevent chipping the decorative surface. With a circular saw, cut face-down as well.
- Doorways: Slide planks under the casings you undercut earlier.
- Pipes: Drill a hole 1/2 to 1 inch larger than the pipe’s diameter, cut the plank through the hole’s center, fit both halves around the pipe, and cover the gap with a pipe collar.
- Notches and irregular shapes: Make a paper or cardboard template first, then trace it onto the plank.
Finish the Last Row
The final row almost always needs to be ripped (cut lengthwise). Measure at several points along the wall, walls are rarely straight, and mark your cut line accordingly, keeping the expansion gap.
There’s no room to swing a mallet against the wall, so use the pull bar: hook it over the plank’s edge and tap the bar’s raised end to draw the joint tight.
Step 6: Finish the Job
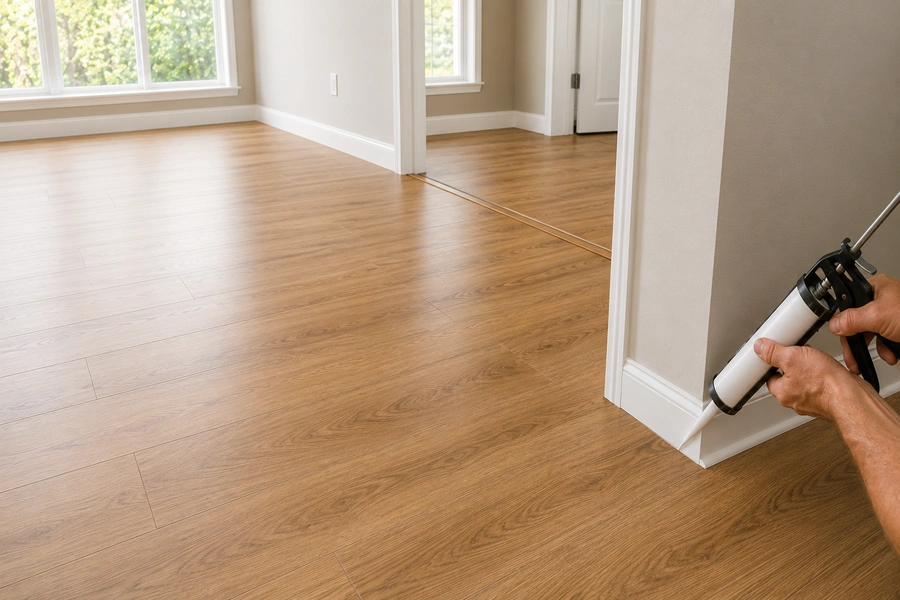 You’re close. Don’t stop now; an unfinished floor has a way of staying unfinished for months.
- Remove all spacers from around the room.
- Install baseboards or quarter-round trim to cover the expansion gap. Critical detail: nail trim to the wall, never to the floor. Pinning the floor down blocks its movement and defeats the expansion gap.
- Install transition strips in doorways and where laminate meets tile, carpet, or other flooring.
- Apply 100% silicone sealant along edges in moisture-prone spots, near exterior doors, dishwashers, or refrigerators.
- Vacuum and damp-mop (lightly, never soak laminate) and enjoy your new floor. You can walk on a click-lock floating floor immediately.
If you’re working with a concrete subfloor, find out whether vinyl flooring can be installed over concrete before choosing your flooring.
How Long Does It Take to Install Laminate Flooring?
| Project | Realistic Time (DIY Beginner) |
| Acclimation | 48–72 hours (hands-off) |
| Subfloor prep and cleaning | 2–4 hours |
| Average bedroom (150–200 sq ft) | 1 day |
| Large living room or open area | 1–2 days |
| Trim, transitions, and cleanup | 2–3 hours |
Rooms with many doorways, closets, or angles take longer because every obstacle means a custom cut.
Can You Install Laminate Flooring Yourself?
Yes. If you can measure, use a saw, and kneel for a few hours, you can install click-lock laminate flooring.
Here’s an honest skill breakdown:
| Skill Level | What You Can Handle |
| Complete beginner | A simple square or rectangular room with few doorways |
| Confident DIYer | Rooms with closets, multiple doorways, and undercut door casings |
| Advanced DIYer | Hallways, uneven subfloors that need leveling, and rooms with fireplaces or pipes |
| Best left to a pro | Stairs, glue-down laminate, and major subfloor repairs |
A helpful trick for first-timers: practice inside a closet first. If a cut isn’t perfect there, only you will ever see it.
How Much Does It Cost to Install Laminate Flooring?
Here’s where DIY really pays off. Based on 2026 pricing data:
| Cost Item | Typical Range |
| Laminate planks (materials) | $1–$4 per sq ft |
| Underlayment | $30–$50 per 100 sq ft roll |
| Vapor barrier (concrete only) | ~$35 per roll |
| Installation kit (spacers, pull bar, tapping block, mallet) | $20–$35 |
| Professional labor (if hired) | $4–$8 per sq ft |
According to NerdWallet, labor can account for 20% to 50% of a professionally installed laminate floor’s total price. On a 500-square-foot project, doing the labor yourself can save $2,000 or more.
10 Common Laminate Installation Mistakes to Avoid
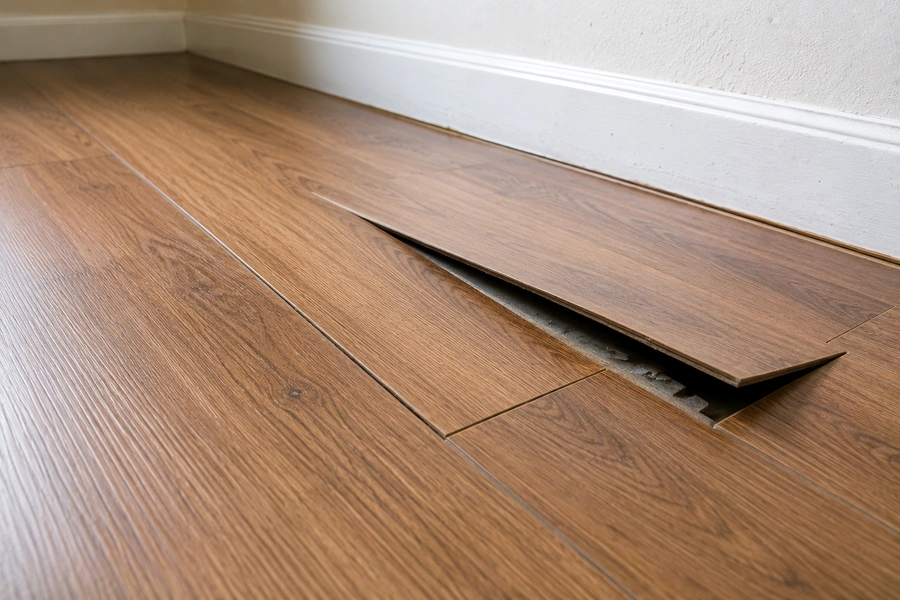
- Skipping acclimation. The #1 cause of gaps and buckling.
- Installing over an uneven subfloor. Causes flexing, noise, and broken joints.
- Forgetting the expansion gap, or blocking it later with tight trim or heavy built-ins.
- Nailing trim into the floor instead of the wall.
- Skipping the vapor barrier on concrete. Moisture swells the core from below.
- Lining up end joints between rows instead of staggering them.
- Hammering directly on plank edges and crushing the locking system.
- Cutting planks face-up with a jigsaw, which chips the surface.
- Pulling all planks from one box, creating obvious repeated patterns.
- Installing cabinets or kitchen islands on top of a floating floor, which pins it down and causes buckling.
Where Should You (and Shouldn’t You) Install Laminate?
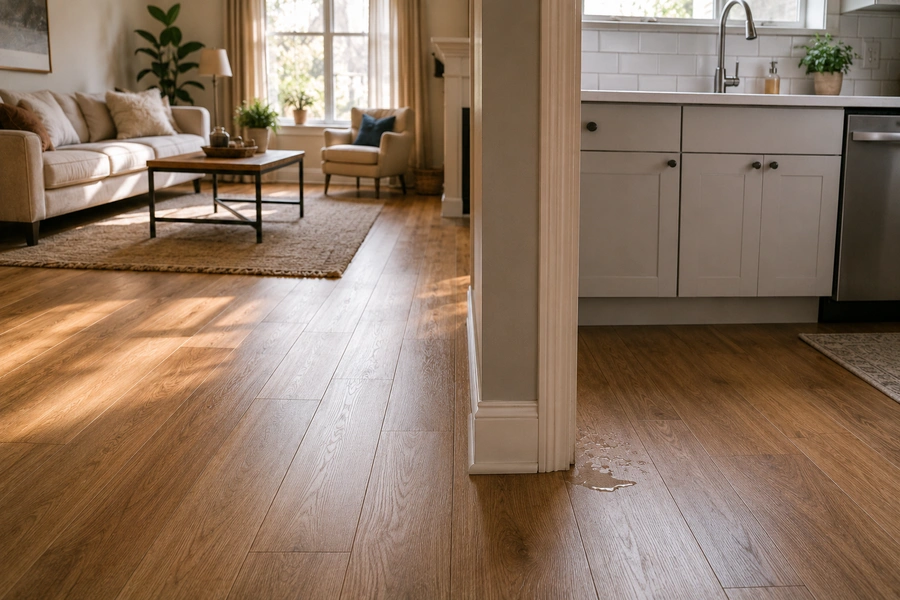 Great for: Bedrooms, living rooms, dining rooms, hallways, home offices, and finished basements with a proper vapor barrier.
Use caution in: Kitchens and half-baths. Choose a water-resistant laminate and seal the edges with silicone.
Avoid in: Full bathrooms, laundry rooms with drain risk, and any space with standing water, unless your specific product is rated waterproof and the manufacturer approves wet-area installation. When moisture is a daily reality, luxury vinyl plank (LVP) is usually the safer pick.
Choosing durability: Check the AC (Abrasion Class) rating. AC3 handles general residential traffic like bedrooms. AC4 suits busy areas like kitchens, hallways, and home offices.
Caring for Your New Laminate Floor
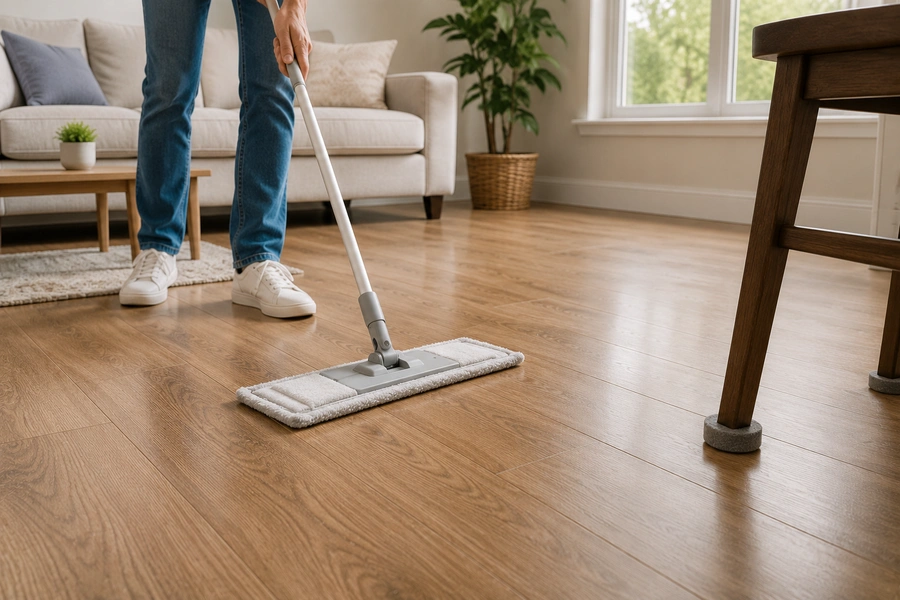
- Sweep or vacuum (hard-floor setting) regularly to remove grit.
- Damp-mop only. Standing water is laminate’s enemy.
- Wipe spills right away.
- Add felt pads under furniture legs.
- Keep indoor humidity roughly between 30% and 50% to minimize seasonal movement.
- Never wax, polish, or sand laminate.
- Warranty requirements, some manufacturers require professional installation for full coverage.
Want to add more character to your flooring? Discover how to create patterns with floor tiles for a distinctive and stylish finish.
Frequently Asked Questions
Do I really need to leave an expansion gap?
Yes, always. Laminate expands and contracts with humidity changes. A 1/4 to 1/2 inch gap around every wall and fixed object gives the floor room to move. Without it, the floor will buckle. Your baseboards hide the gap completely.
Which direction should I lay laminate flooring?
Run planks parallel to the room’s main light source to hide seams, or parallel to the longest wall to make the room feel bigger. Neither choice is “wrong”, pick the look you prefer.
Can I install laminate over tile, vinyl, or hardwood?
Usually yes, as long as the existing floor is flat within 3/16 inch over 10 feet, clean, dry, and firmly attached. Never install laminate over carpet. Check that the added height still clears your doors and appliances.
Do I need underlayment if my planks have an attached pad?
No. Use one or the other, never both. Doubling up makes the floor too soft and stresses the locking joints. On concrete, you’ll still need the 6-mil plastic vapor barrier underneath even with an attached pad.
How long before I can walk on the floor?
Immediately. Click-lock floating floors use no glue, so there’s nothing to cure. Move your furniture back in the same day, just lift heavy pieces rather than dragging them.
How do I cut laminate without chipping it?
Use a fine-tooth blade. With a jigsaw or circular saw, cut planks face-down so any chipping lands on the back. With a miter saw, cut face-up. A dedicated laminate cutter (a guillotine-style tool) makes dust-free crosscuts too.
What if my first two rows keep shifting while I work?
That’s normal, a floating floor is unstable until several rows lock together. Assemble two or three rows, position them with spacers, and weigh them down with unopened flooring boxes while you continue.
Is laminate or vinyl plank better?
Laminate typically looks and feels more like real wood and resists scratches well. LVP handles water better. For bedrooms and living areas, laminate is excellent. For bathrooms and laundry rooms, LVP wins.
How much extra flooring should I buy?
Add 10% to your measured square footage for simple rooms, and 15% for rooms with angles, closets, or diagonal layouts. The extra covers cutting waste, mistakes, and future repairs.
Can I install laminate in one day?
Yes, an average bedroom is very achievable in a day once the planks are acclimated and the subfloor is prepped. Just remember the 48-hour acclimation clock starts two days before installation day.
Final Thoughts: You’ve Got This
Installing laminate flooring like a pro comes down to three things most beginners rush past: acclimate the planks, flatten the subfloor, and respect the expansion gap. Get those right, and the click-lock system does the rest.
Take your time on the first two rows, stagger your seams, and finish the job completely, trim, transitions, and all. In a weekend, you’ll have a floor that looks professionally installed at a fraction of the cost.
Ready to start? Measure your room today, order your flooring with 10% extra, and set those boxes in the room to acclimate. Two days from now, you’ll be clicking your first planks into place. And when you’re done, step back and enjoy it, you earned that floor.