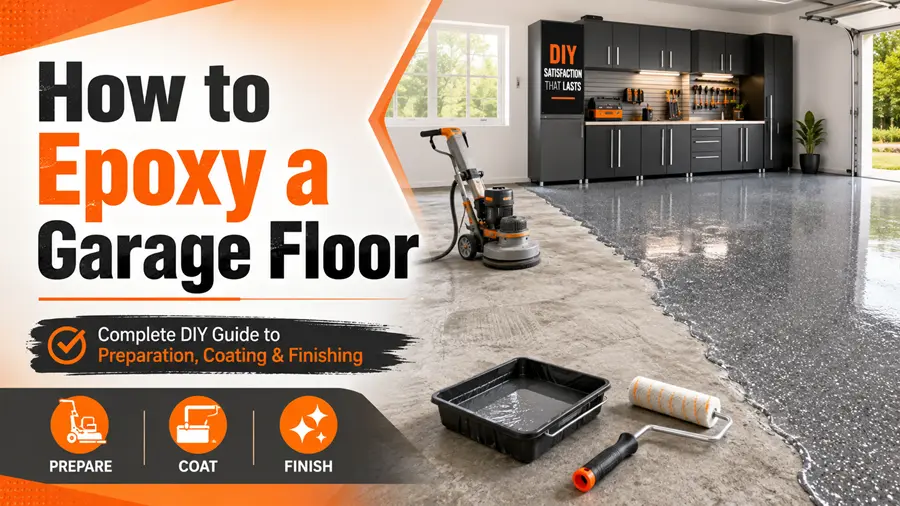
To epoxy a garage floor, you empty the space, degrease the concrete, repair cracks, grind or acid etch the surface to open the pores, let it dry fully, then roll on a two-part epoxy, broadcast decorative flakes, and seal it with a clear topcoat. A DIY epoxy floor installation takes two to three days for a two-car garage and costs $300 to $1,200 in materials. Around 80% of that time goes into preparation, not painting.
That last sentence is the whole guide in one line. Nearly every failed epoxy floor traces back to prep, not the product in the bucket.
This guide by Nova Floor Experts walks through the full process with real numbers, the tests pros run before they open a single can, and the mistakes that cause peeling six months later.
Contents
What Epoxy Flooring Actually Is
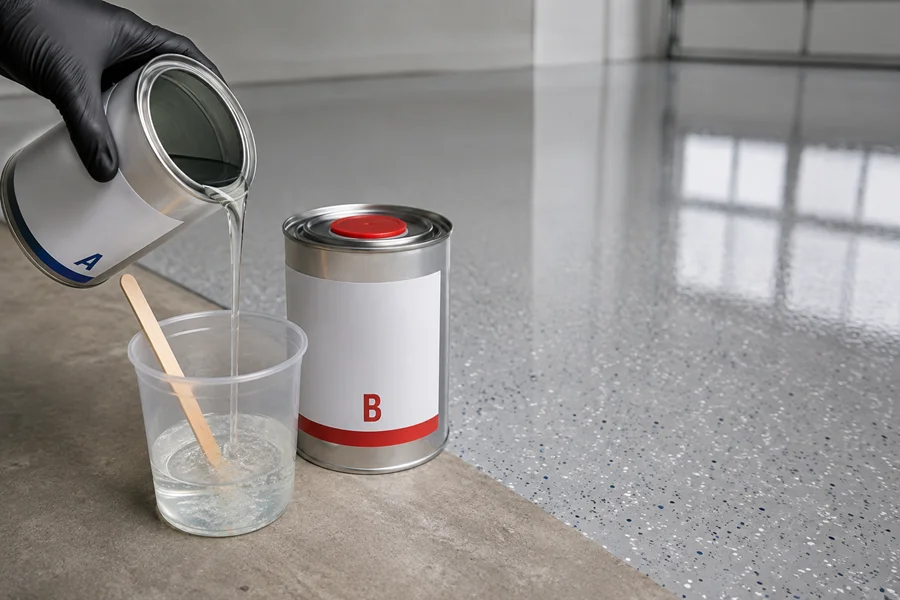
Epoxy is not paint. It is a thermoset resin system with two parts that you mix right before use:
- Part A (resin): the base material that gives the coating its body and gloss
- Part B (hardener): the curing agent that triggers a chemical reaction
Once you combine them, a chemical bond forms and the mixture hardens permanently. It does not dry by evaporation the way latex paint does. That reaction starts the moment you stir, which is why timing matters so much during application.
The finished coating bonds mechanically to concrete. It flows into the tiny peaks and valleys on the surface and locks in place. Smooth, sealed, or dirty concrete gives it nothing to grip, so the coating sits on top like a sticker and eventually lifts.
Types of Garage Floor Coatings Compared
Not every product sold as “epoxy” performs the same. Here is how the main options stack up.
| Coating type | Thickness per coat | Realistic lifespan | Material cost (500 sq ft) | Best use |
| 1-part epoxy paint (acrylic fortified) | 2 to 3 mils | 1 to 3 years | $80 to $200 | Light storage, quick refresh, rental property |
| 2-part water-based epoxy kit | 3 to 6 mils | 3 to 7 years | $200 to $500 | Most home garages, first-time DIY |
| 2-part 100% solids epoxy | 10 to 20 mils | 10 to 20 years | $600 to $1,400 | Workshops, gyms, heavy vehicles |
| Polyurea / polyaspartic system | 8 to 15 mils | 15 to 20 years | $900 to $2,000 | Fast cure, UV exposure, cold climates |
A mil equals one thousandth of an inch. That number drives durability more than brand name does. A 3 mil water-based coating simply cannot resist hot tires the way a 15 mil solids system can.
One-part “epoxy paint” is not a true epoxy system. It needs no mixing and wears out fast. Skip it unless you only want a cosmetic refresh.
For most homeowners, a quality 2-part water-based kit hits the sweet spot: low odor, forgiving working time, and a finish that lasts five years or more with good prep. Choose 100% solids if you park heavy trucks, roll tool chests around, or run a home gym.
A note on UV and color
Standard epoxy ambers when sunlight hits it. It turns slightly yellow over time. That matters at the garage door line where sun reaches the slab. A polyaspartic or urethane clear topcoat blocks this and keeps grays and whites looking true.
Before You Start | Three Tests That Decide Everything
Skipping these is the most expensive shortcut in this project. Run all three.
1. The water bead test (checks for sealers)
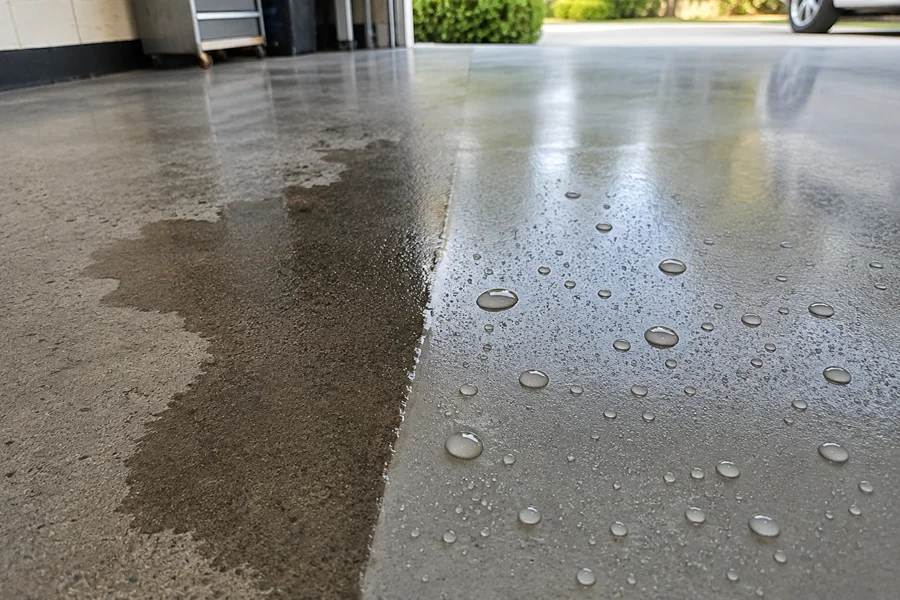
Sprinkle water in five spots across the floor, including where cars park.
- Water soaks in and darkens the concrete: good, the slab is porous and ready for prep
- Water beads up: a sealer, cure-and-seal product, or old coating is present
Beading means you must grind the surface mechanically. Acid will not cut through a sealer. This is common on newer homes, where builders often apply a cure-and-seal on the slab.
2. The plastic sheet test (checks for moisture)
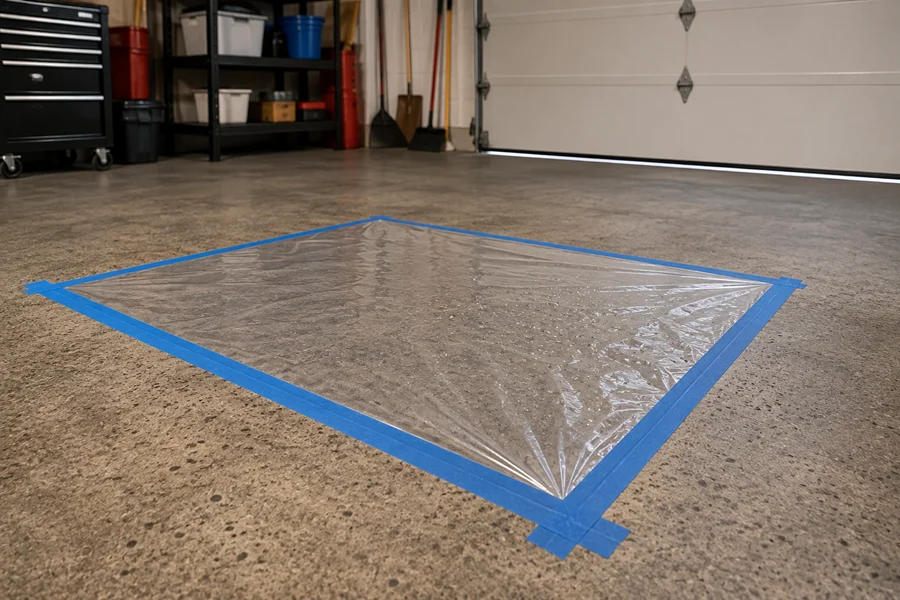
This follows ASTM D4263. Tape an 18 by 18 inch square of clear plastic sheeting to the floor. Seal all four edges completely with duct tape. Leave it 16 to 24 hours.
- Dry underneath: you can proceed
- Condensation on the plastic or a dark spot on the concrete: moisture is moving up through the slab
Test at least three spots, including near the garage door and along any wall that borders soil.
Moisture vapor pushes upward through concrete and lifts coatings from below. It causes bubbles, blisters, and sheet delamination months after installation. If your test shows moisture, you need a moisture-tolerant epoxy primer rated as a vapor barrier before the color coat goes down.
For a definitive answer, professionals use two lab-grade tests:
- ASTM F1869 (calcium chloride dome test): most coatings require results under 3 lbs per 1,000 sq ft per 24 hours
- ASTM F2170 (in-situ relative humidity probes): most systems require 75% RH or lower inside the slab
Test kits run $30 to $60 and take about 72 hours. On a slab that failed the plastic test, that money is well spent.
3. The slab age check
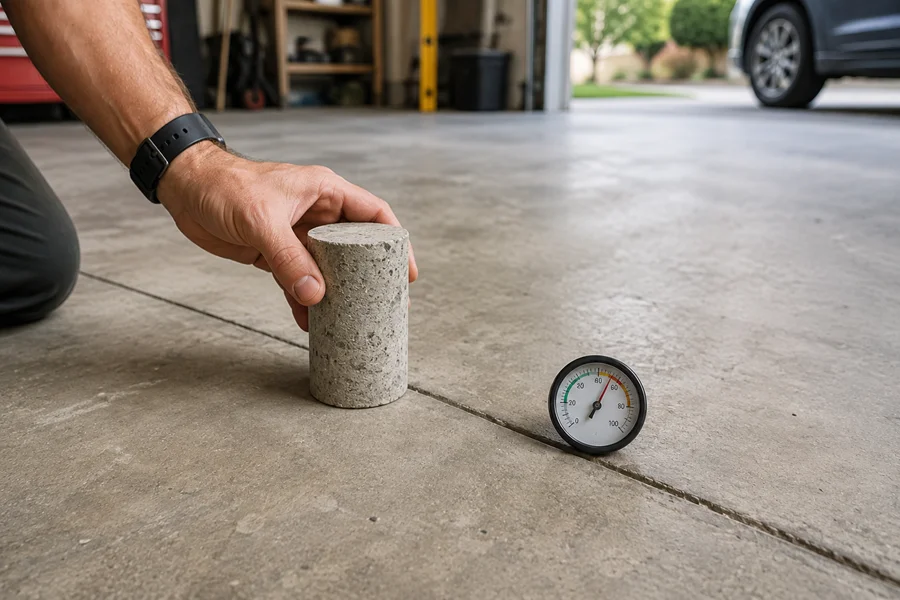
New concrete needs 28 days minimum to cure before you coat it. Many manufacturers ask for 30 days. Fresh concrete releases water and carries high alkalinity, and both attack the bond.
If the slab was poured this season, wait. There is no workaround.
What This Project Costs
| Item | DIY range |
| Water-based 2-part kit (500 sq ft) | $200 to $500 |
| 100% solids kit (500 sq ft) | $600 to $1,400 |
| Concrete degreaser | $20 to $40 |
| Crack and divot repair epoxy | $25 to $60 |
| Diamond grinder rental (1 day) | $80 to $150 |
| Dust extractor rental | $50 to $90 |
| Rollers, brushes, trays, spiked shoes | $60 to $100 |
| PPE (respirator, gloves, goggles) | $40 to $70 |
| Clear topcoat with anti-slip additive | $90 to $250 |
| Total DIY | $350 to $1,400 |
Professional installation runs $3 to $12 per square foot, or roughly $1,500 to $6,000 for a two-car garage. The premium buys diamond grinding, moisture mitigation, and a 100% solids or polyaspartic system with a warranty.
DIY makes sense when your slab is clean, dry, and in decent shape. Hiring out makes sense when you have moisture problems, badly spalled concrete, or an old coating that needs full removal.
Tools and Materials Checklist
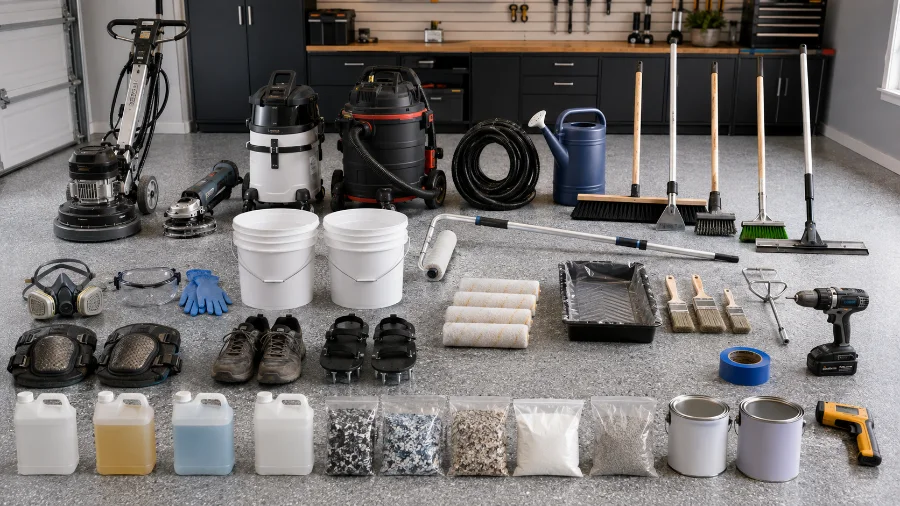
Safety gear
- Respirator rated for organic vapors (a dust mask is not enough)
- Chemical-resistant nitrile gloves
- Sealed safety goggles, not glasses
- Knee pads and old closed-toe shoes
Prep tools
- Push broom and shop vacuum with a fine dust filter
- Floor scraper and stiff wire brush
- Stiff bristle deck brush on a pole
- 24 inch floor squeegee
- Pressure washer or garden hose
- Plastic watering can (for etching solution only)
- Walk-behind diamond grinder plus hand grinder with a cup wheel for edges
- Dust extractor with HEPA filtration
Application tools
- 9 inch roller frame with an extension pole
- Shed-resistant 3/8 inch nap roller covers (buy four, not one)
- 3 inch chip brushes for cutting in
- Two 5 gallon buckets and a drill-mounted mixing paddle
- Roller tray with liners
- Spiked shoes
- Painter’s tape
- A cheap infrared thermometer
Materials
- Two-part epoxy kit sized for your square footage
- Epoxy crack filler and concrete patch
- Concrete degreaser
- Etching solution (usually citric acid crystals in modern kits)
- Moisture-blocking or recoat primer, if your tests call for one
- Decorative flakes
- Clear polyaspartic or urethane topcoat
- Anti-slip additive (aluminum oxide or polymer grit)
Realistic Project Timeline
| Day | Work | Hours |
| Day 1 morning | Empty garage, sweep, scrape, degrease, rinse | 4 to 5 |
| Day 1 afternoon | Repair cracks and holes | 1 to 2 |
| Day 2 morning | Grind or acid etch, rinse, squeegee | 4 to 6 |
| Day 2 to 3 | Dry time (24 hours minimum) | passive |
| Day 3 morning | Vacuum, tape, prime if needed | 2 |
| Day 3 afternoon | Base coat plus flake broadcast | 3 to 4 |
| Day 4 | Scrape flakes, vacuum, apply topcoat | 3 |
| Day 5 to 7 | Cure before parking | passive |
Do not compress this. The dry time between etching and coating is the step people cut, and it is the step that ruins floors.
Step 1: Measure and Buy the Right Amount
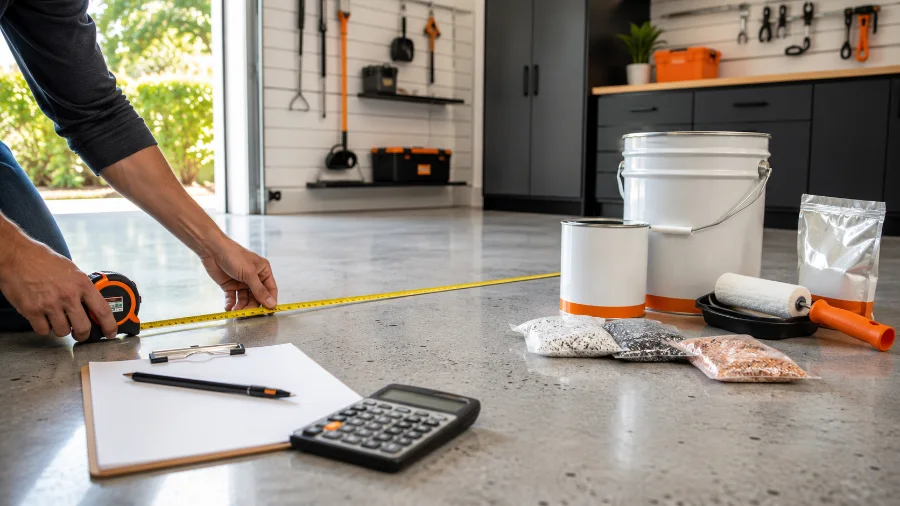
Multiply length by width. Add any alcoves, bump-outs, or the area behind a knee wall. A standard two-car garage measures roughly 20 by 22 feet, or about 440 square feet.
Buy 10% more than your measurement suggests. Rough, porous concrete drinks more coating than the label predicts, and running out mid-application is a disaster because you cannot stop and restart a wet edge.
If you plan on two base coats, or your moisture test failed and you need a primer, buy that additional material now.
Check the coverage rate on the label, not the marketing on the box. Water-based kits typically cover 250 to 500 sq ft per kit. A 100% solids epoxy covers about 80 to 100 sq ft per gallon at proper thickness.
Step 2: Empty the Garage and Inspect
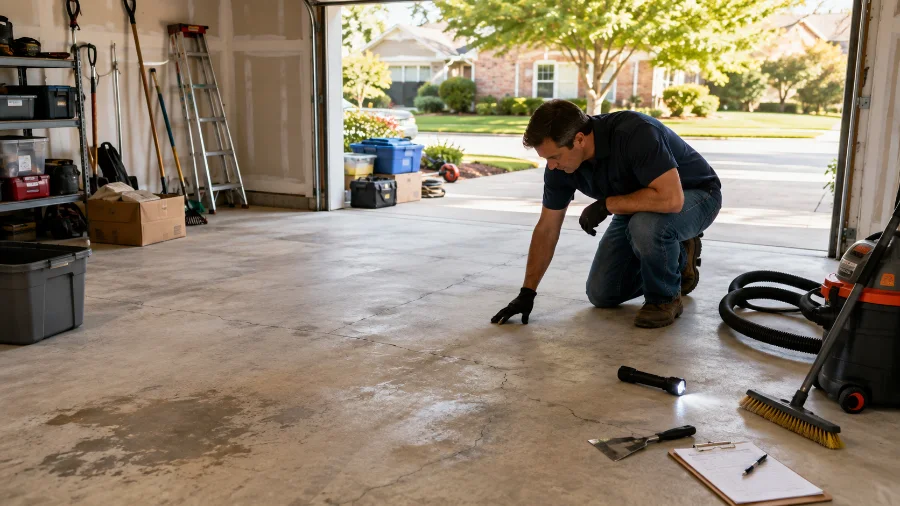
Move everything out. Every shelf, every bike, every box. The floor needs to stay clear for four to five days.
Now look at the slab in good light:
- Note oil stains, especially where engines sit
- Mark cracks with chalk
- Tap suspicious areas with a hammer. A hollow sound means the concrete is delaminating and needs removal
- Check control joints (the straight saw cuts) and expansion joints
- Look for old paint, mastic, or adhesive
Sweep, then vacuum. A leaf blower moves the bulk quickly, but you still need a vacuum for fine dust.
Step 3: Degrease the Concrete
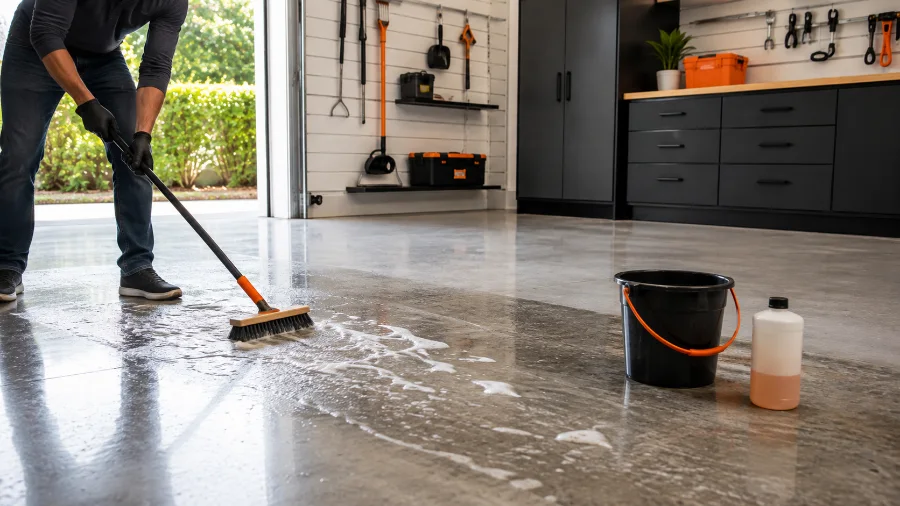
Oil is the number one adhesion killer, and it soaks deeper into concrete than most people realize.
- Wet the floor lightly
- Apply an alkaline concrete degreaser at the labeled dilution
- Scrub with a stiff brush, working in 10 by 10 foot sections
- Give heavy stains extra attention and a second application
- Rinse thoroughly until the water runs clear
- Squeegee the water out the door
For deep, old oil spots, a single scrub will not do it. Use an enzymatic or microbial concrete cleaner and let it dwell for several hours. These products break down hydrocarbons rather than just lifting surface residue. Very saturated spots may need a poultice treatment or, in bad cases, patching after you grind that section out.
Here is a useful check: after the floor dries, water should absorb evenly everywhere. If it still beads on one spot, oil remains there. Clean it again.
Let the floor dry for 24 hours before moving on.
Step 4: Repair Cracks, Divots, and Joints
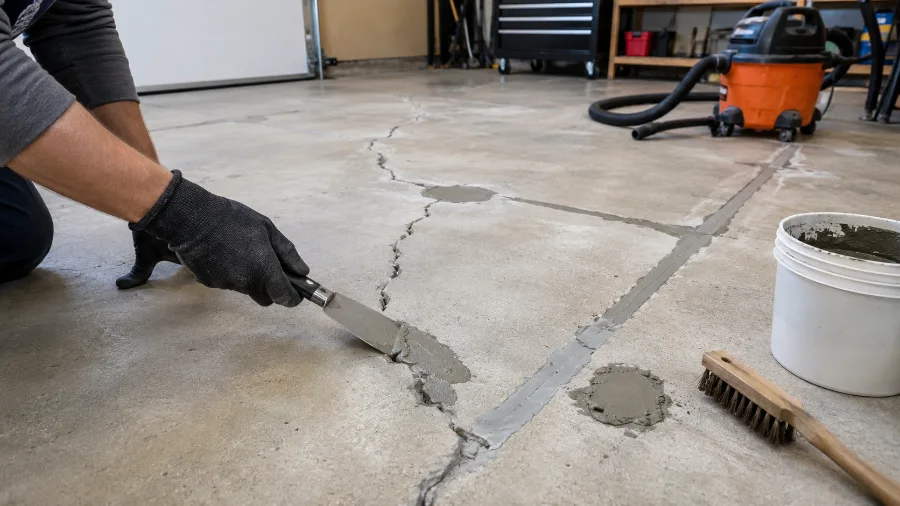
Coating over damage just highlights it. Fix everything first.
Hairline cracks (under 1/8 inch): chase them open slightly with a grinder or chisel to create a V-groove, vacuum the dust, and fill with a two-part epoxy crack filler.
Wider cracks and holes: clean out loose material with a wire brush, vacuum, then fill with a polymer-modified concrete patch or epoxy mortar. Slightly overfill and level it flush once it starts to set.
Spalled or pitted areas: these need a resurfacing compound rather than a filler. Feather the edges so no ridge shows through the coating.
Control joints: you have two choices. Fill them with a semi-rigid polyurea joint filler for a seamless look, or leave them open and let the coating follow the contour. Filling looks better but risks a visible crack later if the slab moves. Leaving them open is safer for a first-time job.
Use repair products from the same manufacturer as your kit when possible. Mixed chemistries sometimes react badly. Follow cure times exactly, which usually run 8 to 24 hours for epoxy patches.
Step 5: Profile the Concrete (Grinding vs. Acid Etching)
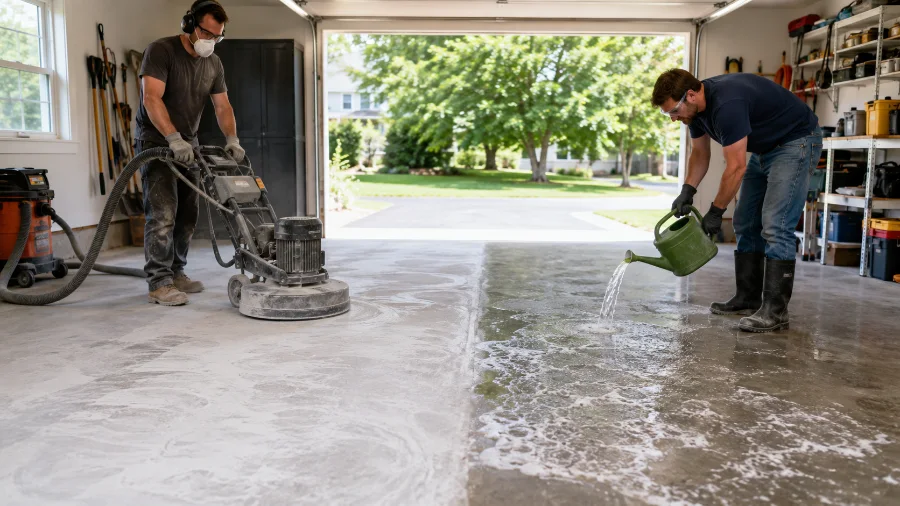
This step creates the texture that epoxy grabs onto. The industry measures that texture with the ICRI Concrete Surface Profile scale, defined in Guideline 310.2R, running from CSP 1 (nearly smooth) to CSP 10 (very rough).
| Coating thickness | Required profile | How to achieve it |
| Thin sealers, under 4 mils | CSP 1 to 2 | Acid etch or light grind |
| Thin-film epoxy, 4 to 10 mils | CSP 2 to 3 | Acid etch or grind |
| High-build epoxy, over 10 mils | CSP 3 to 5 | Diamond grind or shot blast |
Acid etching reaches CSP 1 to 3 at best. That works for water-based kits. It does not work for 100% solids systems, and it does not touch a sealed floor at all.
FloorsFor other common flooring problems, learn how to fix squeaky floors and restore a more stable, comfortable surface.
How to acid etch
Modern kits use citric acid crystals instead of muriatic acid. They are far safer, though you still need full PPE.
- Mix the crystals with water in a plastic watering can. Never use your epoxy buckets
- Pre-wet the floor with a hose so it is damp but has no puddles
- Pour the solution across one 10 by 10 foot section
- Scrub it in with a stiff brush while keeping the surface wet
- Let it react for at least 15 minutes. Light fizzing is normal
- Rinse hard, then rinse again. Repeat until the rinse water runs neutral
- Squeegee all standing water out the door
Correctly etched concrete feels like 100 grit sandpaper under a bare hand. If it still feels smooth, etch it a second time.
Acid neutralizes as it works. Any residue left behind interferes with adhesion, so over-rinse rather than under-rinse.
How to grind
Grinding beats etching on every measure except cost and convenience. It produces a consistent profile, removes sealers and old coatings, and opens the concrete evenly.
Rent a walk-behind planetary grinder with 25 or 30 grit metal-bond diamond tooling. Connect it to a HEPA dust extractor. Use a hand grinder with a diamond cup wheel and shroud for the perimeter and corners.
Work in overlapping passes, then make a second pass at 90 degrees to the first. Vacuum thoroughly, then vacuum again. Wipe a clean white cloth across the floor. If it comes up gray, keep vacuuming.
Silica dust from grinding causes permanent lung damage. Wear a fitted respirator and always run dust extraction.
Step 6: Check Conditions Before You Open Anything
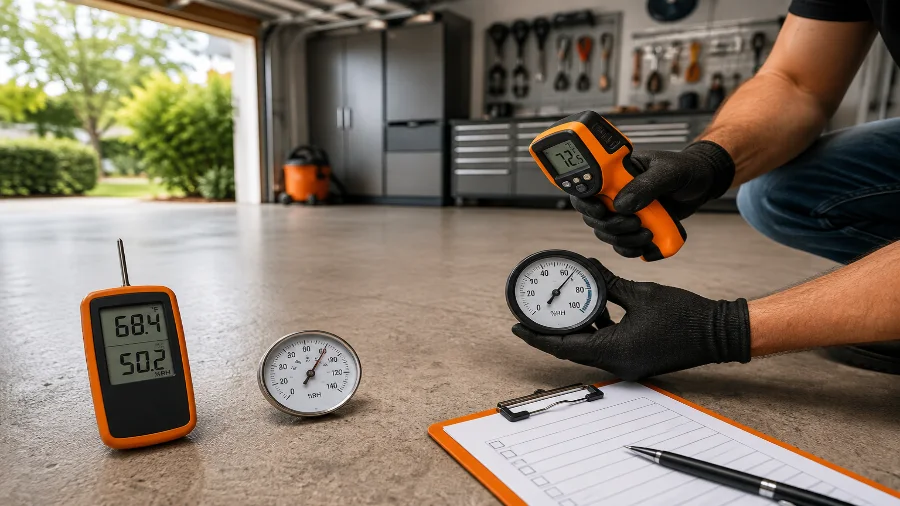
Epoxy cures by chemical reaction, and that reaction responds to temperature and humidity.
- Air temperature: 60°F to 85°F is the working window. Most products list 50°F to 90°F as absolute limits
- Slab temperature: measure it with an infrared thermometer. Concrete lags behind air temperature by 10 to 20 degrees, and slab temperature governs the cure, not air
- Humidity: keep it under 70%. Above 85%, water-based epoxy can blush and dry milky
- Dew point: the slab must sit at least 5°F above the dew point. Coating a slab at or below dew point traps a film of moisture under the epoxy and destroys the bond
Spring and fall installs need extra care. Morning slab temperatures often sit 20 degrees below afternoon air temperature.
Final prep before mixing:
- Vacuum one more time
- Tape off walls, trim, and the garage door line
- Stop taping right at the inside edge of the door. Epoxy past that line gets direct sun and will fade noticeably
- Set out all tools, open the roller covers, and stage your buckets
- Close the garage door partway to keep wind and debris out while keeping airflow
Step 7: Prime If Your Tests Call for It
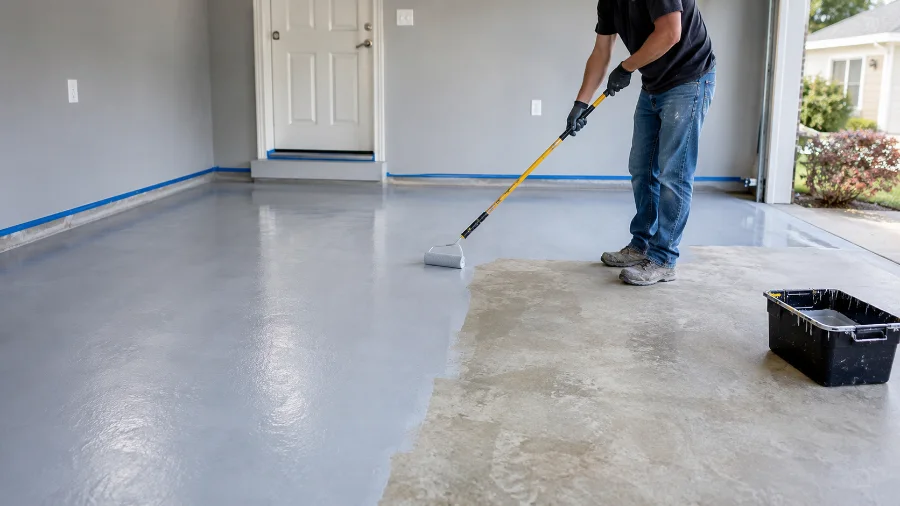
Prime when any of these apply:
- The water bead test showed a sealer
- The plastic sheet test showed moisture (use a vapor-barrier primer specifically)
- You are recoating an existing epoxy floor (use a recoat primer)
- Your concrete is unusually porous or power-troweled smooth
Primer thins out and penetrates deeper than the color coat. It costs an extra day but adds years to the floor.
Follow the recoat window on the label. Most primers require you to apply the base coat within a set span, often 12 to 24 hours. Miss that window and you have to abrade the primer before coating.
Step 8: Mix the Epoxy Correctly
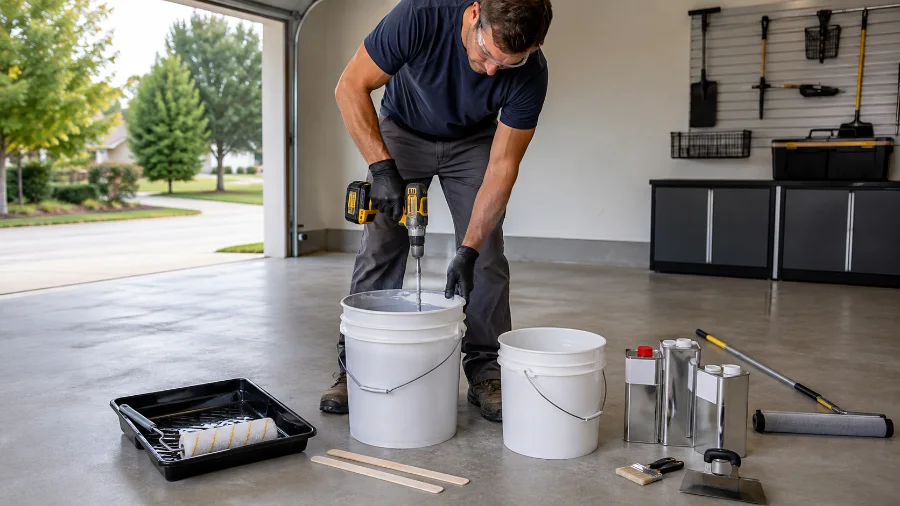
More floors fail from bad mixing than from bad product. A soft or permanently tacky floor almost always means the ratio was off or the mix was incomplete.
- Read the mix ratio. It is by volume and it is not negotiable
- Shake or stir Part B (hardener and pigment) on its own for 2 to 3 minutes
- Pour Part A into a clean bucket, then add Part B
- Mix with a drill paddle on low speed for 3 to 5 minutes
- Scrape the sides and the bottom of the bucket repeatedly. Unmixed resin hides in those corners
- Avoid high speed. Whipping air into the mix creates bubbles and pinholes
Pot life is your working clock. It typically runs 30 to 45 minutes at 75°F. Heat cuts it dramatically, so at 90°F you might have 20 minutes. Epoxy also generates its own heat in the bucket, which speeds the reaction further.
Two rules that follow from this:
- Mix only one batch at a time
- Pour it out of the bucket quickly. Epoxy spread thin on the floor cures much slower than epoxy sitting in a mass
Step 9: Apply the Base Coat
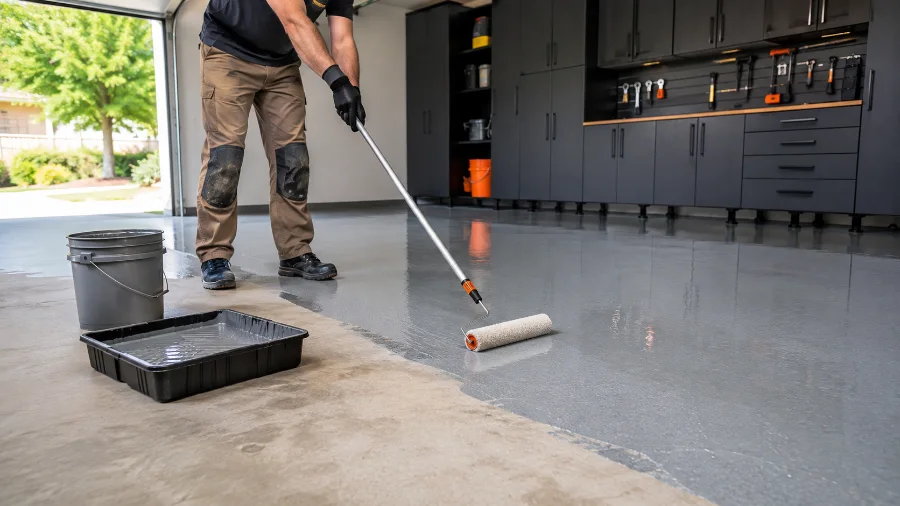
Divide the floor into sections roughly 10 by 10 feet. Start at the corner farthest from the door and work backward toward your exit.
- Cut in first. Brush a 4 inch band along walls, posts, and corners for the section you are about to roll
- Pour a ribbon of epoxy about a foot from the wall
- Roll it out in an overlapping W or M pattern. This spreads material evenly before you level it
- Back-roll the whole section in one direction to even out the film and remove roller marks
- Keep a wet edge. Always roll into the section you just finished before it starts to set
Watch your spread rate. If you have covered less than half the floor with half your material, you are laying it on too thick. Thick epoxy traps solvent, cures unevenly, and stays soft.
Change roller covers if one starts shedding. Epoxy fully embeds loose fibers and you cannot remove them later.
Move at a steady pace and do not stop to admire your work. Pot life does not pause.
Step 10: Broadcast the Decorative Flakes
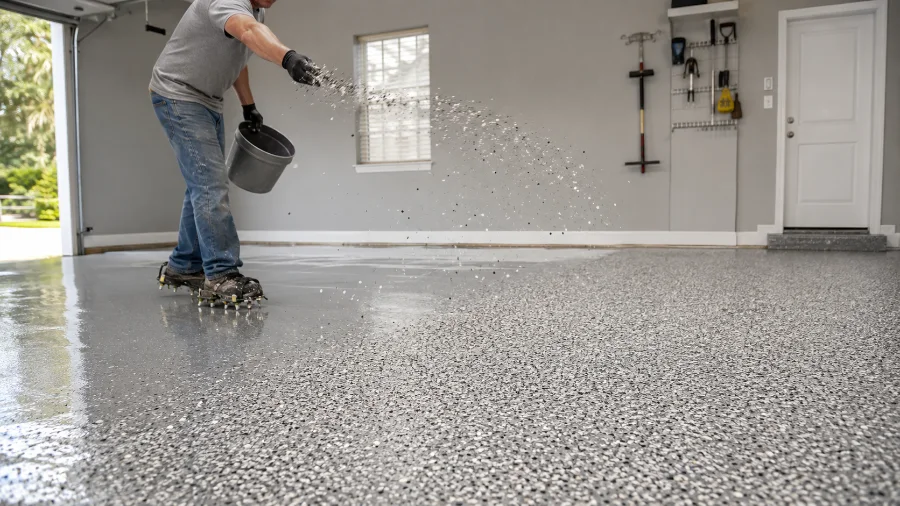
Flakes do more than decorate. They hide slab imperfections, add slip resistance, and mask future wear.
Broadcast into wet epoxy, section by section, immediately after rolling. Do not wait until the whole floor is coated.
Technique: grab a handful, and throw upward toward the ceiling rather than outward. Flakes should rain down and land flat. Thrown sideways, they land on edge and stick up.
Coverage guidelines:
| Look | Flake amount per 100 sq ft |
| Light accent | 1/2 to 1 lb |
| Medium coverage | 2 to 4 lbs |
| Heavy, granite-like | 5 to 8 lbs |
| Full broadcast to rejection | 20 to 30 lbs |
Leave a bare foot of wet epoxy at the leading edge of each section so you can blend into the next one. Fill it in once the neighboring section is coated.
Wear spiked shoes if you need to step into a coated area. Step deliberately and lift straight up.
Full broadcast means throwing flakes until the epoxy will accept no more. It gives the most durable, most professional result, but it requires scraping and sweeping the excess the next day plus two clear coats. Most DIY kits are designed for light to medium coverage.
Step 11: Apply the Clear Topcoat
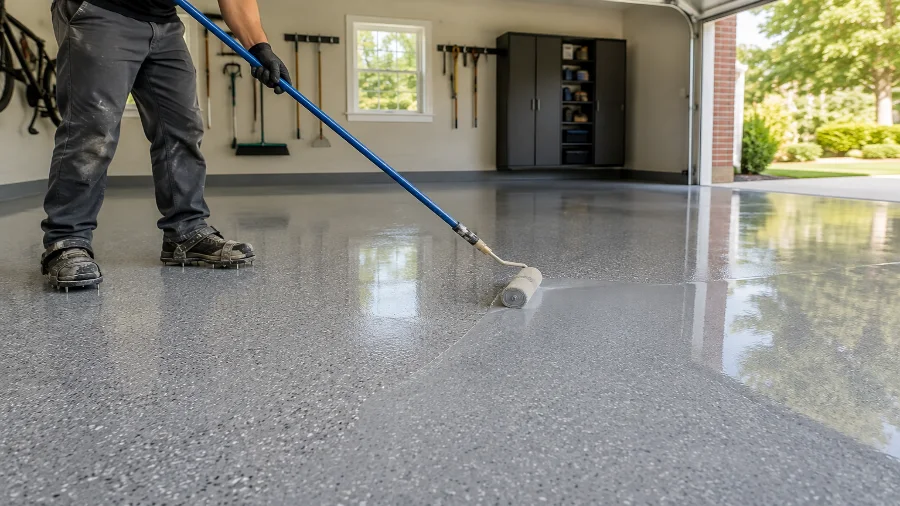
Let the base coat cure per the label, usually 10 to 24 hours. Then:
- Scrape the entire floor with a wide floor scraper held at a low angle. This knocks down flake edges that stick up
- Sweep and vacuum all loose flakes
- Run a hand across the floor. It should feel textured but not sharp
Now mix your topcoat and add the anti-slip additive.
Anti-slip matters more than people expect. A glossy epoxy floor is genuinely dangerous when wet, and a garage floor gets wet every time you park in the rain. Use aluminum oxide or a polymer grit in the 60 to 100 grit range. Add roughly 4 to 8 ounces per gallon depending on how aggressive you want it.
Grit settles fast in the bucket. Stir it every few minutes as you work.
Apply the topcoat the same way you applied the base: cut in, pour, roll in a W pattern, back-roll. Keep this coat thinner than the base coat.
Choosing a topcoat:
- Polyaspartic: cures fast (return to service in hours), excellent UV stability, but a short pot life around 20 minutes that punishes slow work
- Urethane: more forgiving working time, good abrasion resistance, good UV performance
- Clear epoxy: cheapest, but ambers in sunlight
Pull your painter’s tape while the coating is still slightly tacky. Waiting until it hardens means you tear a ragged edge.
Step 12: Cure Times and Getting Back In
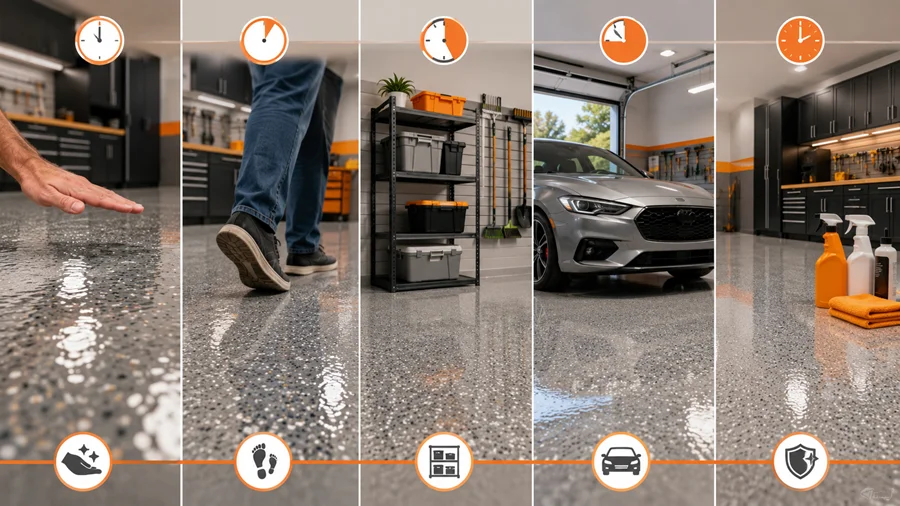
| Milestone | Time at 70°F |
| Dry to touch | 8 to 12 hours |
| Foot traffic | 24 hours |
| Light items, shelving | 48 hours |
| Vehicle traffic | 72 hours minimum |
| Full chemical cure | 5 to 7 days |
Cold slows everything. Below 60°F, expect these times to nearly double. Below 50°F, some products never cure properly at all.
Do not park early. This is the single most common way people ruin an otherwise good floor. A warm tire pressing on epoxy that has not fully hardened will lift the coating when the car moves again.
Keep water, chemicals, and cleaners off the floor for the first week. The coating reaches full chemical resistance only at the end of the cure.
Understanding Hot Tire Pickup
Hot tire pickup is the classic epoxy failure, and it is worth understanding because it is preventable.
Here is the mechanism. Tires heat up while you drive. You park, and the hot rubber sits against the coating and softens it. As the tire cools it contracts and grips that softened surface hard. When you back out, the tire pulls with real force. If the coating’s bond to the concrete is weaker than the tire’s grip on the coating, the epoxy tears off the slab in patches.
Five things prevent it:
- Grind instead of etch. Mechanical profile beats chemical every time
- Use a thicker coating. Thin water-based products soften more readily under heat
- Degrease the parking spots aggressively. This is exactly where oil and tire dressing overspray accumulate
- Respect full cure before parking
- Add a polyaspartic topcoat. It handles heat better than epoxy alone
One overlooked cause: silicone tire shine products drip onto concrete and seal it. Nothing bonds to those spots. Grind them out before coating.
Mistakes That Ruin Epoxy Floors
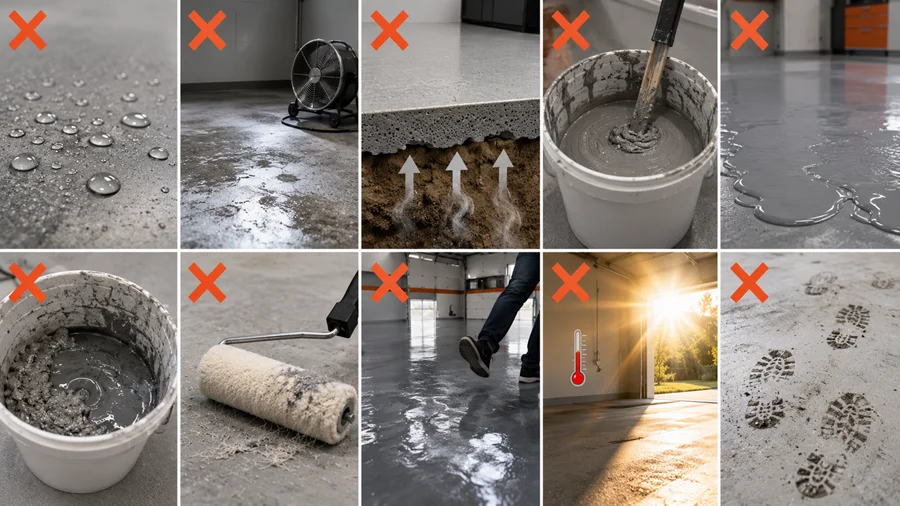
Coating over a sealed slab. Always run the water bead test first.
Rushing the dry time after etching. Concrete absorbs a lot of water during rinsing. Twenty-four hours is a minimum, and 48 is better in humid weather. Fans help.
Ignoring moisture from below. No amount of surface prep fixes vapor pressure pushing up through the slab.
Mixing by eye. Ratios are chemistry, not preference. Use marked containers.
Applying too thick. Thick spots stay soft, cure unevenly, and can wrinkle.
Working past pot life. Once epoxy starts to gel in the bucket, stop. Material applied after that point will not bond properly.
Cheap roller covers. They shed fibers permanently into the finish.
Skipping the anti-slip additive. A wet gloss epoxy floor is slick enough to cause a real fall.
Starting on a hot afternoon. Heat cuts your working time in half and can flash-cure the surface before the coating levels.
Tracking dirt onto etched concrete. After prep, treat the slab as a clean room. Set a mat at the entry and change shoes.
For other flooring repair projects, learn how to fix chipped or cracked tiles and handle common surface damage.
Keeping the Floor Looking New
Epoxy is easy to maintain, and a small routine adds years.
- Weekly: dust mop or soft-bristle sweep. Grit underfoot acts like sandpaper and dulls the gloss faster than anything else
- Monthly: mop with warm water and a few drops of dish soap or a pH-neutral cleaner
- Spills: wipe up oil, brake fluid, and antifreeze promptly. The coating resists them, but prolonged contact can stain
- Avoid: citrus cleaners, vinegar, and anything with acid. They degrade the finish over time
- Use mats under jack stands, motorcycle kickstands, and tool chest casters
- Never drag metal shelving or engine blocks across the surface
- Recoat with a clear topcoat every 4 to 7 years to refresh gloss and add sacrificial wear layer
Rock salt and de-icing chemicals drip off vehicles all winter. Rinse the floor a few times during the season if you live somewhere that salts roads.
Frequently Asked Questions
How long does an epoxy garage floor last? A water-based DIY kit lasts 3 to 7 years. A 100% solids system installed over ground concrete lasts 10 to 20 years. Prep quality affects lifespan more than product price.
Can you epoxy a garage floor yourself? Yes. A two-car garage is a realistic weekend project for someone comfortable with basic tools. The physical work is straightforward. The judgment calls around moisture and surface prep are where people go wrong, which is why testing first matters.
Do you have to grind, or is acid etching enough? Acid etching works for thin water-based coatings on bare, porous concrete. Grinding is required for sealed floors, old coatings, and any high-build system over 10 mils. Grinding also gives more consistent results.
Can you epoxy over old epoxy? Yes, if the existing coating is well bonded. Scrape off any loose sections, sand or lightly grind the whole surface to dull the gloss, clean thoroughly, and apply a recoat primer. If more than about 20% of the old coating is failing, remove it all.
What temperature is best for applying epoxy? Between 60°F and 85°F for both air and slab, with humidity under 70%. Check that the slab sits at least 5°F above the dew point.
Why is my epoxy floor still sticky? Almost always an incorrect mix ratio or incomplete mixing. Cold temperatures and excessive thickness also delay cure. Give it several more days in warmer conditions. If it stays tacky after a week, the coating will not harden and needs removal.
Can you apply epoxy in a cold garage? Only if you can raise and hold the slab temperature above 50°F for the full cure period, not just during application. Space heaters that produce combustion moisture make things worse. Use electric heat and start warming the slab a day early.
Does epoxy hide cracks? No. It follows the contour of whatever is underneath and can even highlight defects with its gloss. Repair everything first. Heavy flake broadcast does a reasonable job of camouflaging minor surface variation.
Is epoxy slippery? Cured epoxy is slippery when wet. Always add an anti-slip aggregate to the clear topcoat. Flake systems provide some texture on their own, but grit gives reliable traction.
The Short Version
A durable epoxy floor comes down to four things: a dry slab, a properly profiled surface, accurate mixing, and patience during cure. Products vary in quality, but no product overcomes bad preparation.
Test your floor before you buy anything. If the plastic sheet comes up dry and water soaks into the concrete, you have a good candidate and a solid weekend ahead of you.