
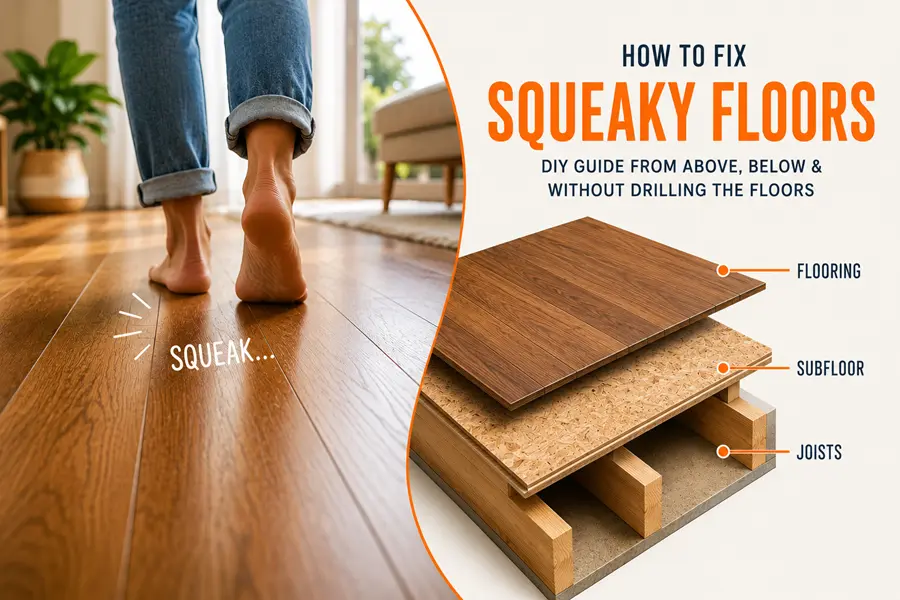
A squeaky floor can turn a quiet night into an annoying game of hide and seek every time you walk across the room. The good news is that most squeaks come from simple, fixable problems. You do not need to replace your entire floor. In most cases, you can stop the noise in an afternoon with a few basic tools.
This guide by Nova Floor walks you through every method to fix squeaky floors, whether you can reach the floor from below, only from above, or want a quick fix without drilling at all. You will also learn which popular DIY tricks actually make squeaks worse, plus how to fix squeaks under carpet, laminate, vinyl, and tile.
Contents
Why Do Floors Squeak? Common Causes
Floors squeak when two surfaces rub against each other under your weight. That rubbing creates the sharp creaking sound you hear. Once you understand what causes the friction, fixing it becomes much easier.
Loose Subfloor and Joist Gaps
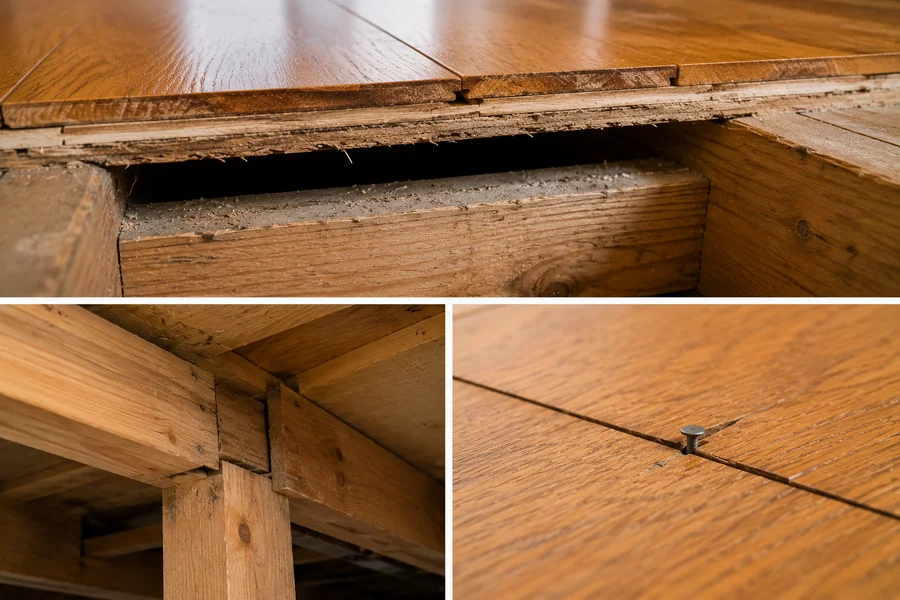
The most common cause of a squeaky floor is a gap between the subfloor and the joists beneath it. Joists are the wooden beams that support your floor. The subfloor sits on top of them. When nails or fasteners loosen over time, the subfloor shifts slightly every time you step on it. That small movement creates the squeak.
Wood Expansion from Humidity and Temperature
Wood naturally expands and contracts as humidity and temperature change through the seasons. In dry winter months, boards shrink and can pull away from their fasteners. In humid summer months, they swell and press against each other. Both situations can create friction and noise.
Loose or Popped Nails and Screws
Fasteners loosen with age and regular foot traffic. A nail that no longer sits tight in the wood will rub against the surrounding material every time weight passes over it. This is especially common in older homes where original fasteners have had decades to work loose.
Improper Installation
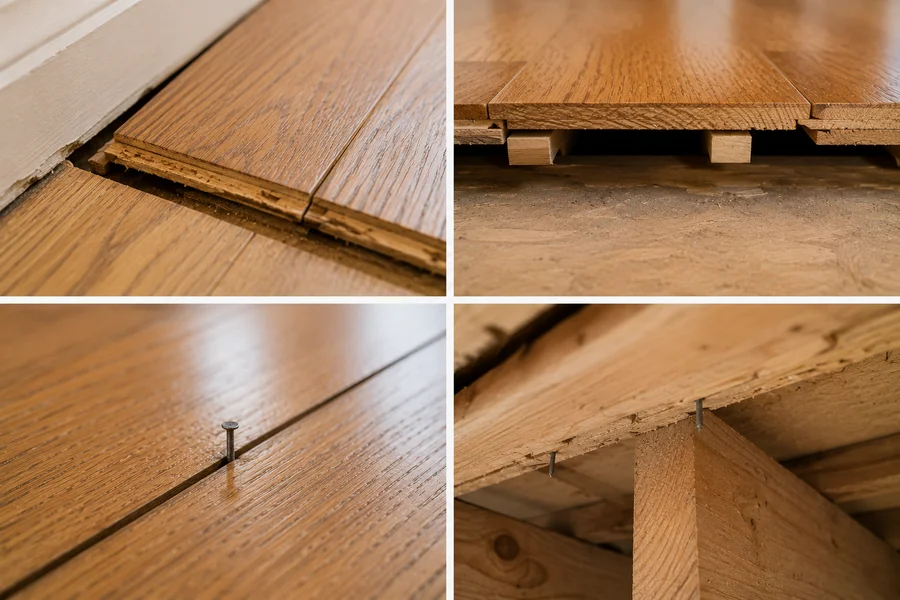
Sometimes the squeak starts on day one. Boards installed with incorrect spacing, too few fasteners, or an uneven subfloor underneath are more likely to squeak soon after installation. If your floor is new and already squeaking, this is often the reason.
Home Settling Over Time
Every house shifts slightly as it ages. Framing lumber dries out, foundations settle, and small structural movements happen even in well built homes. These shifts can open tiny gaps between the subfloor and joists that were once snug. A squeak that shows up years after a floor was installed often traces back to this slow, natural settling rather than a fault in the original work.
Squeaky Floor Diagnosis Chart
Before you start repairing, use this quick chart to match your situation to the right fix. Find your access type and squeak location, then jump to that section below.
| Your Situation | Likely Cause | Best Fix | Where to Go |
| Squeak in one spot, basement access available | Gap between joist and subfloor | Shim or adhesive from below | Fix From Below |
| Squeak in one spot, no basement access | Loose board fastener | Screws or nails from above | Fix From Above |
| Renters or want a quick, non-permanent fix | Friction between boards | Powder or lubricant | Fix Without Drilling |
| Squeak under carpet | Loose subfloor beneath carpet | Finishing nails through carpet | Fix Under Carpet |
| Squeak under laminate or vinyl | Underlayment gap | Adhesive injection | Fix Under Vinyl or Laminate Floors |
| Squeak under tile | Loose backer board or cracked grout | Re-securing from below or grout repair | Fix Under Tile |
| Squeaking spread across a large area | Structural settling or subfloor damage | Call a professional | When to Call a Pro |
How to Find the Source of a Squeaky Floor
Before you fix anything, you need to know exactly where the noise is coming from. Guessing wastes time and materials, and a fix in the wrong spot will not stop the sound.
Walk and Listen Test with a Helper
Ask a family member or friend to walk slowly across the squeaky area while you listen. Have them shift their weight from foot to foot in different spots. This helps you narrow down the exact board or section causing the noise.
Using a Flashlight to Check from the Basement or Crawlspace
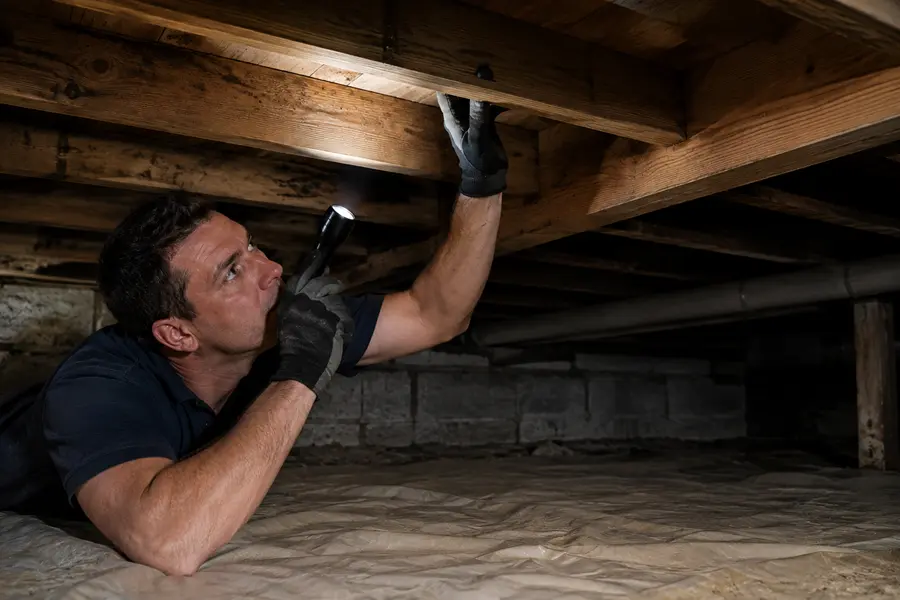
If you have access to the underside of your floor, head down to the basement or crawlspace with a flashlight. Have your helper walk across the floor above while you watch and listen from below. You are looking for movement, gaps, or a nail that has worked its way loose.
Marking the Squeaky Spot with Tape
Once you find the noisy area, mark it with painter’s tape. This keeps you from losing track of the exact spot once you start gathering tools and materials for the repair.
Tools and Materials Needed to Fix Squeaky Floors
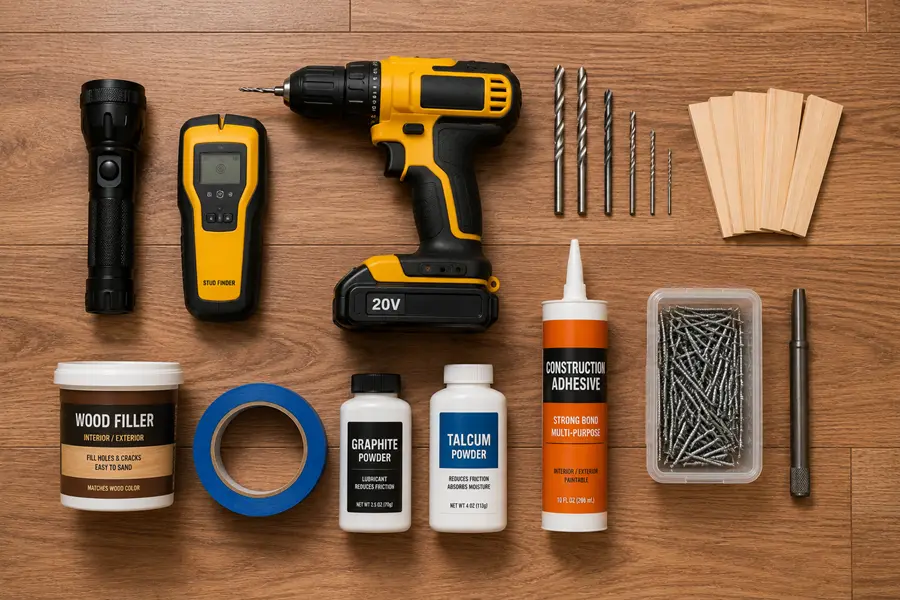
One reason squeaky floor repairs are such a popular DIY project is that they rarely require specialty equipment. Gathering everything ahead of time also means fewer trips back and forth once you locate the squeak. Most squeaky floor repairs require only a handful of common tools:
- Flashlight
- Stud finder
- Power drill and pilot drill bits
- Wood shims
- Construction adhesive
- Trim screws or finishing nails
- Nail set
- Wood filler matching your floor color
- Painter’s tape
- Powdered graphite or talcum powder
You likely already own several of these items, and the rest are available at any hardware store.
How to Fix Squeaky Floors from Below the Floor
If you can access the underside of your floor through a basement or crawlspace, this is usually the easiest and most effective way to fix squeaky floors. You avoid damaging the visible surface of your flooring entirely.
Shimming the Gap Between Joist and Subfloor
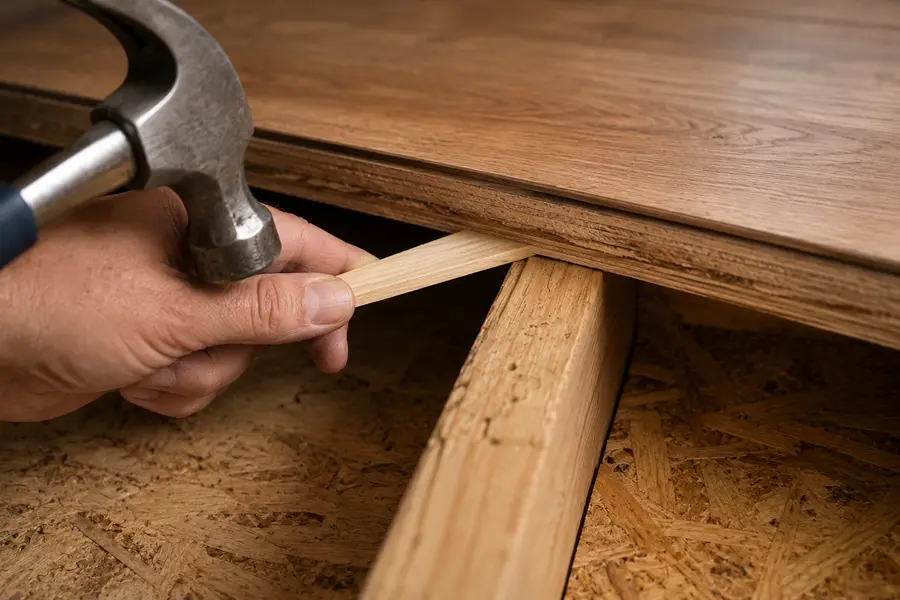
A gap between the joist and the subfloor is one of the most common causes of squeaking. You can close that gap with a wood shim.
- Locate the gap using a flashlight while your helper walks above you.
- Apply a small amount of construction adhesive to one end of the shim.
- Slide the shim into the gap by hand. You only need to insert it an inch or two.
- If the shim does not slide in easily, tap it gently with a hammer. Do not force it too far.
Avoid pushing the shim in too tightly. Excess pressure can lift the floor above and create new squeaks nearby.
Adding Construction Adhesive to the Joist
For a squeak that comes from a subfloor rubbing against the top of a joist, apply a bead of construction adhesive along the joist where it meets the subfloor. This bonds the two surfaces together and reduces the movement that causes noise.
Fixing Squeaky Floor Joists with a Cleat or Bridging
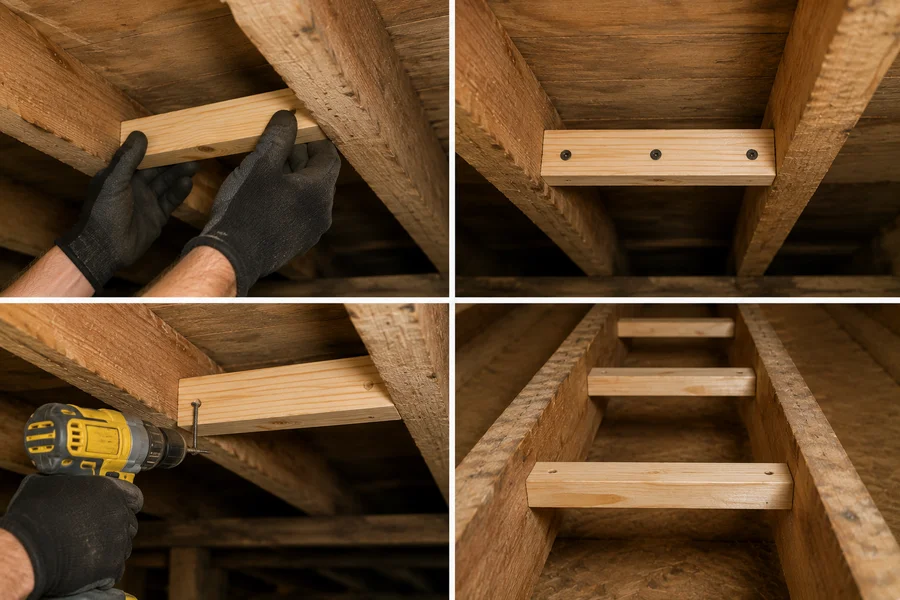
If a section of the subfloor moves when someone walks across it, bracing the area can help. Cut a length of lumber to fit alongside the joist and secure it with screws. This is called cleating, and it adds extra support so the boards move less.
Steel bridging is another option. This is a metal brace that spans between two joists to reduce flex. Install it below the subfloor, following the gap it needs to fill.
How to Fix Squeaky Floors from Above the Floor
Not every home has open access from below. If your basement is finished or you live in an upper floor apartment, you will need to fix the squeak from the top of the floor instead.
Drilling Pilot Holes and Driving Trim Screws
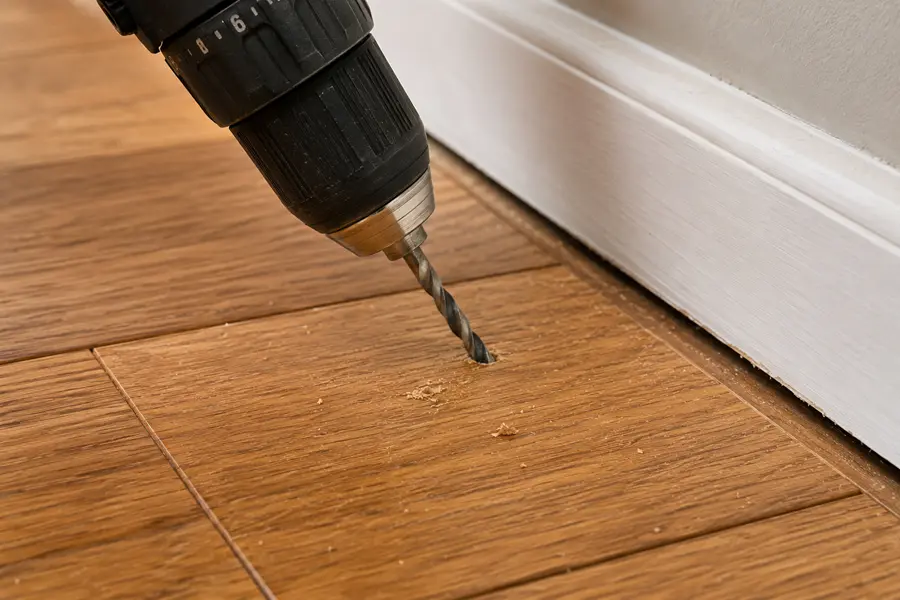
This method works well for a squeak limited to one small area.
- Drill a pilot hole into the flooring at a slight angle, at least half an inch from the edge of the board.
- Drive a trim screw through the pilot hole and into the subfloor below.
- Stop once the screw head sits just below the wood surface.
Using a pilot hole prevents the wood from splitting and keeps the repair neat.
Countersinking and Filling Screw Holes to Hide Repairs
Once the screw sits below the surface, fill the small hole with wood filler that matches your floor color. Let it dry fully, then sand lightly if needed. This keeps the repair nearly invisible once finished.
Fixing Squeaky Floorboards from Above Without Damaging the Finish
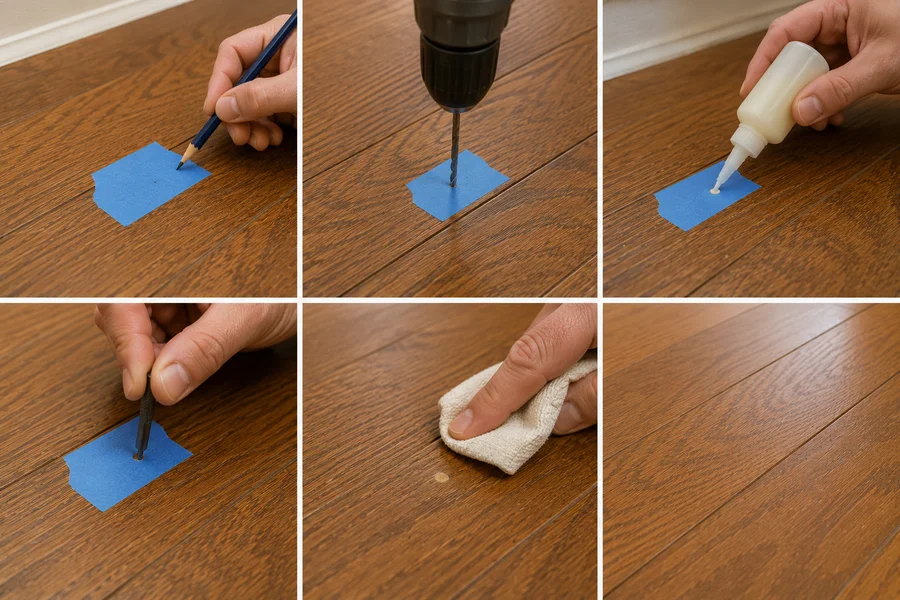
Choose short screws sized for your flooring thickness so they do not poke through the top surface. Pre-drilling every hole and working slowly reduces the risk of cracking or splintering the wood around the repair.
How to Fix Squeaky Floors Without Drilling
Not everyone wants to drill into their floor, especially in a rental or a floor with an expensive finish. These methods reduce or eliminate squeaks without any permanent changes.
Powdered Graphite or Talcum Powder Lubrication Method
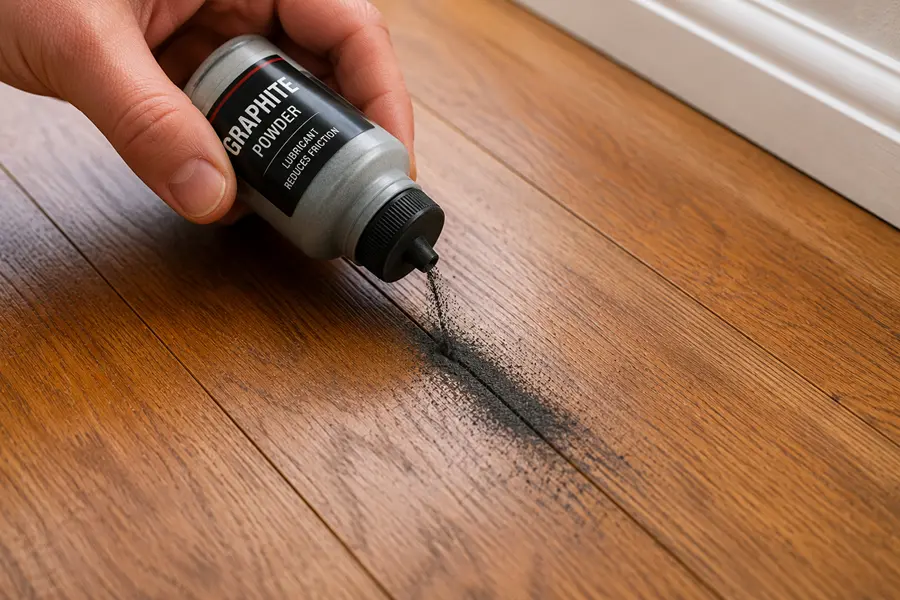
Friction between boards is often the direct cause of the noise. Reducing that friction can quiet the squeak without any tools beyond a vacuum.
- Sprinkle powdered graphite or talcum powder directly onto the squeaky area.
- Cover the powder with a paper towel to keep it in place.
- Walk over the spot repeatedly, shifting your weight side to side to work the powder into the gaps.
- Vacuum up any leftover powder once you are finished.
This fix can wear off over time and may need to be repeated every few months.
Using a Squeak Repair Kit
Repair kits typically include specially designed screws with breakaway heads. You drive the screw through the subfloor and snap off the visible head, leaving the fastener hidden below the surface. These kits can help with squeaks caused by subfloor separation, though they only address one type of squeak and are not effective for every cause.
Tightening Existing Fasteners Instead of Adding New Ones
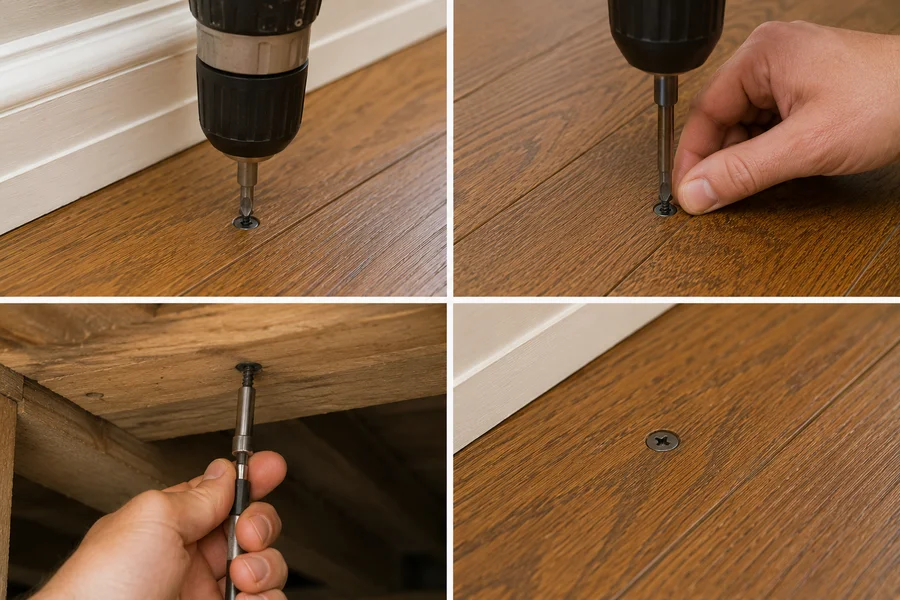
Sometimes the fix is as simple as finding the original nail or screw and tightening it rather than adding new hardware. This works best on floors where the fasteners are still accessible and have only loosened slightly.
How to Fix Squeaky Floors Under Carpet
Carpet adds an extra layer that makes locating and reaching the squeak trickier, but the repair itself stays fairly simple.
Locating Joists Under Carpet with a Stud Finder
Use a stud finder to locate the joists running beneath the carpet. Mark their position with painter’s tape on the carpet surface so you know exactly where to drive fasteners.
Driving Finishing Nails Through Carpet Without Damage
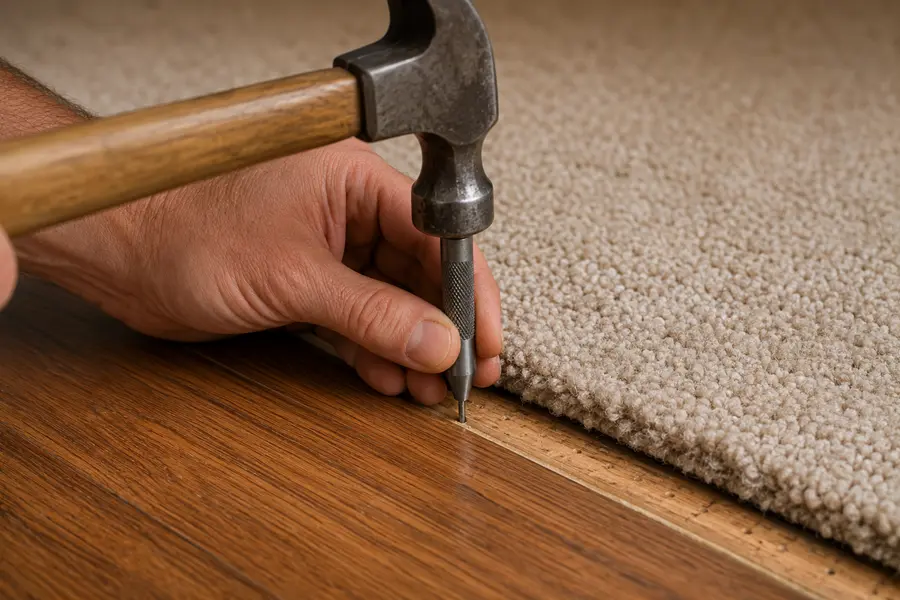
Once you know where the joist is, drive a finishing nail through the carpet and subfloor into the joist below. Use a nail set to sink the nail head below the carpet surface so it stays hidden and does not create a snag.
Why Screws Are Not Recommended for Carpeted Squeaks
Screws can catch and twist in carpet fibers as you drive them, which damages the carpet and makes the repair harder to finish cleanly. Finishing nails avoid this problem and are the better choice for squeaks under carpet.
How to Fix Squeaky Floors Under Laminate or Vinyl
Laminate and vinyl floors squeak for slightly different reasons than solid hardwood, since they usually float over an underlayment rather than attaching directly to the subfloor.
Identifying Squeaks Caused by Underlayment Gaps
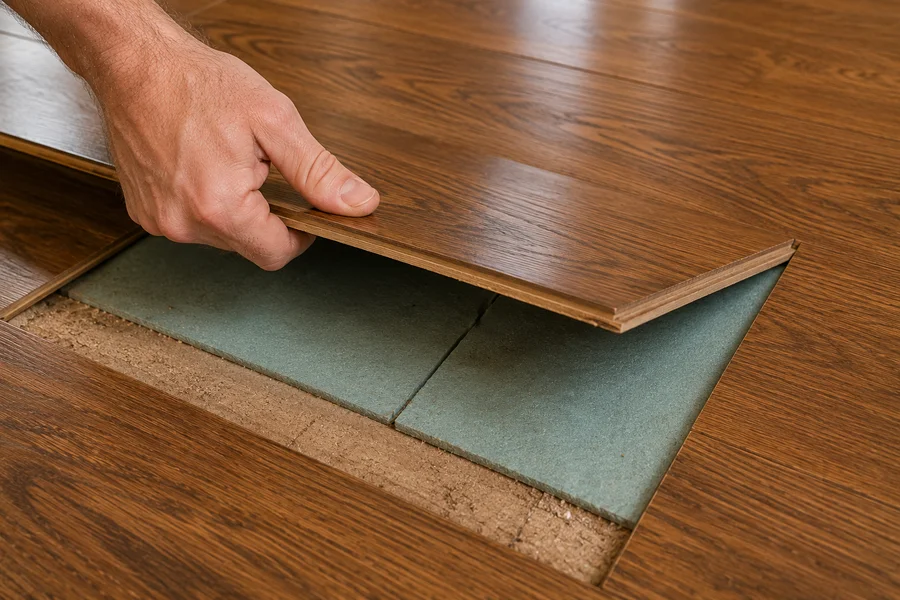
If the underlayment beneath your laminate or vinyl has a gap or has compressed unevenly, the flooring can shift slightly and create noise. This is common in areas with heavy foot traffic.
Injecting Adhesive Between Layers Without Removing Flooring
For minor squeaks, you may be able to inject a small amount of adhesive between the flooring and the subfloor through an existing seam, without removing any planks. This bonds the layers together and reduces movement.
When Laminate Squeaks Mean a Subfloor Problem
If the squeak is widespread rather than isolated to one plank, the issue may sit below the laminate entirely, in the subfloor itself. In that case, treat it the same way you would a squeak under solid flooring, using the from above or from below methods described earlier.
How to Fix Squeaky Floors Under Tile
Tile floors squeak less often than wood, but when they do, the cause usually points to something more serious happening underneath.
Why Tile Floors Squeak (Cracked Grout or Loose Backer Board)
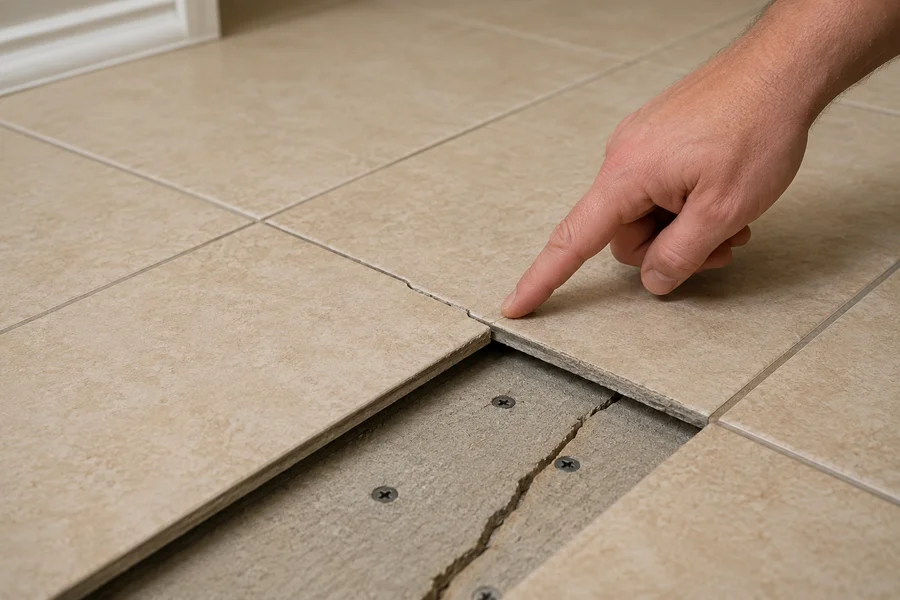
Squeaking under tile is often caused by a loose backer board that was not properly secured to the subfloor before installation, or by cracked grout that allows tiles to shift slightly against each other. Keeping the underlying surface clean and well-maintained, including using the right methods to clean concrete floors, can help protect the subfloor and improve the overall durability of your flooring system.
Re-securing Loose Backer Board from Below
If you have access from below, you can secure the backer board to the subfloor with additional screws, similar to the method used for hardwood subfloors.
When Tile Squeaks Require Professional Repair
Because fixing a tile squeak from above usually means removing and replacing tiles, most tile squeaks are best handled by a flooring professional. Attempting a DIY fix from the top can crack tiles or damage grout lines.
Popular Squeaky Floor Fixes That Don’t Actually Work
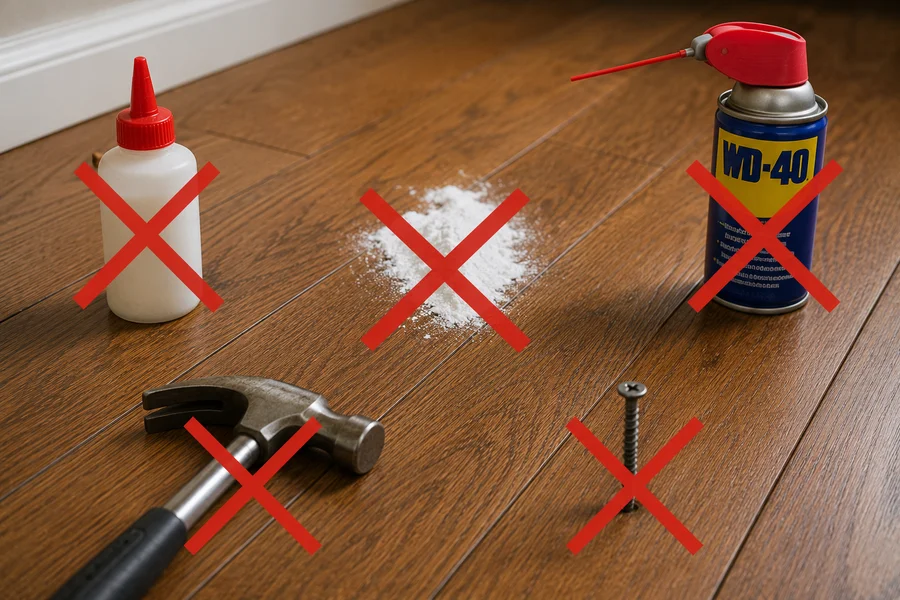
Not every tip you find online will actually solve your squeak. Some can even make the problem worse. Knowing which methods to skip can save you time, money, and damage to your floor.
Why Extra Nails and Screws Can Make It Worse
Adding more fasteners without addressing the underlying gap or movement often just creates a new point of friction. The board will continue to flex, and the new fastener will loosen the same way the old one did, sometimes leaving visible holes behind.
Risks of Over-Tightening Shims
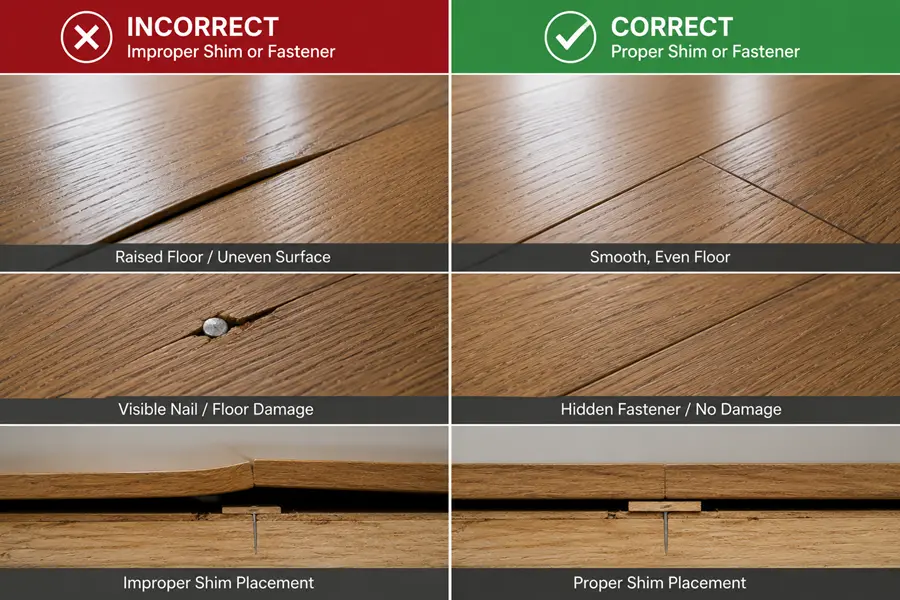
Pushing a shim too far into a gap can lift the floor above it. This spreads the original squeak to a wider area and can even create a completely new noise where none existed before.
Do Break Away Screw Kits Really Work?
These kits can help in specific situations, but they only solve squeaks caused by subfloor separation from the joist. If your squeak comes from a different source, such as board expansion or a loose nail near the surface, the kit will not fix the underlying issue.
How to Prevent Squeaky Floors in the Future
You cannot stop wood from naturally expanding and contracting, but a few habits can reduce how often squeaks develop.
Keep indoor humidity at a stable level throughout the year, since extreme swings are what cause the most movement in wood flooring. A humidifier in winter and a dehumidifier in summer can help maintain consistent moisture levels. Check fasteners in high traffic areas every few years, since these are the spots most likely to loosen first.
If you are installing new flooring, make sure the subfloor is properly leveled and fastened before the finished floor goes down, since a solid foundation prevents many future squeaks before they start. Ask your installer about the recommended fastener spacing for your specific flooring type, and confirm the subfloor moisture level is within range before installation begins. Rushing this step is one of the biggest reasons new floors squeak within the first year.
It also helps to address small squeaks as soon as you notice them. A single loose board rarely stays isolated for long. Left alone, the constant flexing can loosen nearby fasteners too, turning a one spot repair into a much bigger project. Walking your floors periodically and listening for new sounds is a simple habit that saves both time and money down the road.
If your flooring has more serious surface damage, learn how to fix chipped or cracked tiles and restore the damaged area.
Frequently Asked Questions
Why does my new floor squeak?
New floors can squeak due to improper installation, loose fasteners, an uneven subfloor, or humidity changes affecting the wood shortly after installation. Contact your installer first, since the repair may be covered under warranty.
Is it normal for hardwood floors to squeak?
Some squeaking is normal in hardwood floors, especially as the wood ages and adjusts to seasonal humidity changes. Widespread or worsening squeaks, however, may point to a structural issue that needs attention.
Can humidity cause squeaky floors?
Yes. Humidity changes cause wood to expand and contract, which can create friction between boards or between the flooring and its fasteners. Keeping indoor humidity stable can reduce this type of squeaking.
Can I fix a squeaky floor myself?
Most squeaky floors can be fixed with basic tools and a few hours of work, whether you are shimming a gap from below, driving a screw from above, or using a lubricant for a quick fix. Widespread squeaking or signs of structural damage are better left to a professional.
Does furniture placement affect floor squeaks?
Heavy furniture placed over an already loose area can worsen a squeak over time by adding extra pressure to a weak spot. Rearranging furniture will not fix the underlying cause, but it may reduce the noise until you can make a permanent repair.
How long does a squeaky floor repair take?
Most single spot repairs take less than an hour once you have located the source and gathered your tools. Larger areas with multiple squeaks, or repairs that require removing carpet or flooring sections, can take a full afternoon. Repairs that need a professional, such as structural work or tile replacement, may take longer depending on the extent of the damage.